Robot Detaching Guide
This guide covers the step-by-step procedures for detaching and attaching essential robot components, including the arm, wrist pitch (WP) module, gripper, and FT sensor.
Detaching the Robot Arm
If there is an issue with the robot arm, please follow the steps below to detach it and send it to us:
- Ensure the robot is powered off before proceeding.
- Remove the 4 bolts and detach the rear cover.
- Disassemble the robot arm and prepare it for your next task.
Detaching & Attaching the Wrist Pitch (WP) Module
If the tool flange connector is damaged, refer to the following replacement guides:
Detaching the FT Sensor and Gripper
To replace the FT sensor and gripper with your own, refer to the following guide:
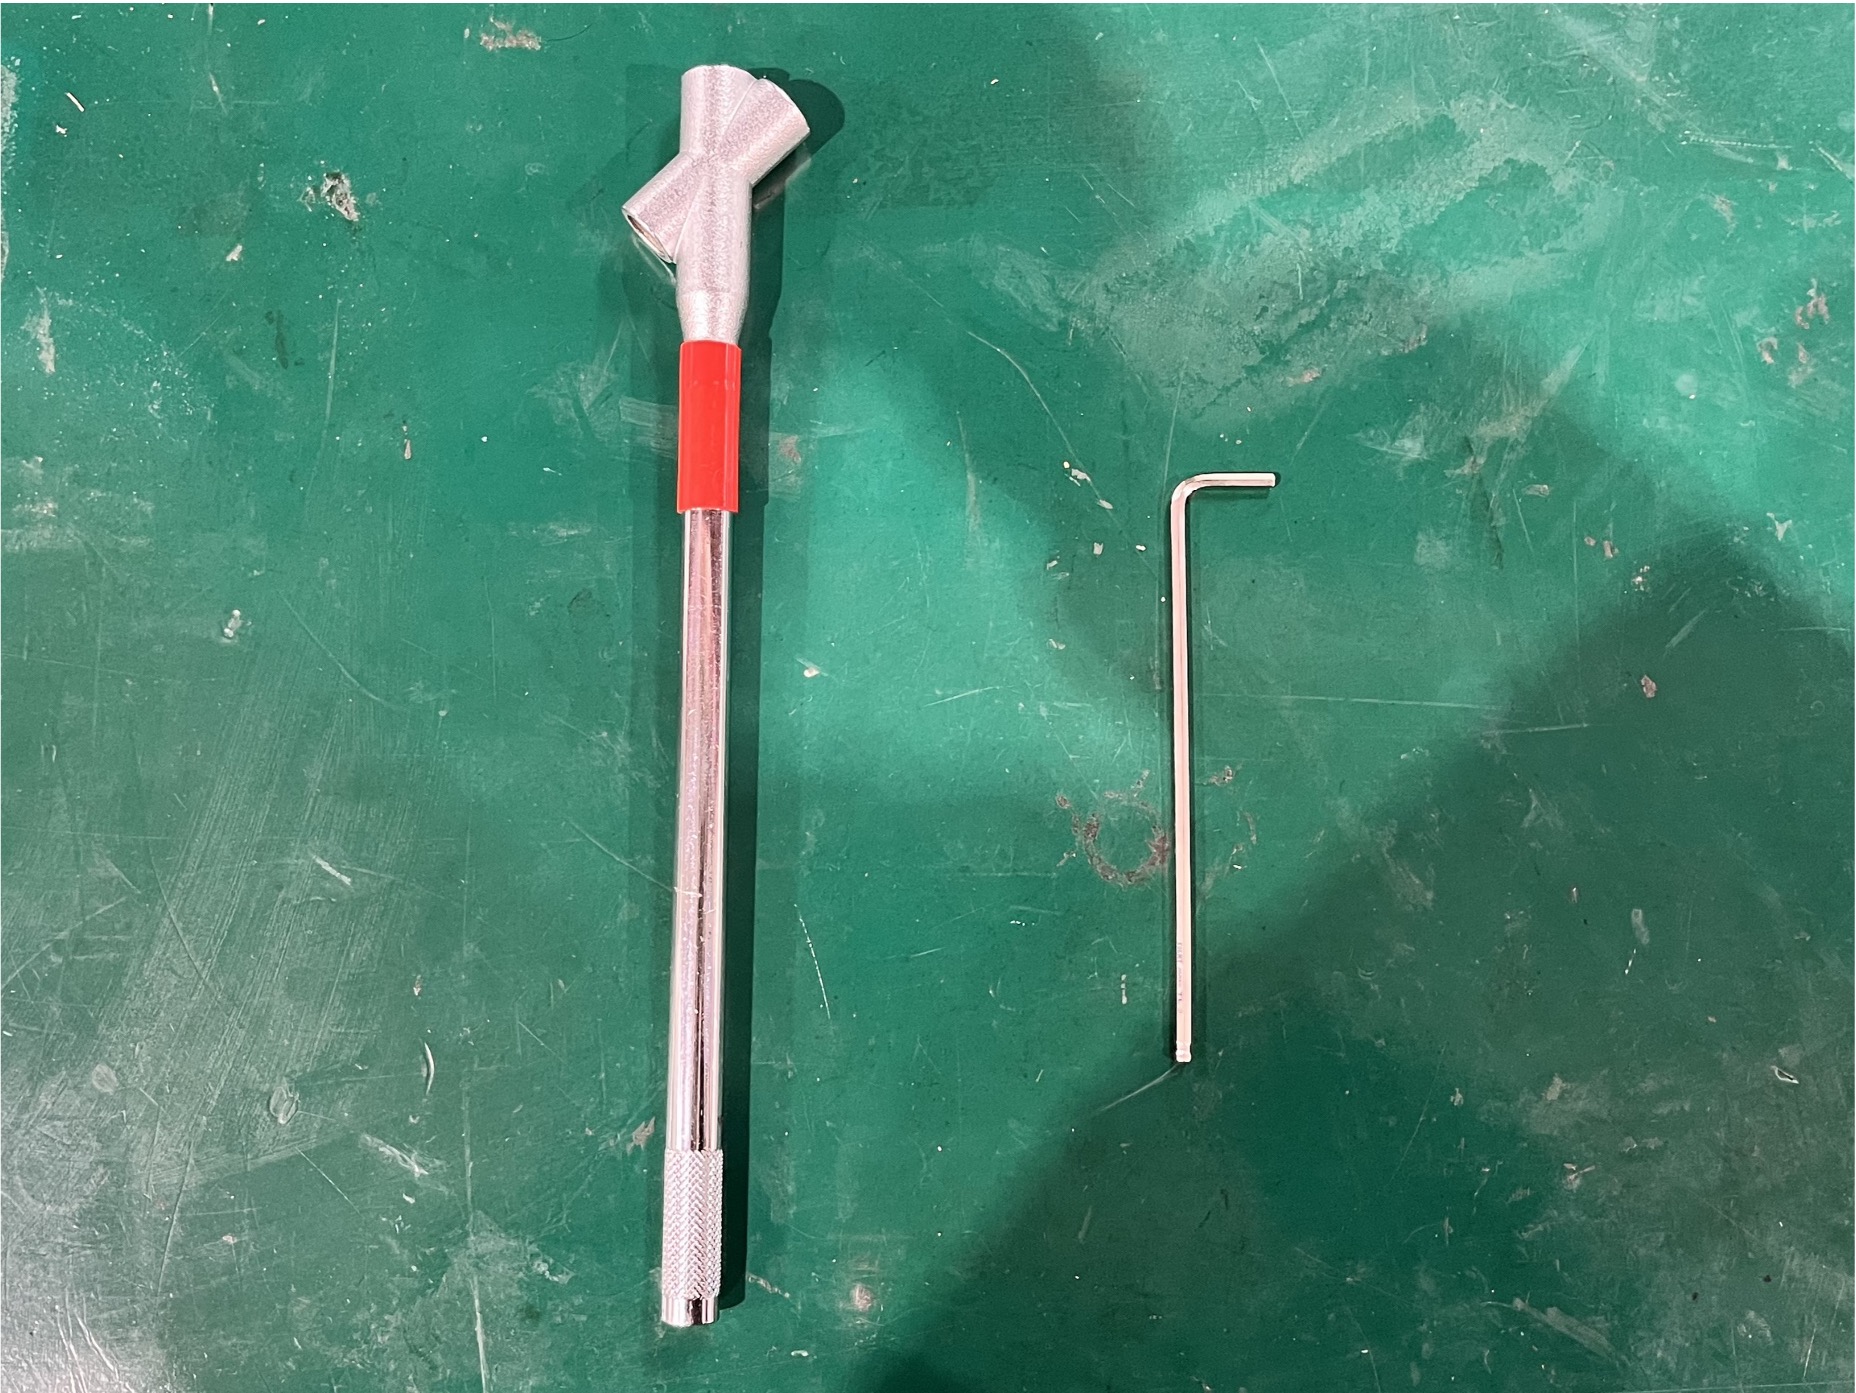
Required Tools: 3mm L-wrench and extension bar
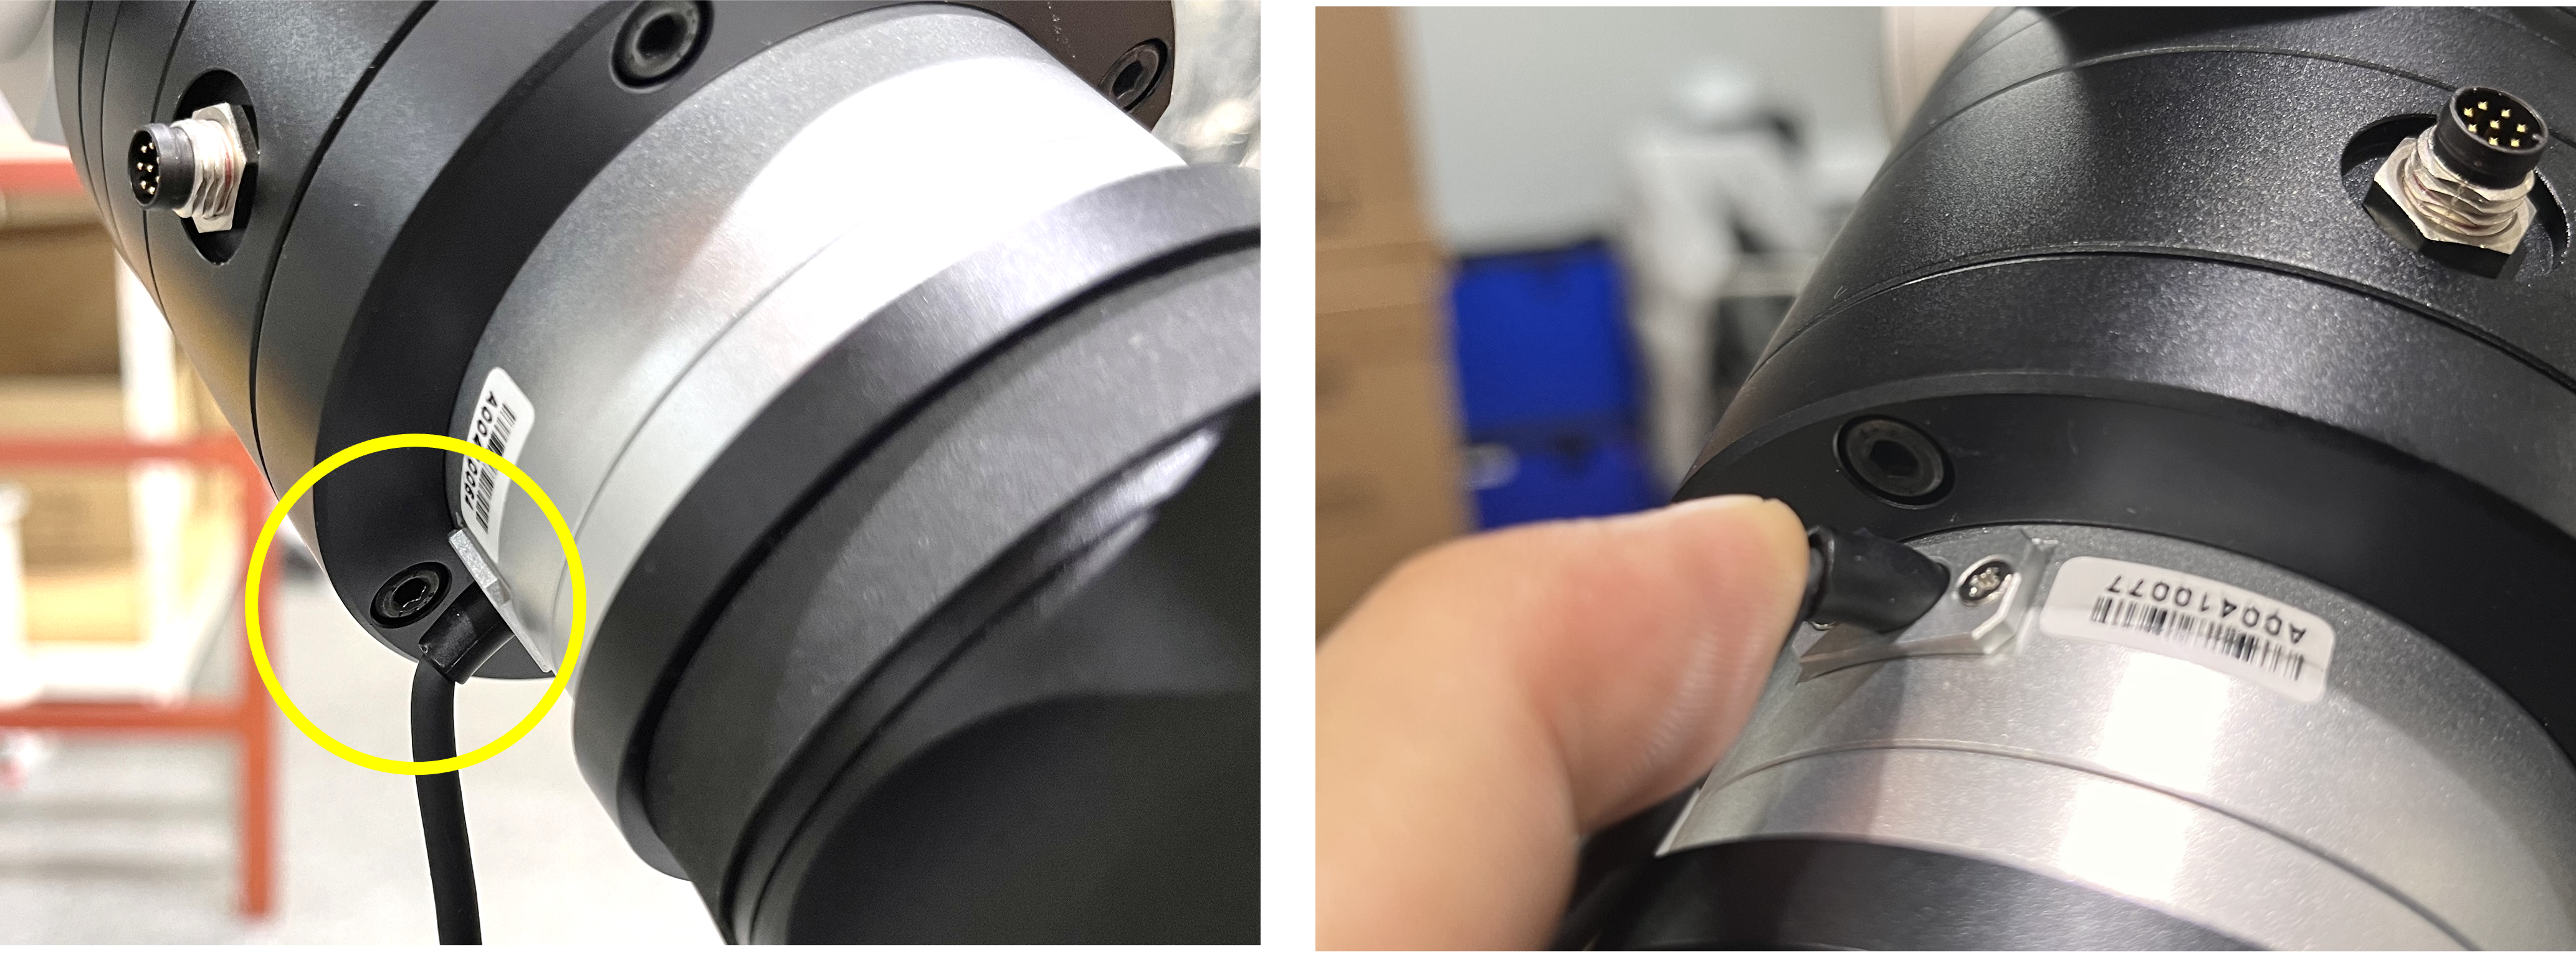
Refer to the GIF below to attach or detach the FT sensor and Gripper connector.
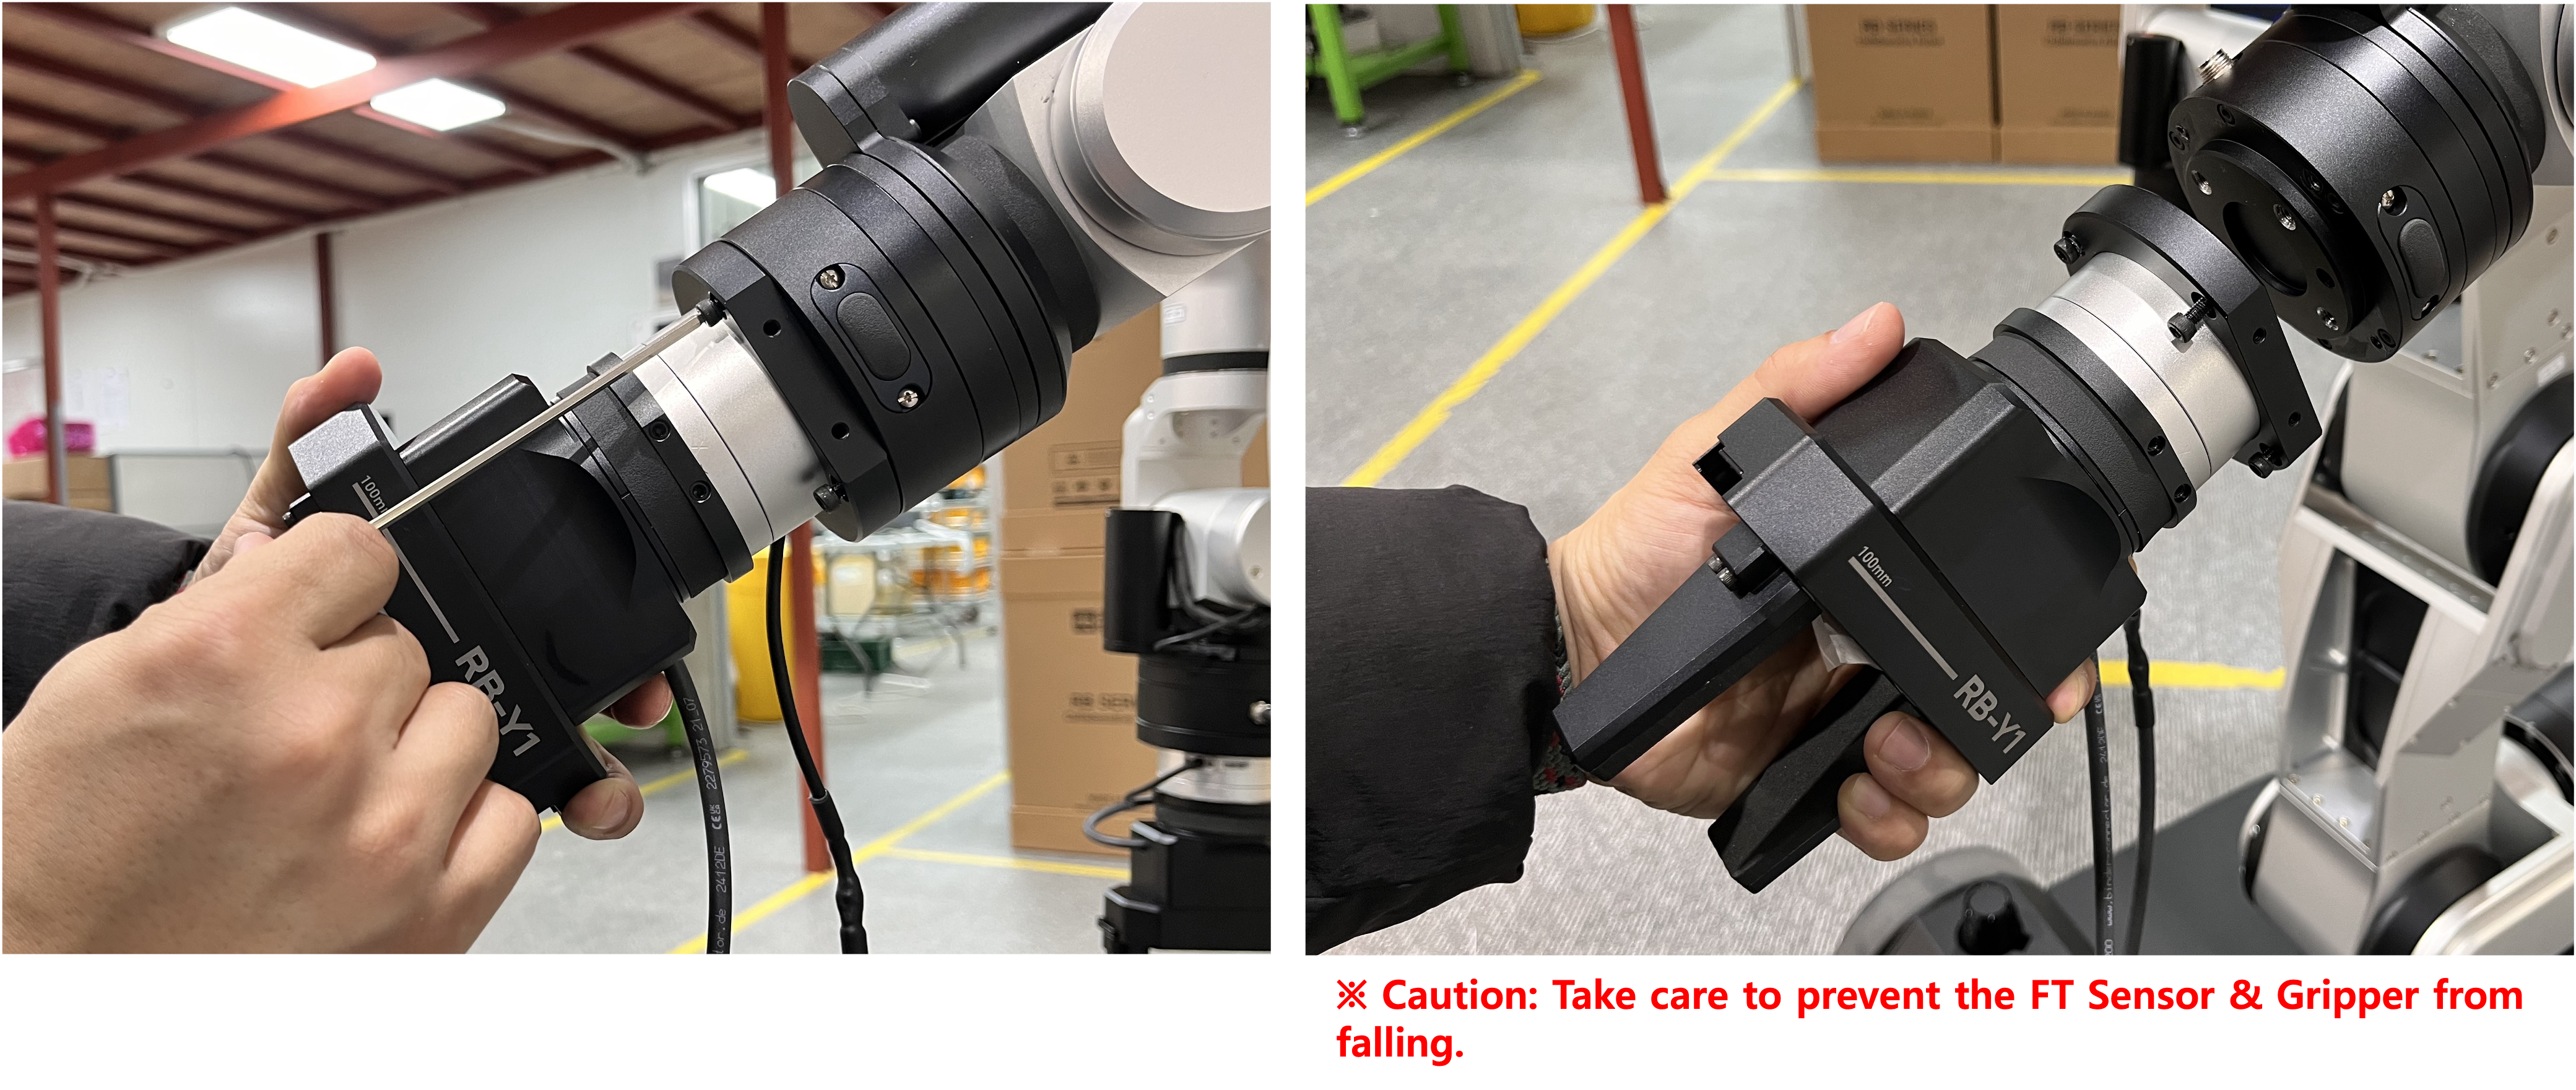
Refer to the diagram below to slightly push the FT sensor cable aside to create space for the wrench.
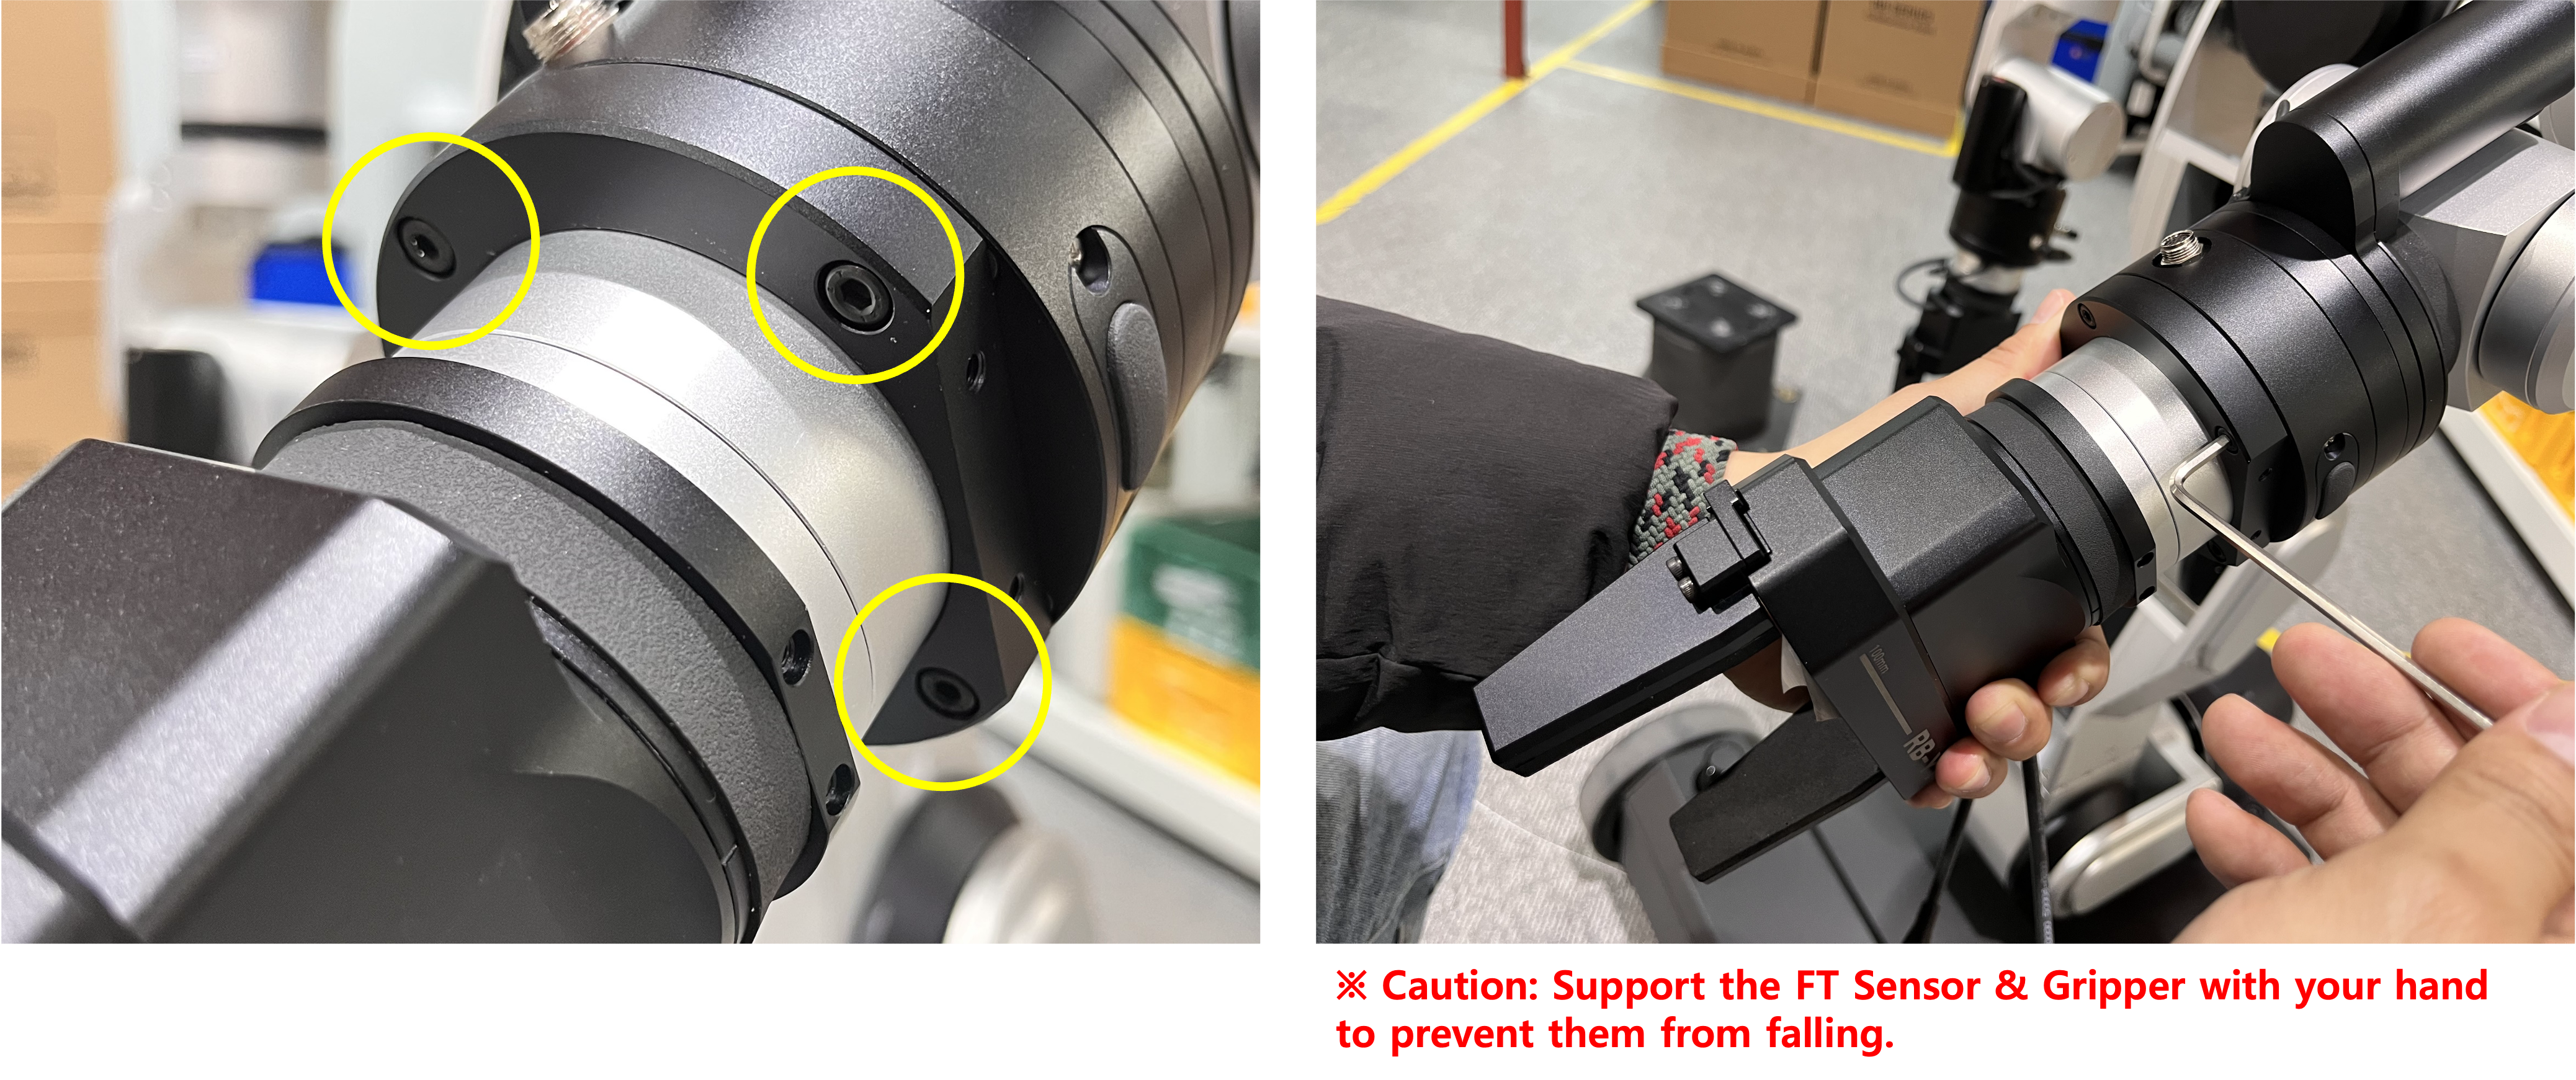
Refer to the diagram below to loosen the bolt at the FT sensor cable outlet using the L-wrench and extension bar.
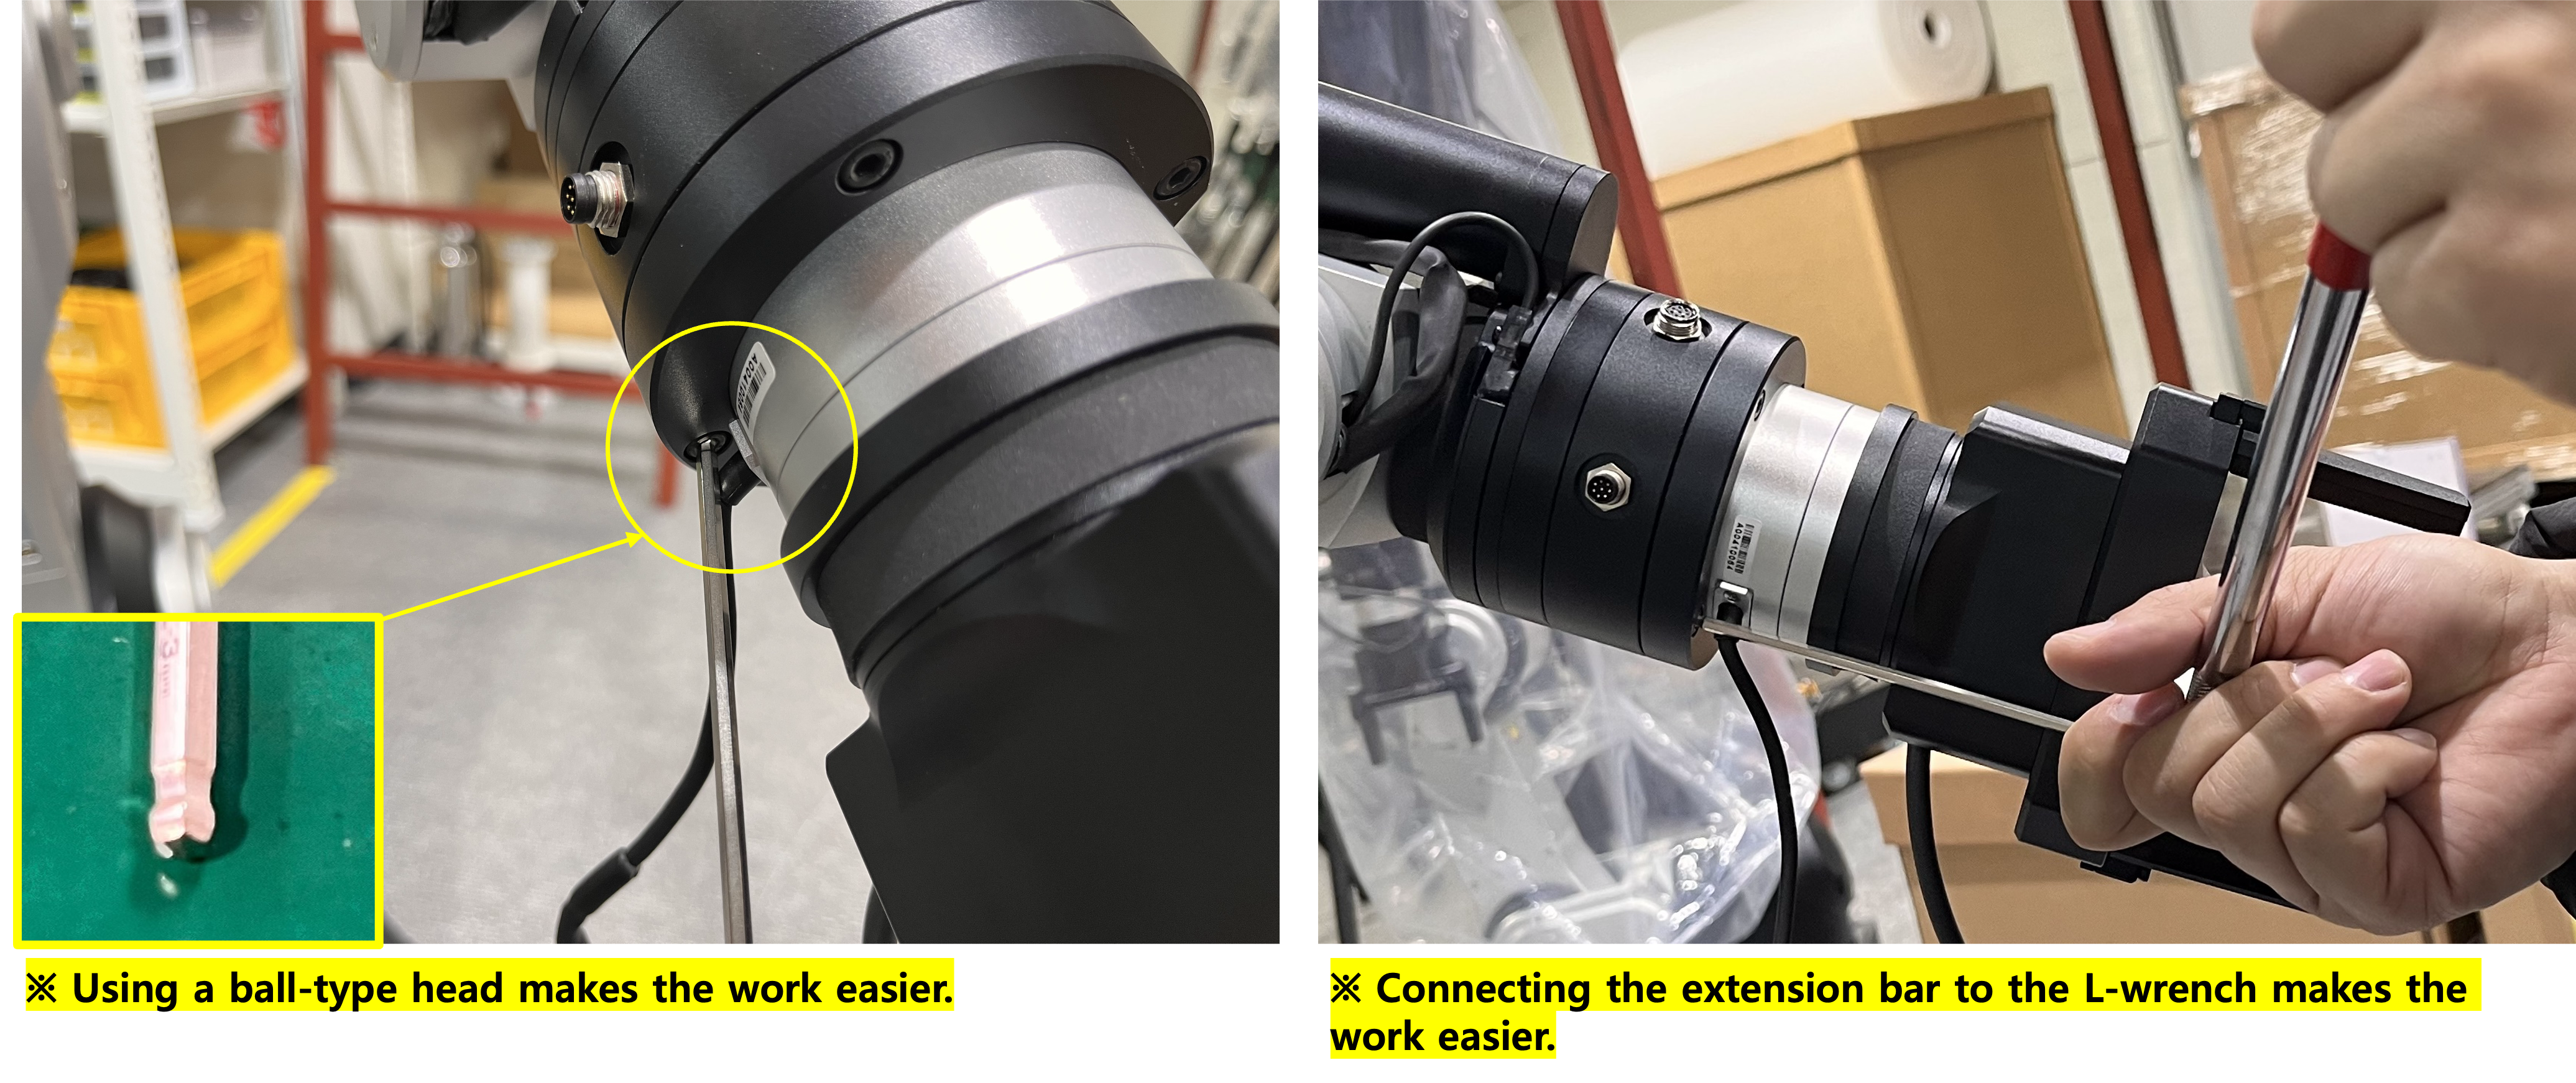
Refer to the diagram below to loosen the remaining 3 bolts using the L-wrench.