Skip to content

3. GUI Introduction

Goal: Get familiar with the RBQGUI screen layout and key buttons before sending motion commands.

Prerequisites: Controller & Wi-Fi Connection must be completed — RBQGUI should be linked to the robot.

Main Screen

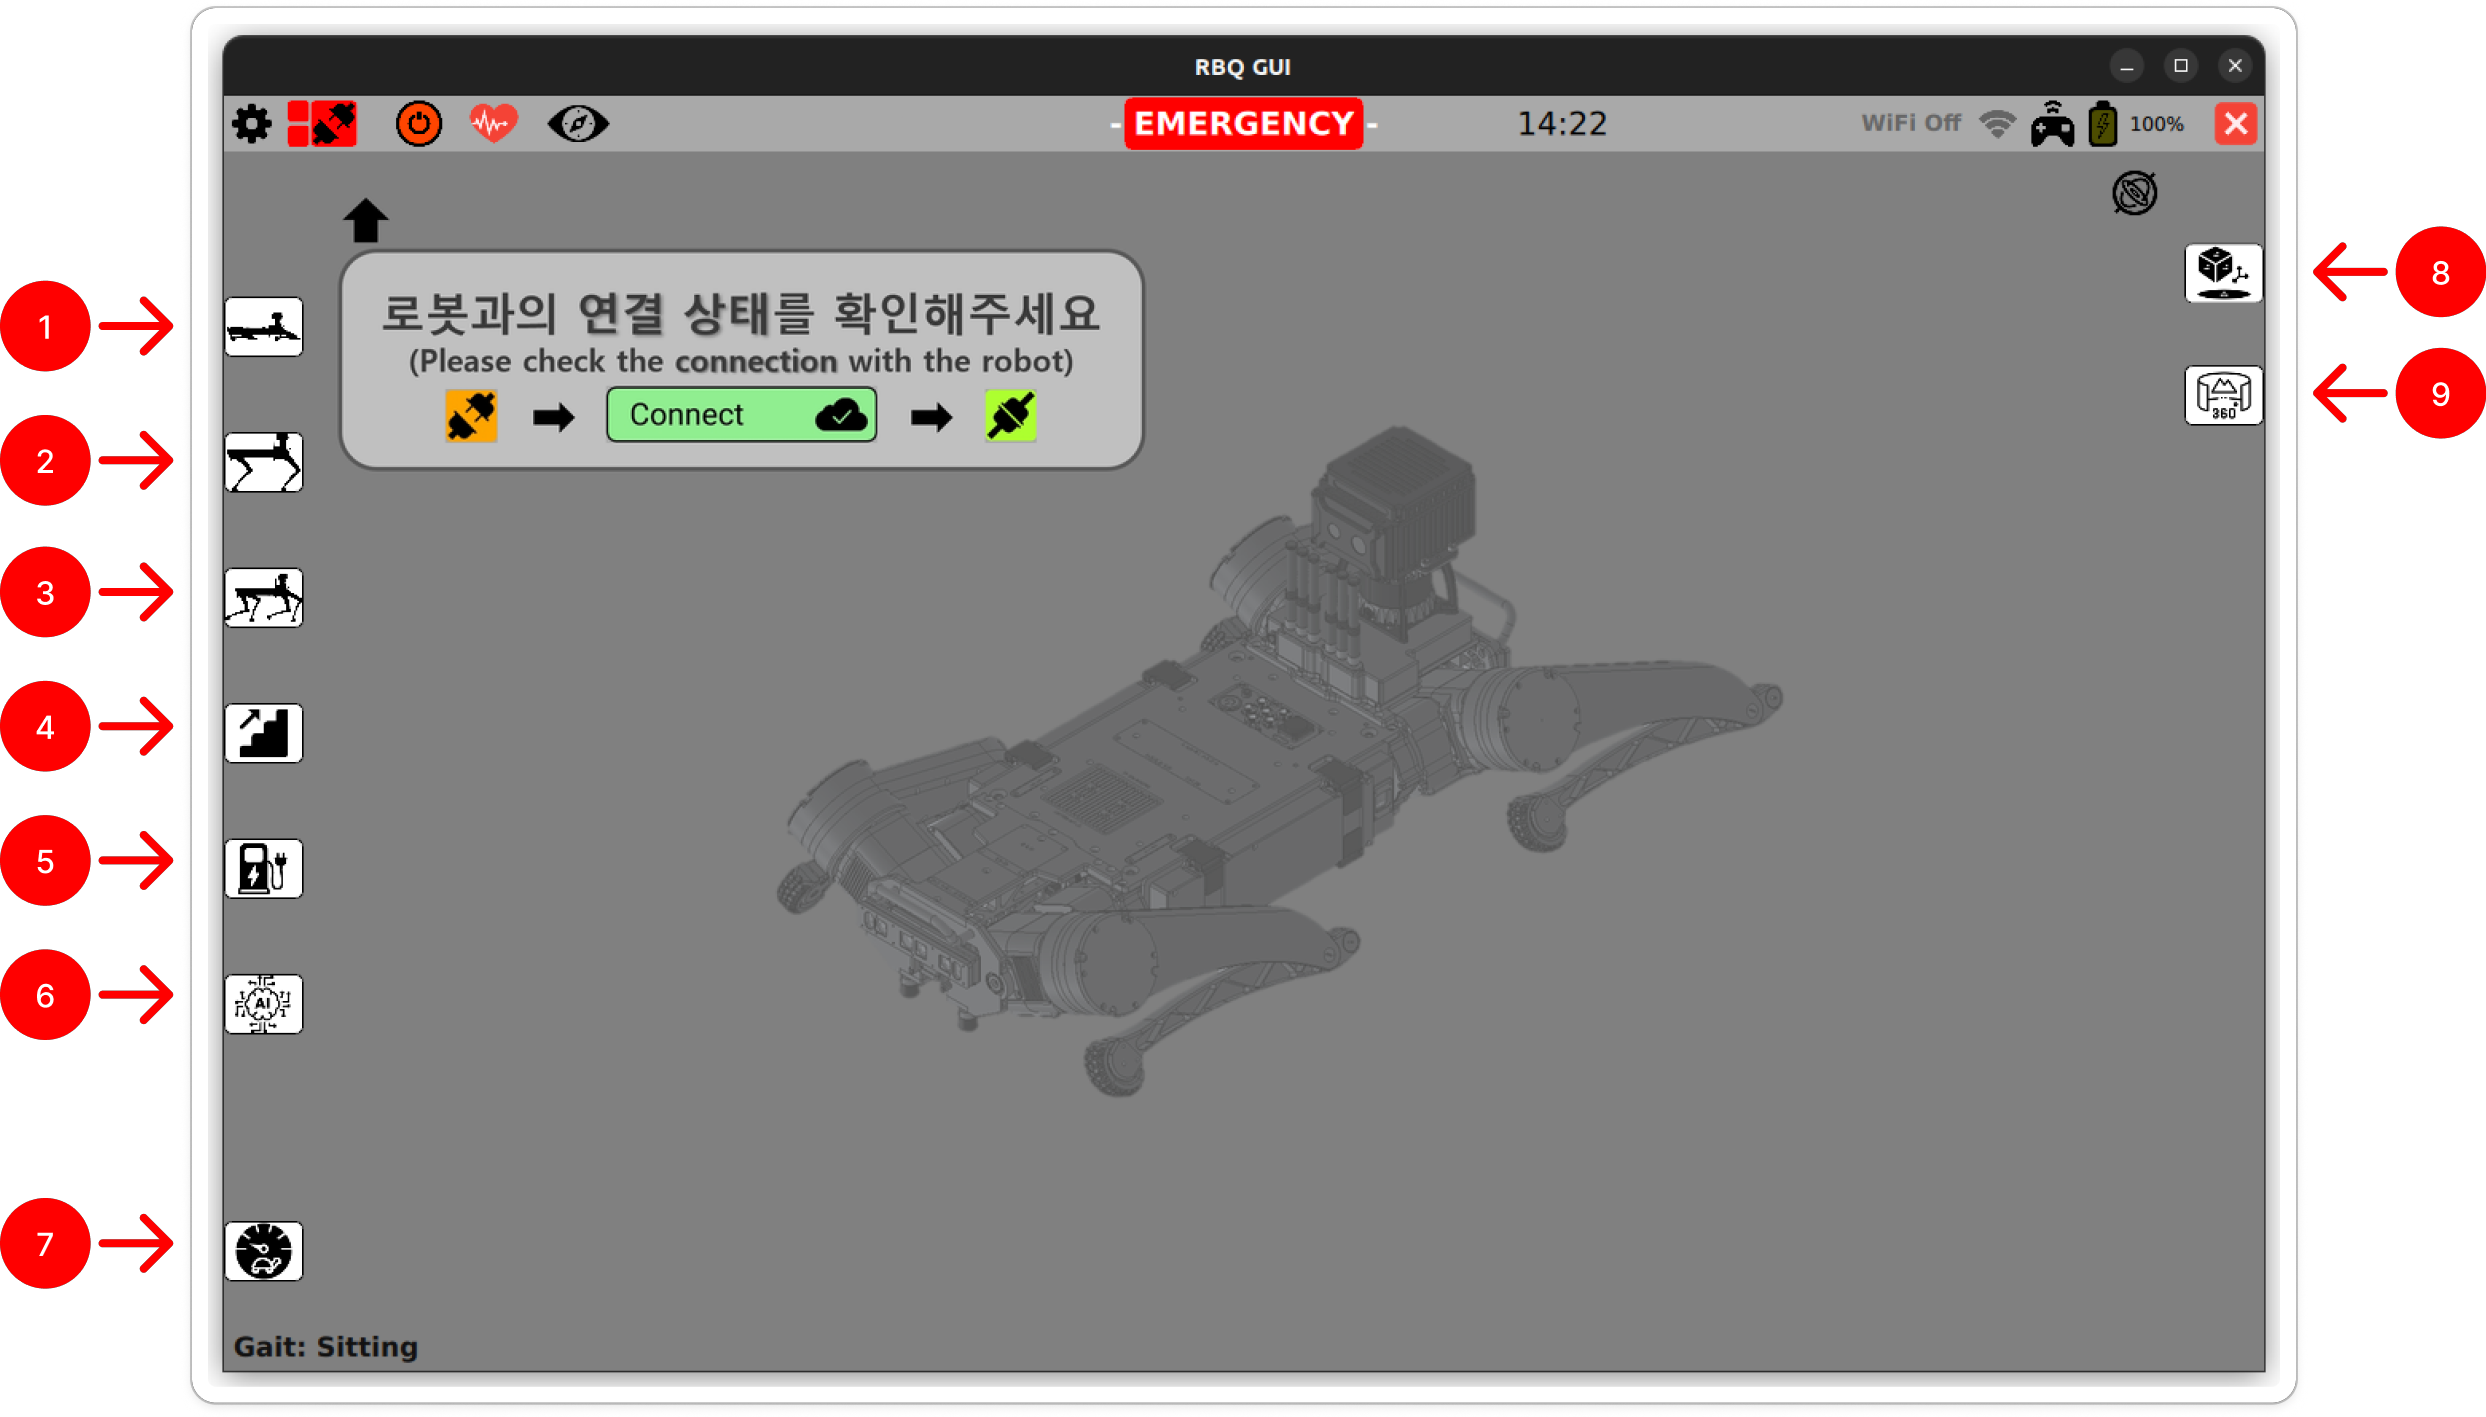
After Auto Start completes, the RBQGUI main screen looks like this:

RBQGUI main screen
<RBQGUI main screen>

RBQGUI provides three core capabilities:

  • Connection — Communicates with the robot on the same Wi-Fi network.
  • Control — Selects gait modes (sit, stance, walk, stair, docking, RL) and drives the robot via the joystick.
  • Monitoring — Shows battery, sensor, and connection status on screen.

Button Reference (1–9)

No.Function
1Sit — keep the robot in a sitting pose
2Stance — stand up to the default pose
3Walk — walk (forward/back, strafe, turn)
4Stair — gait suited for stairs
5Docking — align to the charging dock
6RL (Vision Trot) — vision-based RL walking
7Walking Parameter Setting — tune speed, body height, foot lift
83D Virtual View — switch to the 3D virtual view
9Camera View — switch to the live camera view

NOTE

When the robot posture or the app view changes, the corresponding button turns orange.

Next Step

Now that you know what each button does, try the basic motion commands:

→ 4. Basic Motion Command

This user manual is intended for RBQ users.