Skip to content

Developer mode ​

The app runs at the operator tier by default. Turning on developer mode adds diagnostic, configuration and maintenance features to the screens. Everything that only developer mode opens is collected on this page — the other pages cover what everyday operation needs.

CAUTION

Developer mode exposes commands that move the robot without the usual safeguards (joint lock, forced postures) and power controls that can cut the connection, the stance or driving. Turn it on only when you need it, and read each warning before you act.

Turning it on and off ​

  1. Tap the profile button at the top right of the hub.
  2. Turn on the Developer mode toggle. The subtitle reads Password required to turn on.
  3. Type the password in the Developer mode password dialog and press Check. A wrong password shows Incorrect password and clears the field.

Turning the toggle off returns to the operator tier immediately.

WARNING

The password is issued individually by Rainbow Robotics. It is not printed in this manual — do not share the one you were given. To request it, use Support.

When an account sets the tier ​

Logging in with an access code (Log in with access code in the profile menu) sets the tier from your account. While logged in the profile menu shows the account and its level instead of the Developer mode toggle. Press Log out in the same menu to return to the normal tier.

What each screen gains ​

ScreenAdded in developer mode
Control homeExternal-control toggle in the CONTROL INPUT popover
Motion commandsAI motion group (learned gaits) and Position control group (forced postures)
GamepadSensitivity, deadzone, button mapping, external control, developer options, diagnostics, wizard
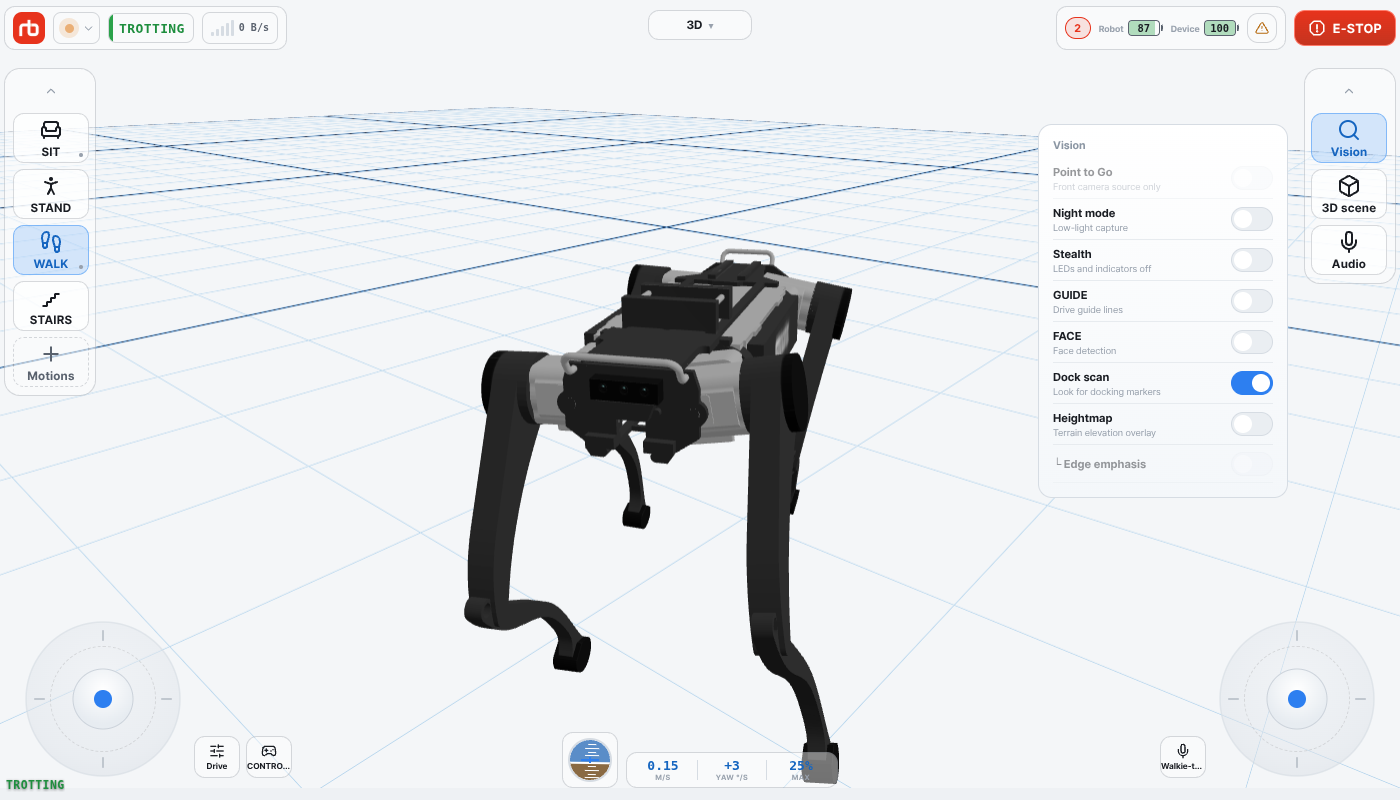
Camera & VisionCamera calibration (the Vision popover itself is open to everyone)
DashboardRobot and Vision tabs; power added to the summary
SettingsEnable camera calibration
ConnectionConnect by address card on Android and iOS · Vision PC IP (optional) field
Emergency stopForced recovery through Position control
MaintenanceThe entire screen is developer-only — Maintenance tile on the hub
LogsNothing — this screen does not change with the tier

Control home ​

  • The CONTROL INPUT popover gains the External control (SLAM/SDK) toggle, which hands driving over to an external program. The SLAM chip in the top bar shows while it is on and turns it off again.

→ Control home

Motion commands — AI motion · Position control ​

The Select motion grid gains an AI motion group and a Position control group.

AI motion holds the learned gaits: AI Pronk, AI Bound, AI Pace, AI Run, AI 2Leg L, AI 2Leg R, AI 2Leg F and AI 3Leg HL. They are hidden entirely at the operator level.

Position control — Lock Joints, Position Sit and Position Stand — forces a posture without the normal transitions. The same items are in the long-press list under SIT. On wheeled robots the Precision·Calib group also offers HIGH SPEED.

CAUTION

Position control changes posture with no trajectory. Use it only on flat ground with the robot on the floor. It exists for cases where the normal recovery does not work.

→ Motion commands · Emergency stop

Gamepad ​

The following appear in App settings › Gamepad.

Response

  • Gamepad sensitivity — input response curve for the physical sticks (separate from the virtual joystick setting).
  • Deadzone — center ignore range, added on top of the device's own dead zone.

Button mapping — tap a button on the controller diagram to assign a robot motion to it; the D-pad and stick-center buttons can be mapped too. Mapped buttons are listed under the diagram with an × to remove them. A controller must be connected, and the diagram lights up as you press buttons.

External control (SLAM/SDK) — hands robot control to an external source. The switch reflects the robot's real state, so it also updates if another client flips it. The same switch is in the CONTROL INPUT popover on the control home.

Developer options

RowEffect
Send all buttonsOFF = only L1/R1 reach the robot (the safe default). ON forwards every button, which is what makes chords such as L1+B work. It turns on when you enter developer mode and back off when you return to the normal level
One-stick modeOne-handed operation — swaps only the horizontal axes of the two sticks (vertical stays on each)
Cruise controlR3 starts cruise, D-pad up/down changes speed. Works only during TROT-family gaits
Publish rate — {hz}HzJoystick frame rate (40 Hz by default). Lower adds latency, higher adds traffic
Input diagnostics › Open diagnosticsThe Gamepad diagnostics screen — Connected devices (name, VID:PID, axes), live Axes (raw) bars and a Button events key-code log. Use it to check an unknown controller before mapping
Mapping Wizard › Start wizardFollow the prompts to build a profile for this device — for unknown controllers or when the stick layout is wrong
Delete wizard profileShown only when the connected device has a wizard profile. Deletes it and returns to auto-detection

CAUTION

Send all buttons and Cruise control change how the robot responds to button input. After enabling it, try it in an open area first and stay within reach of E-STOP.

→ Gamepad

Camera & Vision ​

Vision popover

The Vision row on the right card opens the robot-side vision switches — that popover is open to everyone; see Camera & Vision. Developer mode adds only the camera calibration entry at its bottom.

At the bottom of the popover, Camera calibration opens the camera calibration tool; the same entry is under Robot settings › Calibration › Open camera calibration. Both appear only when camera calibration is enabled in the app and the account is at the developer tier. While a run is in progress the labels change to Camera calibration running — tap to cancel / Running — tap to cancel.

CAUTION

The OAK-D intrinsic calibration makes the robot walk around by itself for about 10 minutes. Clear the area before starting it.

→ Camera & Vision

Dashboard ​

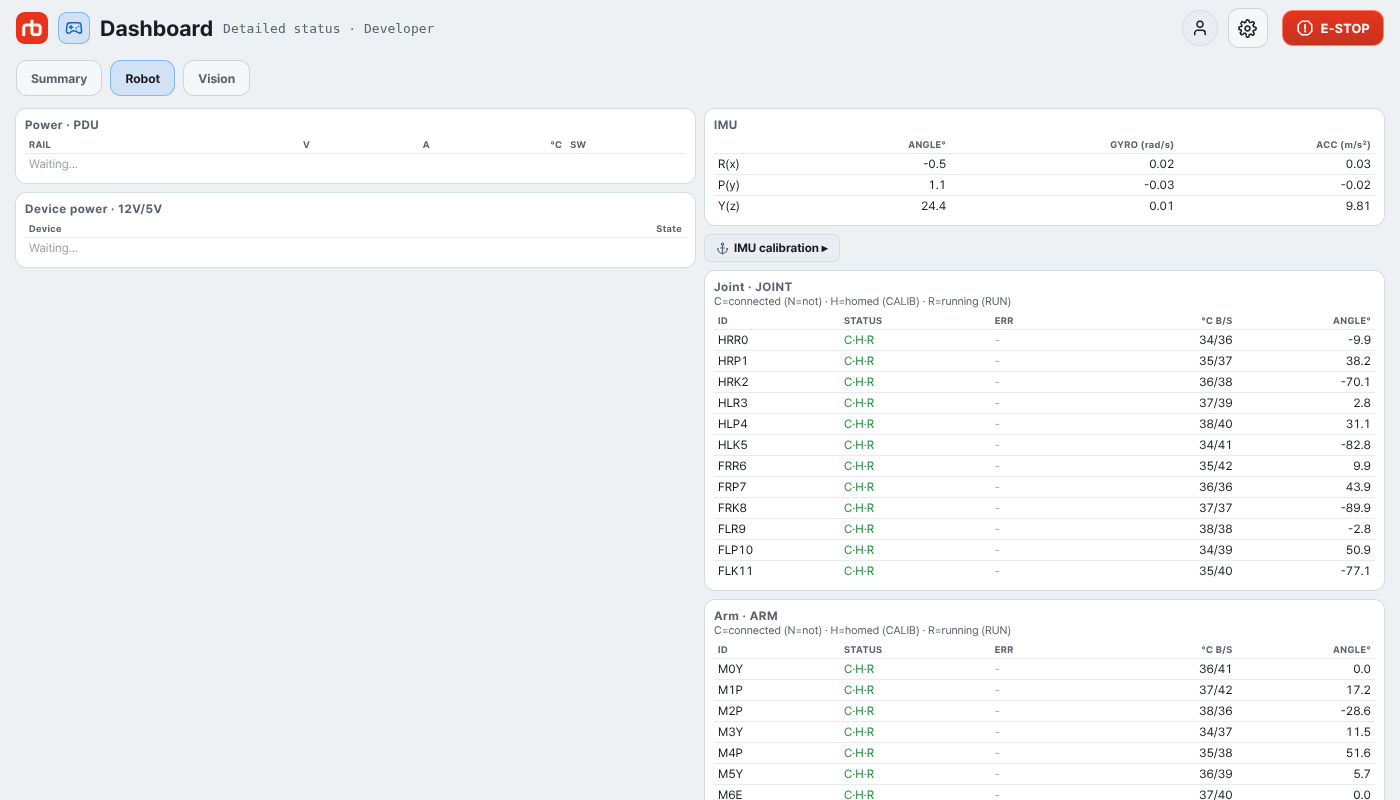
Robot state tables

Three tabs appear under the title: Summary, Robot and Vision. The summary also gains Power maintenance ▸ (System card).

Robot tab tables:

  • Power · PDU — the title also shows the PDU battery percentage; per rail (TOTAL, BAT L, BAT R, LEGS, ADDON, EXTERN, CHARGE): voltage, current, temperature and switch state. On the CHARGE row the switch column names what is active: Dock / Port.
  • Device power · 12V/5V — ON / OFF of each device rail.
  • IMU — ANGLE°, GYRO (rad/s), ACC (m/s²) for R(x), P(y), Y(z), with an IMU calibration ▸ shortcut underneath.
  • Joint · JOINT — one row per joint: ID, STATUS, ERR, °C B/S (board / stator), ANGLE°. STATUS reads C·H·R — C connected (N not), H homed, R running. Green = running and homed, amber = running only, red = otherwise. Temperature turns amber at 60 °C and red at 70 °C.

Vision tab — daemon connection, sensor count, the vision program list with Vision maintenance ▸, and the Vision sensors table (STATUS, RGB / IR / 3D fps, EMIT).

→ Dashboard

Settings ​

  • Calibration › Enable camera calibration — turning it on shows Open camera calibration below. It runs the jig extrinsic / OAK-D intrinsic procedure; progress appears in the top banner.

→ Settings

Connection ​

On Android and iOS, Add robot gains the Connect by address card (the web build, the desktop app and Steam Deck always show it). A collapsed Vision PC IP (optional) appears under it, for robots whose vision computer has its own address. Leave it blank to use the robot IP. It is saved with the robot IP when you connect.

→ Connection

Emergency stop — forced recovery ​

The Select motion grid — opened with the dashed Motions button — has a Position control group for cases where the normal recovery does not work. Lock Joints, Position Sit and Position Stand force a posture without a trajectory, so use them only on flat ground with the robot on the floor. The manual joint-by-joint recovery panel is reserved for internal use.

→ Emergency stop

Maintenance — the whole screen ​

The Maintenance screen is developer-only in its entirety. Without developer mode the Maintenance tile does not appear on the hub, and the route redirects to the control home.

Everything there can cut the connection, drop the robot or change how its daemons start. Read each warning before you press anything.

→ Maintenance

This user manual is intended for RBQ users.