Skip to content

Maintenance ​

Open Maintenance with its tile on the hub; the tile works while the robot is connected. The sections are Power / System, Vision, Config file, and — on robots with an arm — Arm.

This screen is developer mode only, in its entirety. Without it the Maintenance tile is not shown on the hub and the route redirects to the control home. Everything here can cut the connection, drop the robot or change how its daemons start — read each warning before you press anything.

Power / System ​

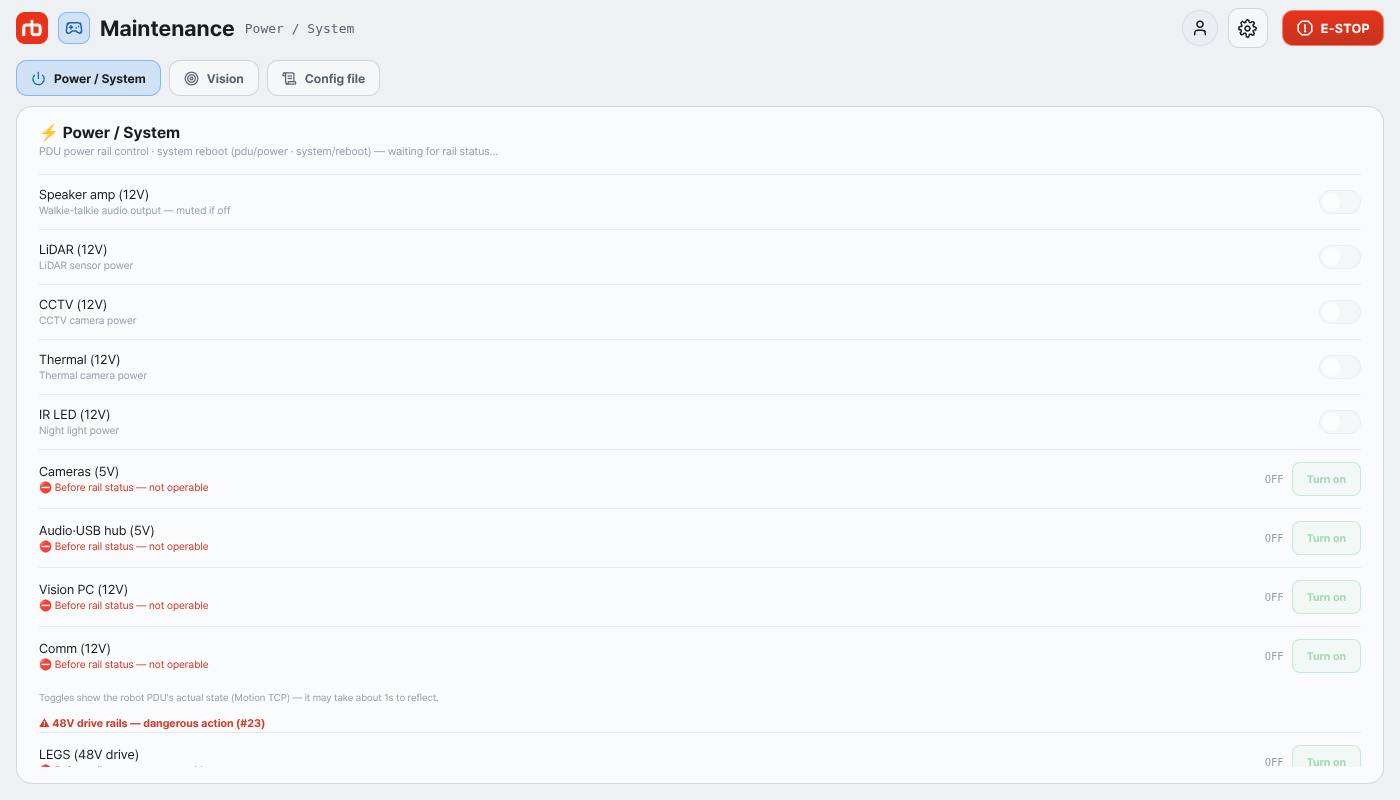
Power / System section

This section exposes every PDU rail, including the ones deliberately kept out of Settings. Toggles show the real rail state from the robot; they are disabled until that state has been received.

12 V toggles (one tap): Speaker amp (12V), LiDAR (12V), CCTV (12V), Thermal (12V), IR LED (12V).

Rails that break the link (two-step confirmation Turn this off? → Turn off; the dialog has a Don't ask for a day checkbox — once ticked, that rail switches without confirmation for 24 hours on this screen only; Robot settings → Power always confirms):

RailEffect of switching off
Cameras (5V)Video stops.
Audio·USB hub (5V)Audio devices disappear.
Vision PC (12V)Cameras, audio and part of the telemetry on this screen stop.
Comm (12V)The app's own connection to the robot is lost.

48 V drive rails (two-step, live voltage shown):

RailNotes
LEGS (48V drive)Leg motor power. Can only be switched off while the robot is not standing (sitting, control off or fallen); the row is blocked otherwise.
ARM · ADDON (48V)Arm and add-on power — one port for both. Confirm the arm is stopped first.
EXTERN (48V)External expansion port power.

DANGER

Switching LEGS (48V drive) off makes the robot collapse. System reboot — Reboot → Reboot the robot PC? → Reboot — restarts the robot PC: the robot loses motor power and the app connection drops for the duration. Sit the robot on the floor before either action. The reboot dialog also has the Don't ask for a day checkbox.

Below the 48 V rails the section repeats the Accelerometer calib (ACC) and IMU roll/pitch zero rows described in Robot settings → Calibration; they behave the same here.

Vision ​

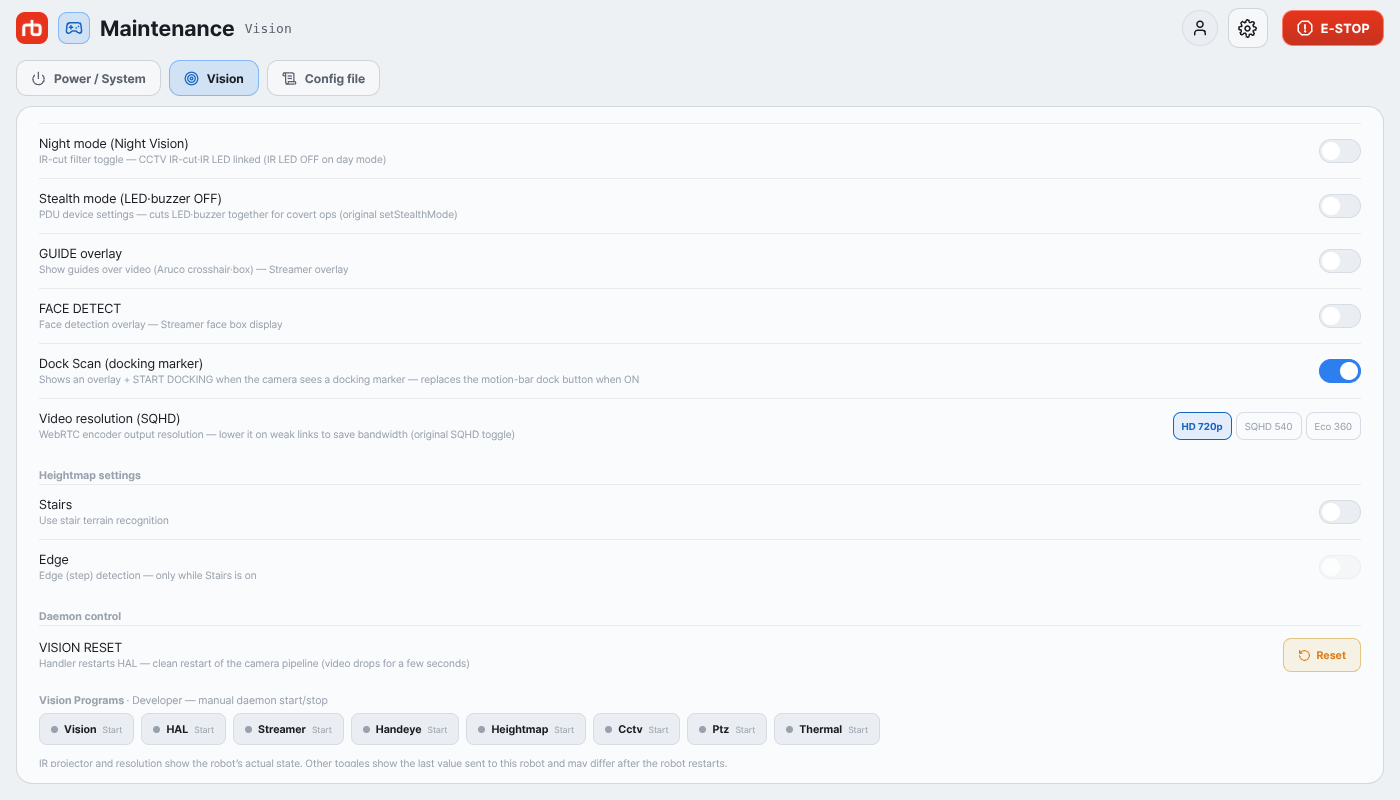
Vision section

RowWhat it does
Night mode (Night Vision)Switches the IR-cut filter; the CCTV IR-cut and IR LED follow it (switching to day turns the IR LED off).
IR projectorDepth-camera dot projector, independent of night mode. Shown only on robots that have one.
Stealth mode (LED·buzzer OFF)Turns the LEDs and buzzer off together.
GUIDE overlayDraws the guide (Aruco cross-hair / box) on the video.
FACE DETECTDraws face boxes on the video.
Dock Scan (docking marker)Whether the robot detects docking markers in the camera images; the overlay and the Start docking button appear when one is found. While docking runs the marker is drawn whatever this says.
Video resolution (SQHD)WebRTC encoder output resolution: HD 720p / SQHD 540 / Eco 360 — lower it on a weak link.

IR projector and Video resolution (SQHD) show the state the robot reports. The other toggles show the last value sent to this robot — the app keeps it per robot, so it survives leaving the page or restarting the app, but it can differ after the robot restarts (the note at the bottom of the section says so).

Heightmap settings — Stairs enables stair terrain recognition; Edge enables step-edge detection and is only available while Stairs is on.

Daemon control — VISION RESET → Reset has the Handler restart HAL, restarting the camera pipeline cleanly. Video drops for a few seconds; the button shows Resetting… and stays unavailable for about 8 seconds.

Vision Programs lets you start and stop individual vision daemons by hand (Vision, HAL, Streamer, Handeye, Heightmap, Cctv, Ptz, Thermal). Their on/off state comes from the robot's reported program status; only on older daemons that do not report it does it fall back to the last command sent.

Config file ​

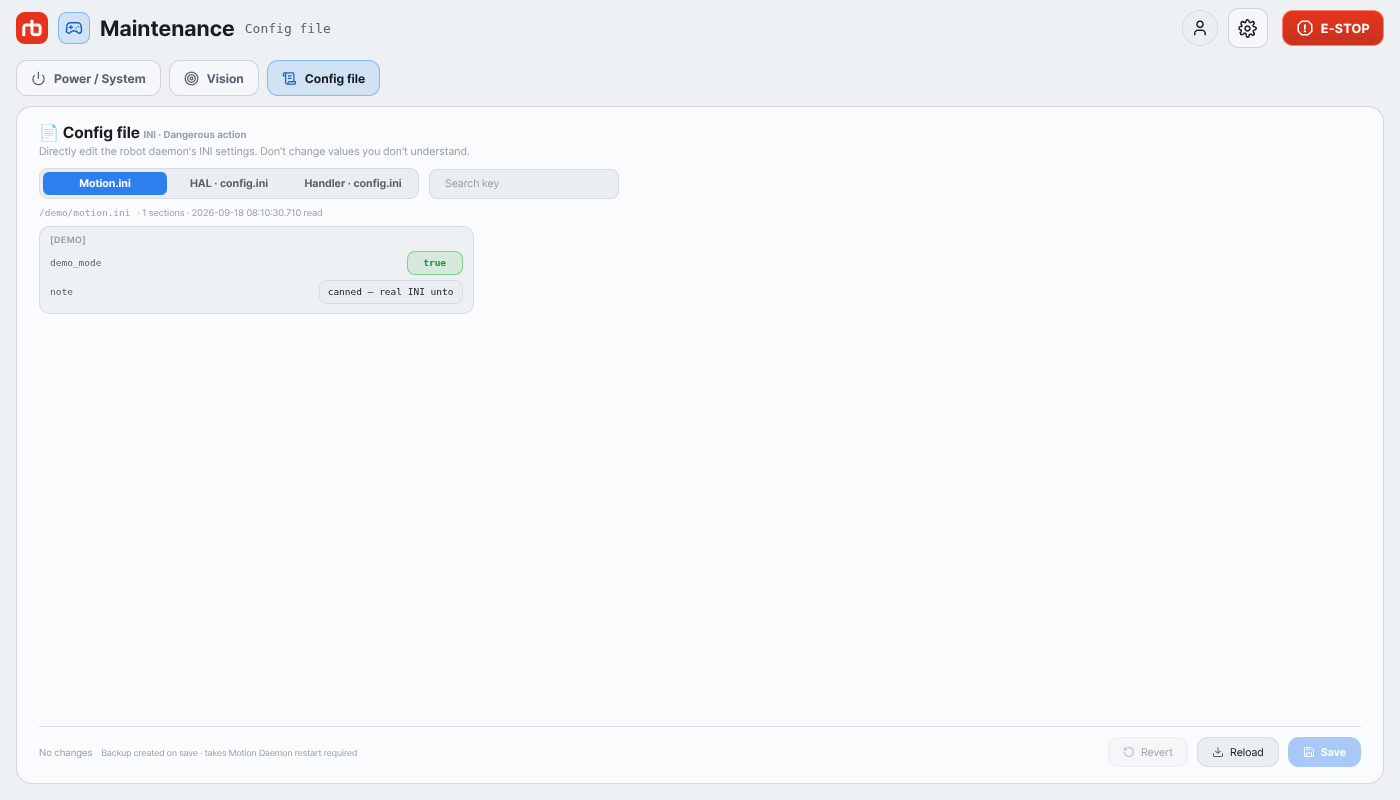
Config file section

The INI editor edits the robot daemons' configuration files directly. The target selector switches between Motion.ini, HAL · config.ini and Handler · config.ini. Use Search key to filter keys; boolean values can be toggled, other values are edited in place. The header shows how many sections were read, when, and Backup exists if a backup file is present on the robot.

The footer counts unsaved edits ({n} changes). Revert discards them, Reload re-reads the file from the robot, Save opens the confirmation Save to {label}? listing every changed key with its old and new value.

WARNING

Saving replaces the entire file on the robot with what the editor holds — always edit on top of a freshly loaded file. The previous file is kept as *_backup.ini. Changes apply only after the corresponding daemon (Motion, HAL or Handler) is restarted; the app does not restart it for you. Do not change values whose meaning you do not know.

Arm ​

Shown only when the robot reports an arm. This section is the initial bring-up.

  1. Press CAN check, Release brake, Control Start in that order. Wait for the status badge to light up after each step before pressing the next. ▶ Auto Start ARM runs the whole sequence in one press.
  2. Static poses sends a fixed pose (Straight, Folding, Ready, Lift, Packing, DoorReady) without a trajectory — on the first use start from Ready.
  3. Joint lock / jog — tap a joint card to lock or unlock it; hold + / − to jog a locked joint (the buttons are disabled while the joint is unlocked).

RC01 / RC02 attachment sections are not covered by this manual.

This user manual is intended for RBQ users.