Skip to content

Controller and Wi-Fi ​

How to put the controller (Steam Deck, tablet, or PC) on the robot's Wi-Fi, connect the RBQ app to the robot, and run the auto-start. Set the initial pose and power the robot on first — see Robot initial pose.

Step 1: Open the app ​

Launch the RBQ app on the controller. If it is not yet installed on a Steam Deck, start with Steam Deck setup. The installers are on Downloads.

Step 2: Join the robot's Wi-Fi ​

The robot provides a Wi-Fi access point named RBQ_{XX} (XX differs per unit). The controller must be on that network to reach the robot.

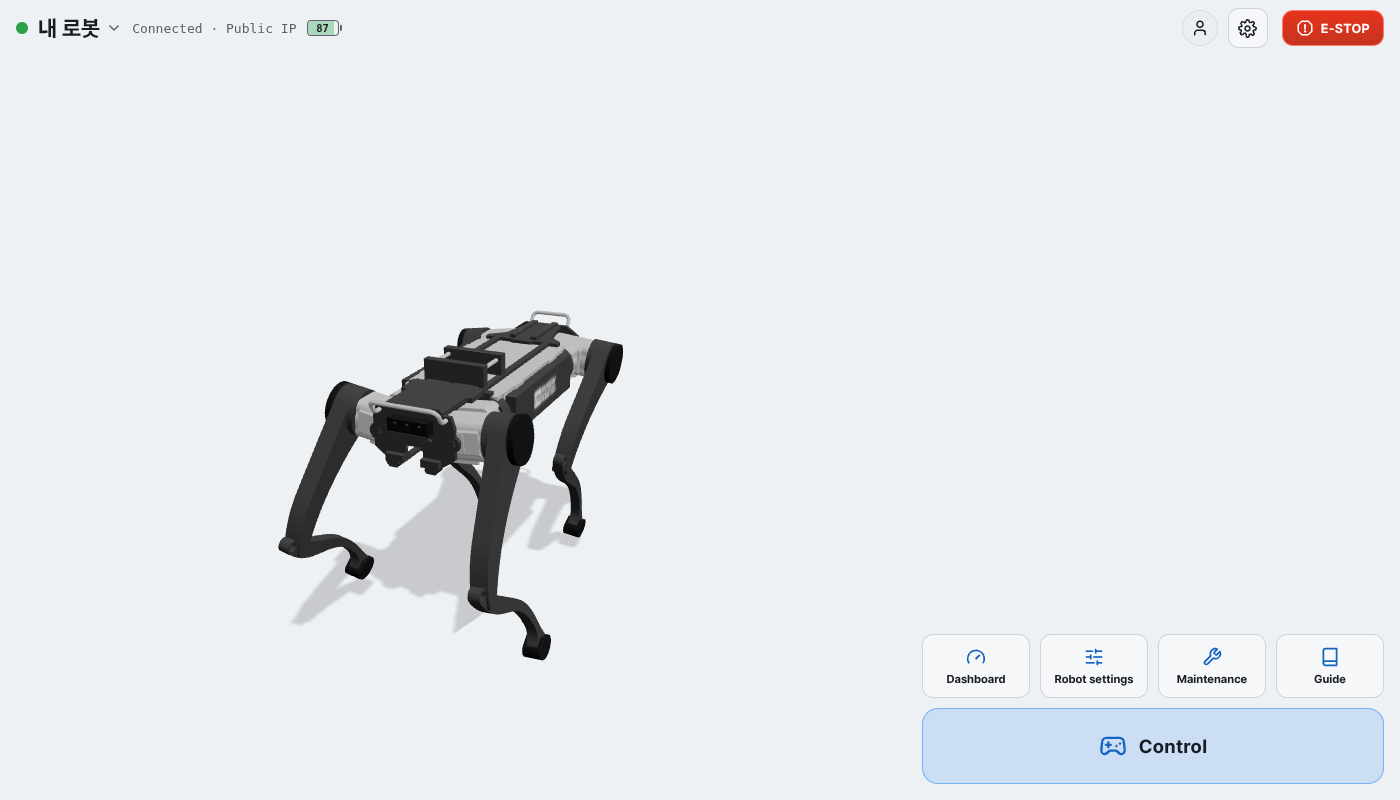
The app opens on the hub. The robot name sits at the top left with the connection state right after it, and that status line is what tells you whether the device is on the right network.

The hub — robot name and status line

  1. Read the status line — Connect to the robot's WiFi means no robot is saved yet, and Not on the robot's WiFi means the device is on some other network. When the app knows the robot's WiFi it names it (Robot WiFi(SSID) — please switch to it).
  2. Switch networks — on Linux desktop and Steam Deck the Switch WiFi button next to the line joins that network directly, or opens the in-app list so you can pick RBQ_{XX}; enter the password there if the network is secured. On Android, WiFi settings opens the system Wi-Fi screen instead.
  3. Confirm — you are ready once the dot in front of the robot name turns green.

If RBQ_{XX} is not in the list, check that the robot is powered on and its Wi-Fi is up.

Once you reach the control home, the Wi-Fi chip in its top bar shows the signal strength. Tap it for My device WiFi, which names the network your device is on and shows a Robot network (green) or Not robot network (amber) badge.

NOTE

Android policy forbids scanning from inside the app, so it offers only a System WiFi settings button. iOS and browser builds cannot read or change Wi-Fi either — join the network from the device's own Wi-Fi settings.

Step 3: Connect to the robot ​

Robots are chosen and added on the hub. There is no connection screen inside Settings.

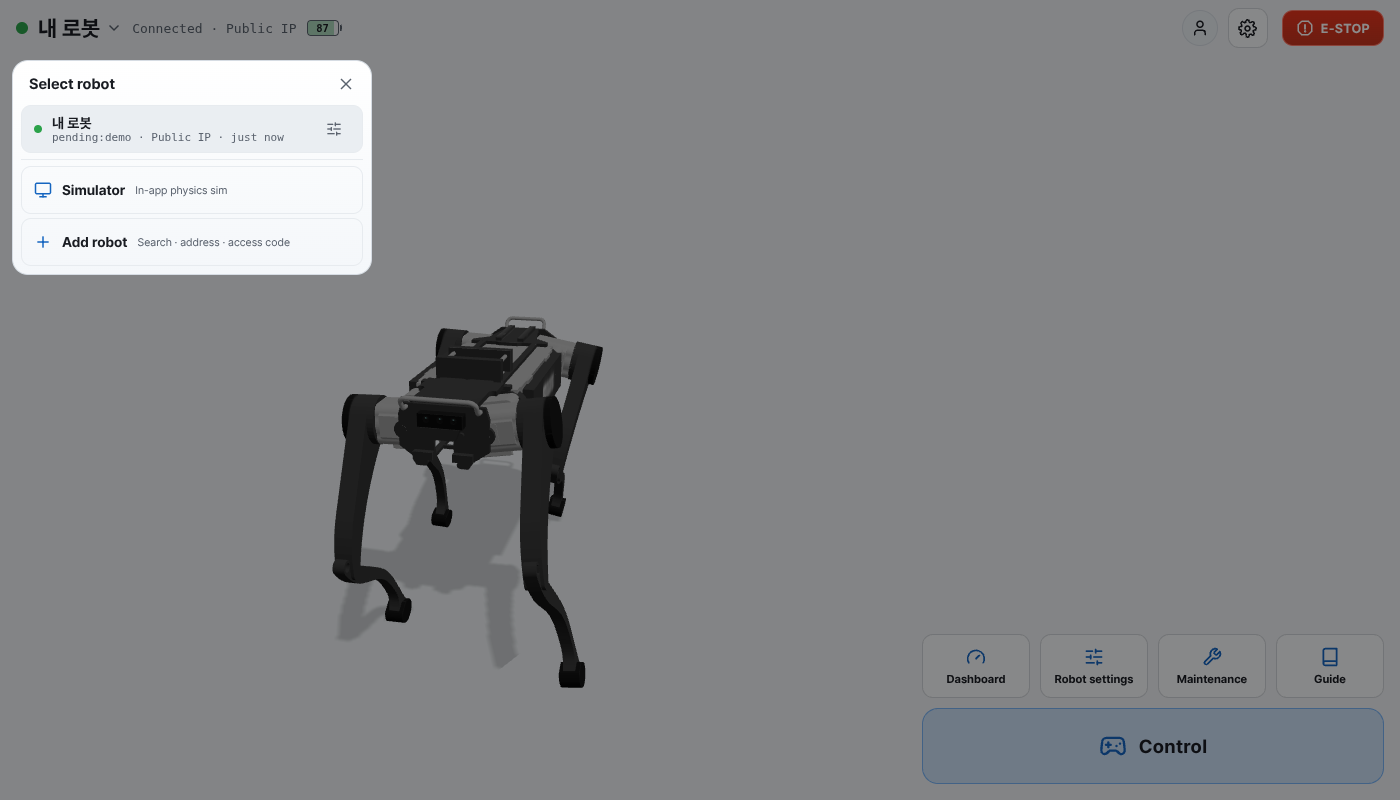
  1. Tap the robot name (▾) to open Select robot. It lists the robots saved on this device and, while you are logged in, the robots assigned to your account.
  2. Tap the robot's row to connect. On Linux desktop and Steam Deck the app switches to the robot's WiFi first when that network is saved and in range.
  3. For a robot you have not used before, press Add robot. On the robot's own AP the app finds it by itself at the fixed address 192.168.0.10 — Check again retries. A robot behind a router or reachable at a public address is added under Connect by address (Robot IP, preset to 192.168.0.10, or Public IP), and Enter access code registers the robots assigned to your account for remote (LTE) use.
  4. Communication is open once the dot is green and the line reads Connected followed by the route.

Select robot

The routes, the automatic connection at start-up and what each status line means are covered in Connection.

Step 4: Auto-start ​

This brings the robot software and state up in one go.

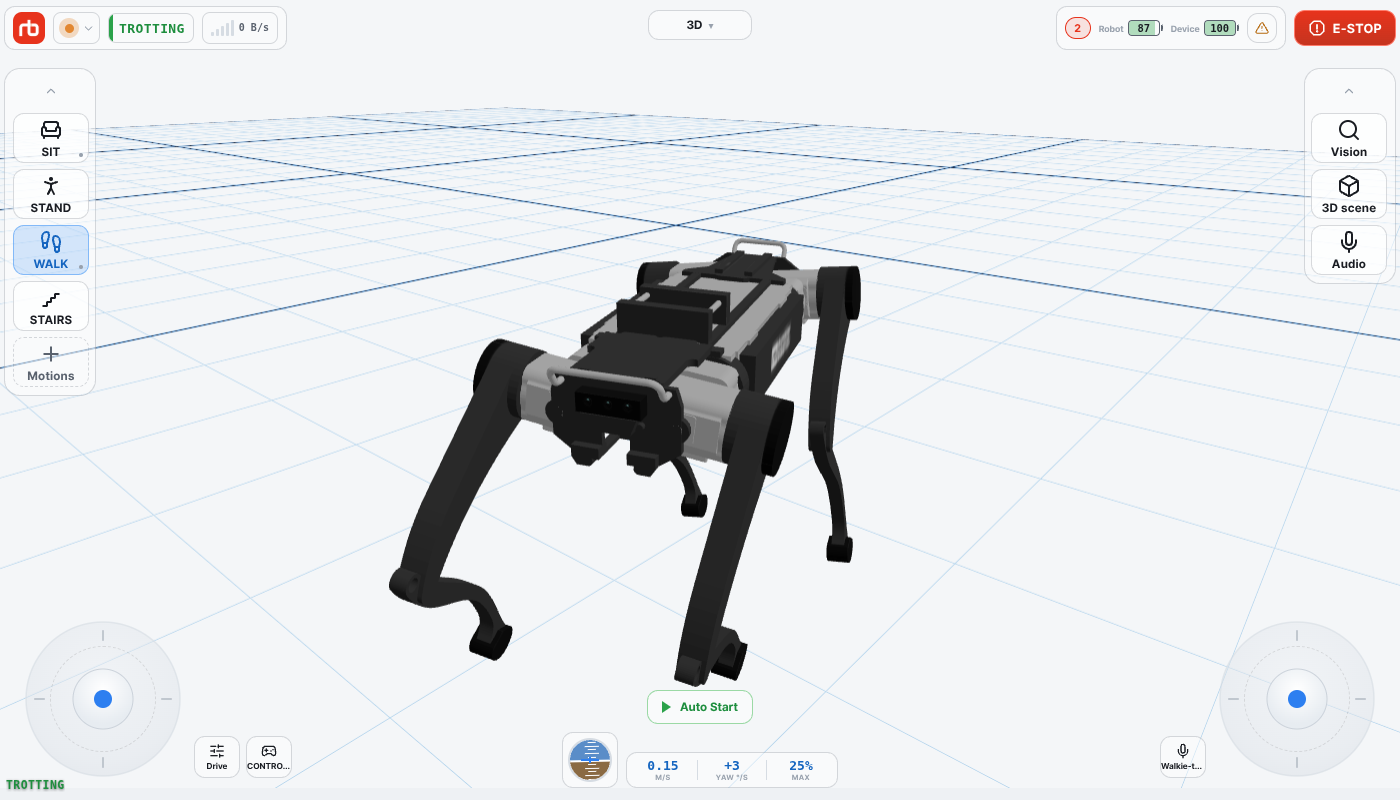
  1. Press auto-start — before start-up, an Auto Start button sits on the hub under the robot status, and at the bottom center of the control home. (The hub card only appears once a robot is connected; the control-home pill is there before that, but grayed out.)
Auto start button on the pre-start home screen
[ Home screen before start-up ]
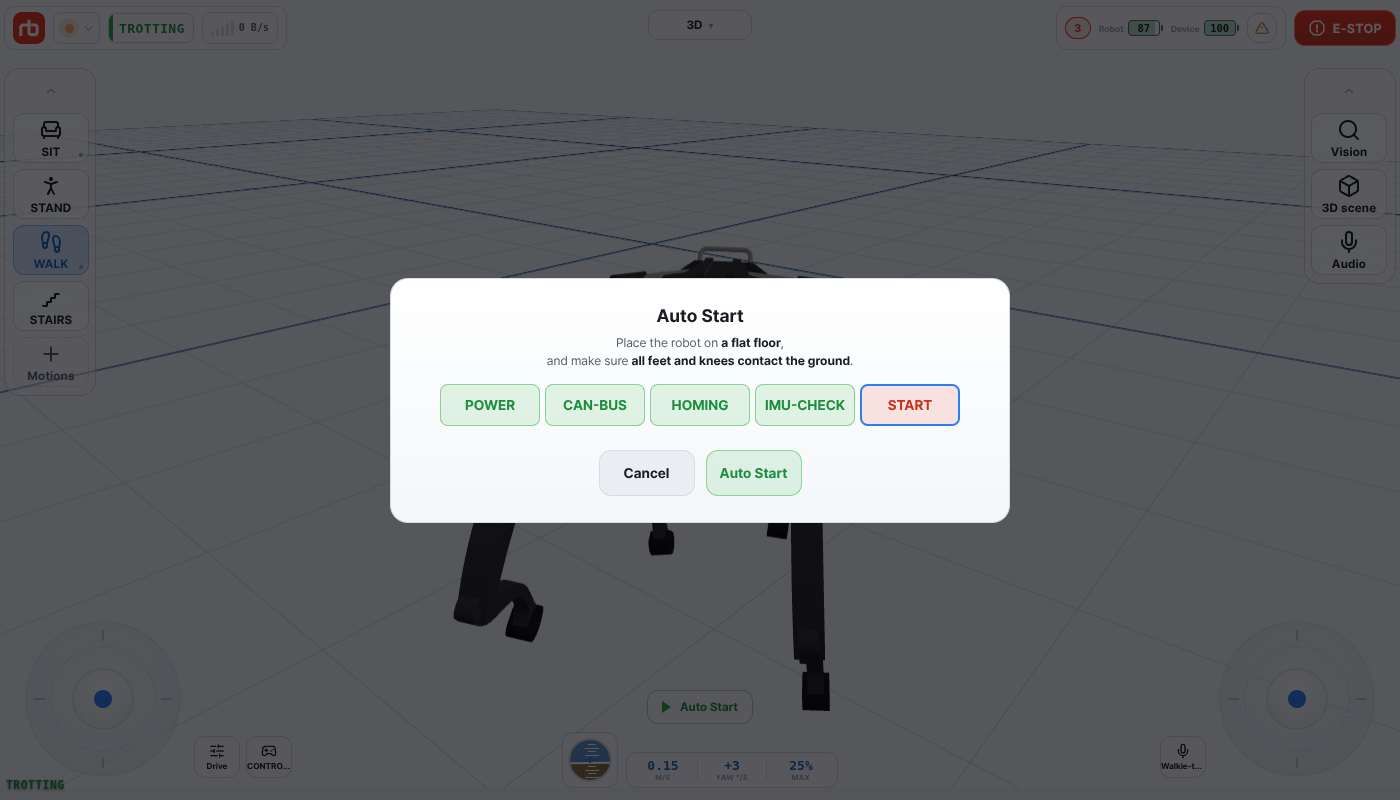
  1. Confirm — a confirmation appears. Check that the robot is on flat ground with every foot and knee touching it, then press Auto Start. The row in the middle lists the stages ahead: POWER, CAN-BUS, HOMING, IMU-CHECK, START.
Auto-start confirmation
[ Auto-start confirmation ]
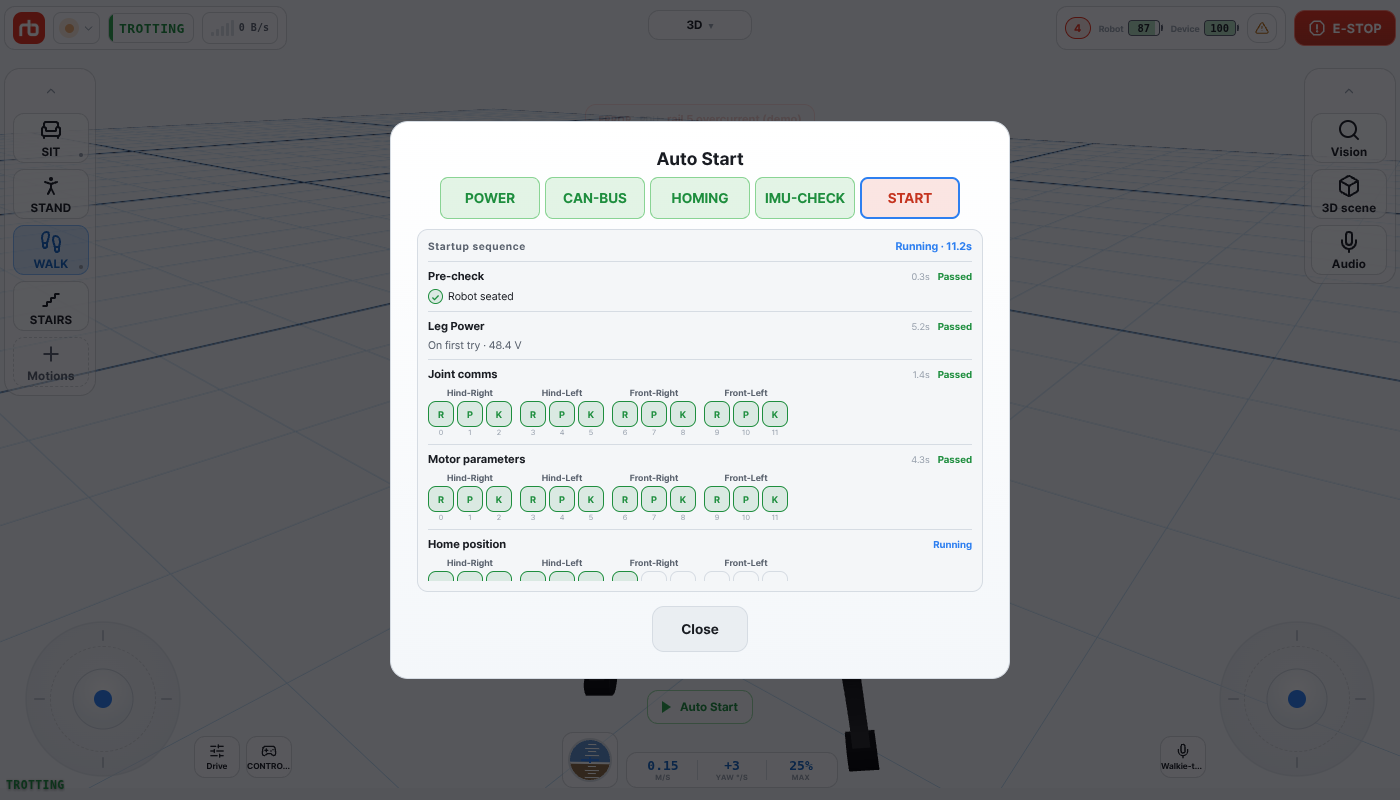
  1. Watch it run — the same window turns into the start-up sequence and reports each stage as it completes, per leg and per joint with its elapsed time, so a failure points straight at the joint responsible.
Auto-start in progress
[ Auto-start in progress ]
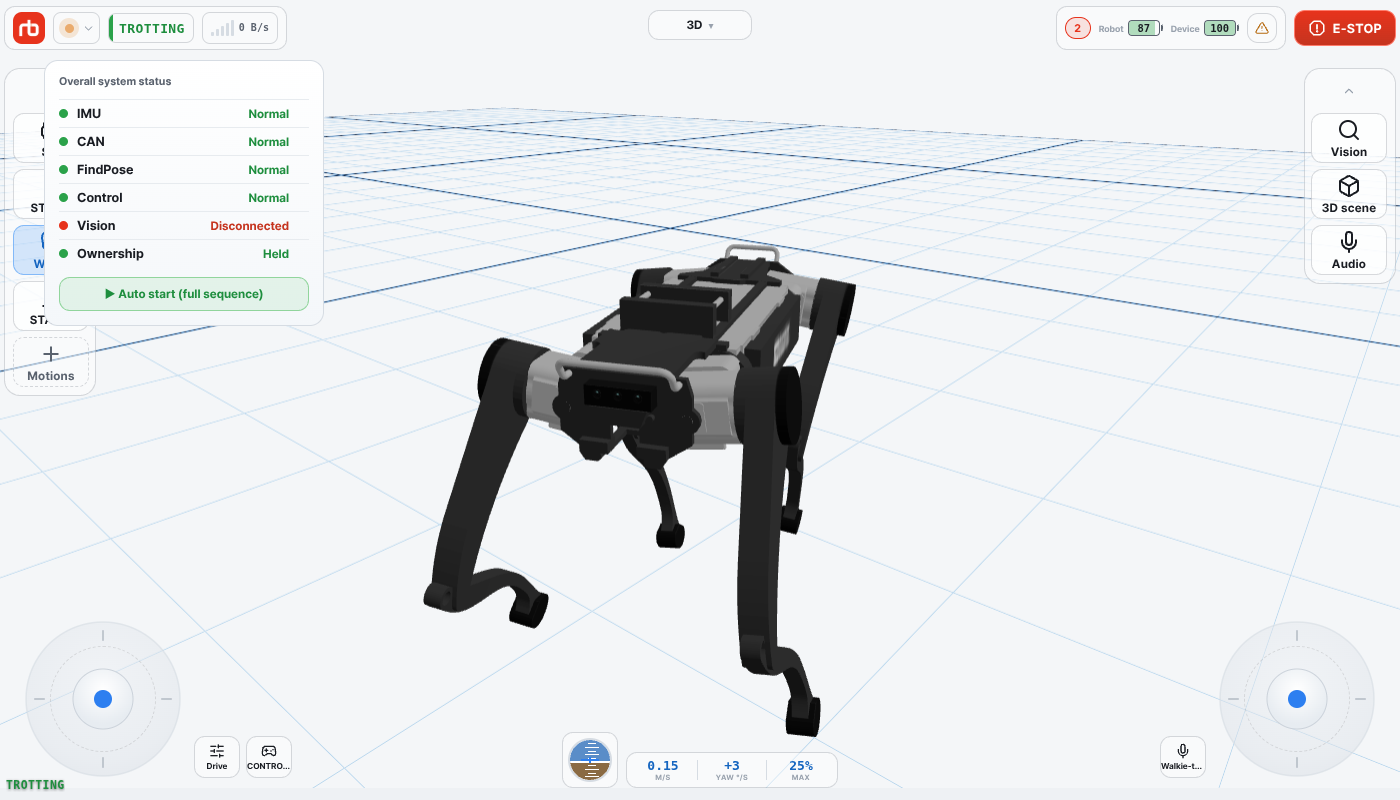
  1. Confirm completion — start-up is done once every item reads as complete and the robot is standing. Press the status in the top bar to review the individual results.
Status popover after start-up
[ Start-up complete — status ]

WARNING

If auto-start does not finish, or an item is left failed, make sure nobody is nearby, review the emergency stop procedures, and follow the steps below. Always observe the general safety precautions before operating.

  1. If the communication check failed: power the robot down safely and restart it.
  2. If finding the home pose failed: check the leg posture on a flat, stable surface as described in maintenance safety, then restart.

If the problem persists, contact Rainbow Robotics as described on the Contact page.

This user manual is intended for RBQ users.