UI Program usage via LAN / Wireless v2.1
TIP
(This page applies only to legacy versions of RB UI.
For the latest RB UI versions, please refer to General → Software Update.
In addition, RB_Driver is not required in the latest RB UI versions.)
1. Update the software-s (UI and ControlBox software) to the latest version
CAUTION
- System updates should always be performed via USB connection
- For more information on how to update the software, refer to the software update document.
Must be used with UI software version 3.7.X or later.
UI software version can be checked as shown in the figure below.

If the UI software version and the control box software version do not match, a software update recommendation pop-up appears as follows.

Go-to ‘Setup > System’ as shown in below.

Click ‘Software update’ button.

2. RB Driver Installation
RB Driver installation is required to connect the UI program with the control box through TCP/wireless communication.
Install the RB Driver application on the android-tablet in the order shown below.
(get RB Driver.apk through distributor or manufacturer)

If you run the RB Driver app, you can see the following screen.

Connect the robot-control box and the tablet by pressing the Step 1.
If the color of the Step 1 icon changes after connection, it is normally connected.


Select TCP/IP in Step 2.

Click the download button in Step 3 to transfer the driver file in the RB Driver app to the robot Control box.

If it is pressed normally, the following message appears. (1~5 second)

Click ‘OK’ after waiting until the following pop-up appears. (1~5 second)

Click the Install button in Step 4 to install the downloaded driver file in the control box.

If it is pressed normally, the following message appears. (3~8 second)

Click ‘OK’ after waiting until the following pop-up appears. (3~8 second)

If OK is displayed, the driver installation is complete. Reboot the entire system.
3.1 IP Address Setting (Android OS UI)
It is recommended to use the router exclusively for robots.
Connect the router directly to the control box as shown below. (Recommended).

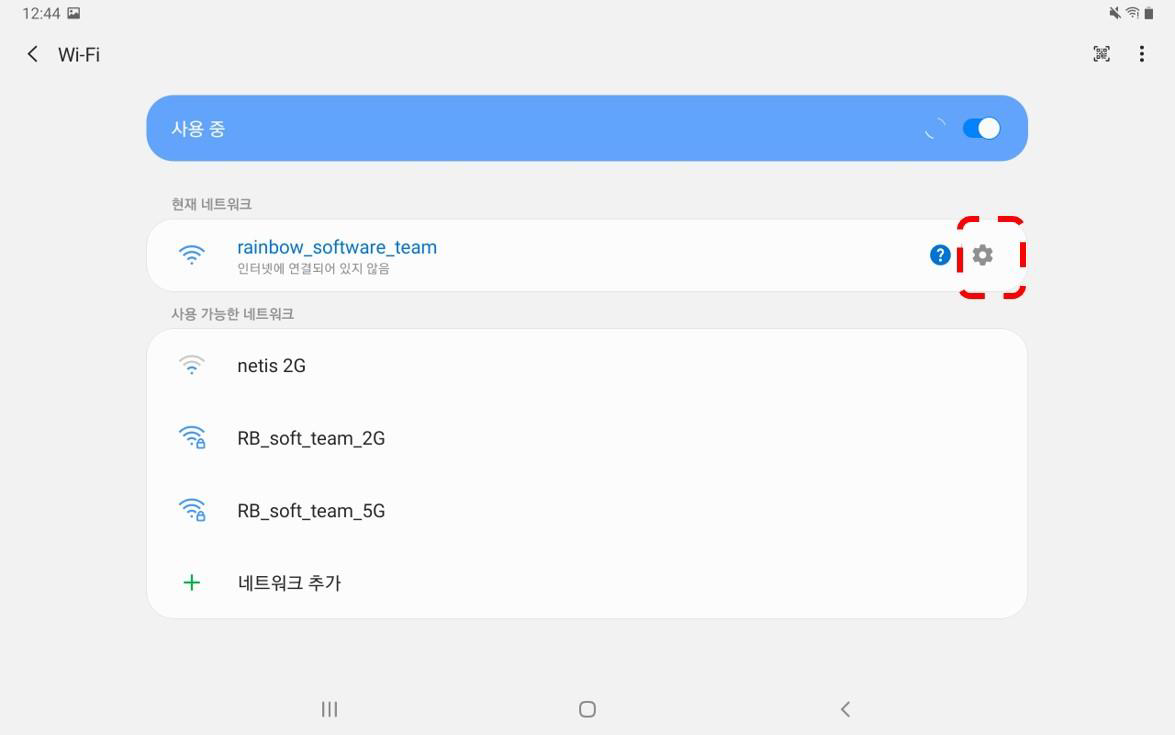
Connect the Android tablet wifi to the installed router as shown below.
(in the example, AP (router) name is rainbow_software_team).
If the AP (router) and the robot control box are directly connected, the following message can be appeared, and at this time, click ‘Keep Wi-Fi connection’.
Click the button below to check the IP setting/status of the Wifi AP router.
(If you know the IP address of the AP device in advance, you can skip this step.)
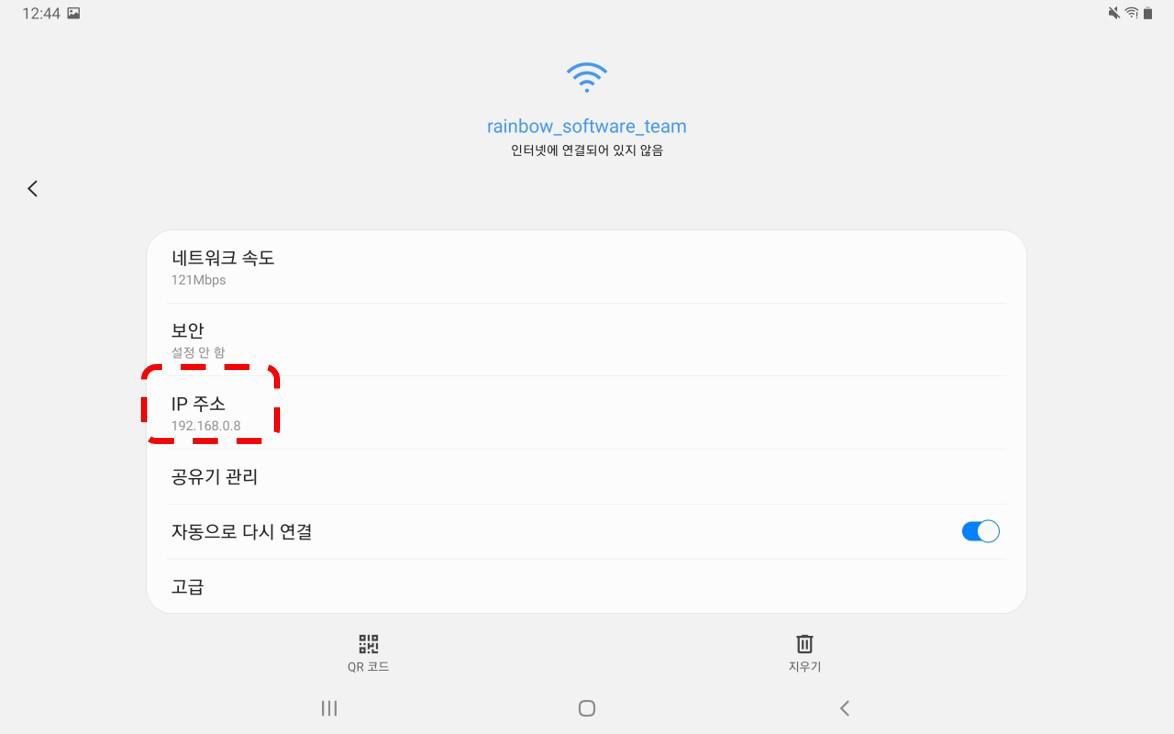
Check the IP address. In the example below, you can see that the IP of the tablet PC is set to 192.168.0.8.
Through this, it can be estimated that the operating IP band of the router is 192.168.0.X.
(If you have set the IP of the router separately, this process is not necessary.)
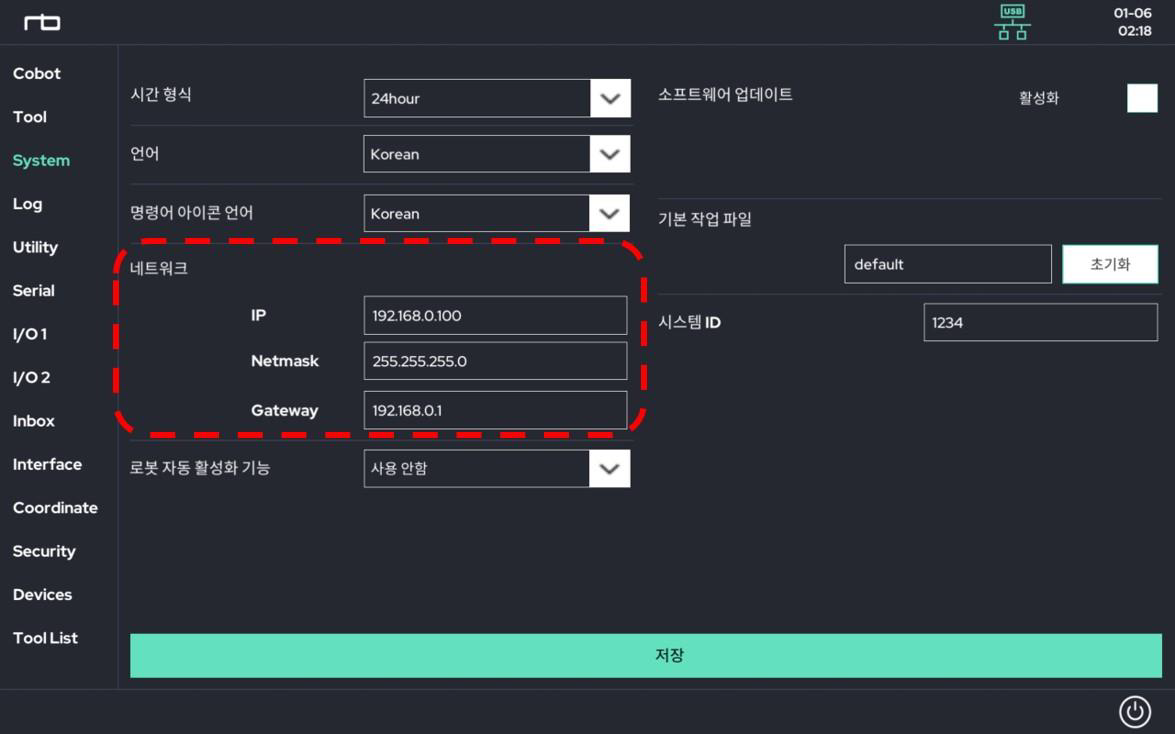
After connecting the control box and the tablet with a USB cable, go to ‘Setup > System’.
Modify the IP/Netmask/Gateway inside the red box to match the range of the AP-router address you checked earlier.
At this time, to match the band, the first three numbers of IP are the same and the last number is set differently.
3.2 IP Address Setting (Window OS UI)
This is an example of a direct connection between the user PC and the robot control box.
Connect the user PC and the robot control box directly with a LAN cable.
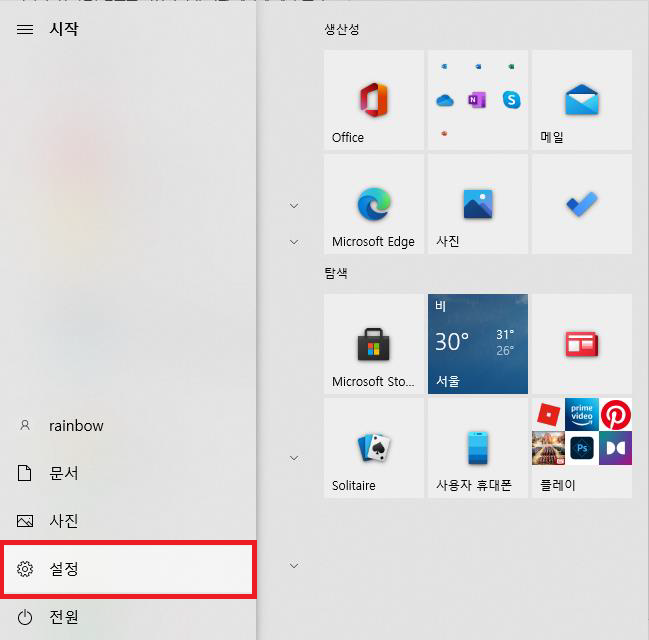
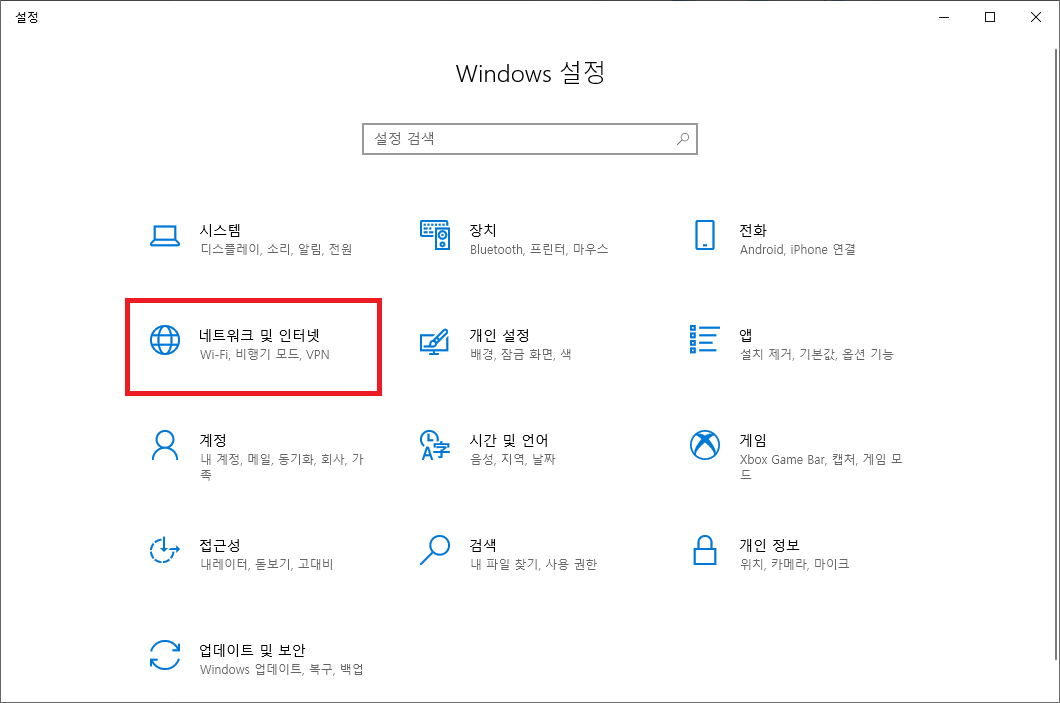
PC > ‘Start > Settings’
Select ‘Network / Internet’
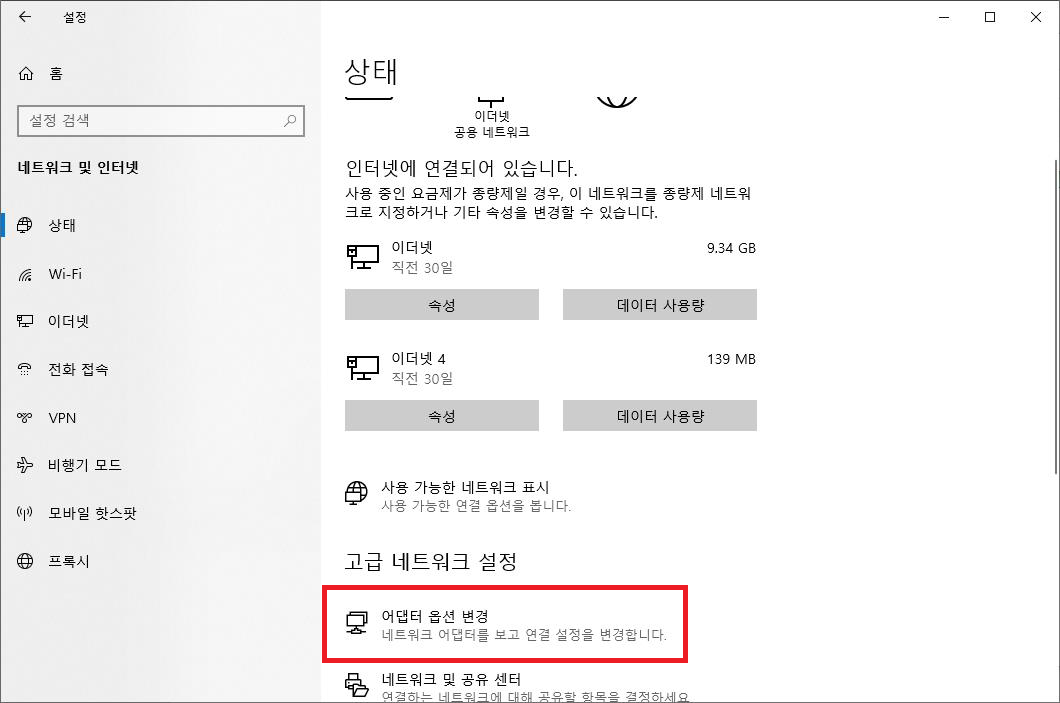
Click ‘Advanced Network Setting > Adapter option change’
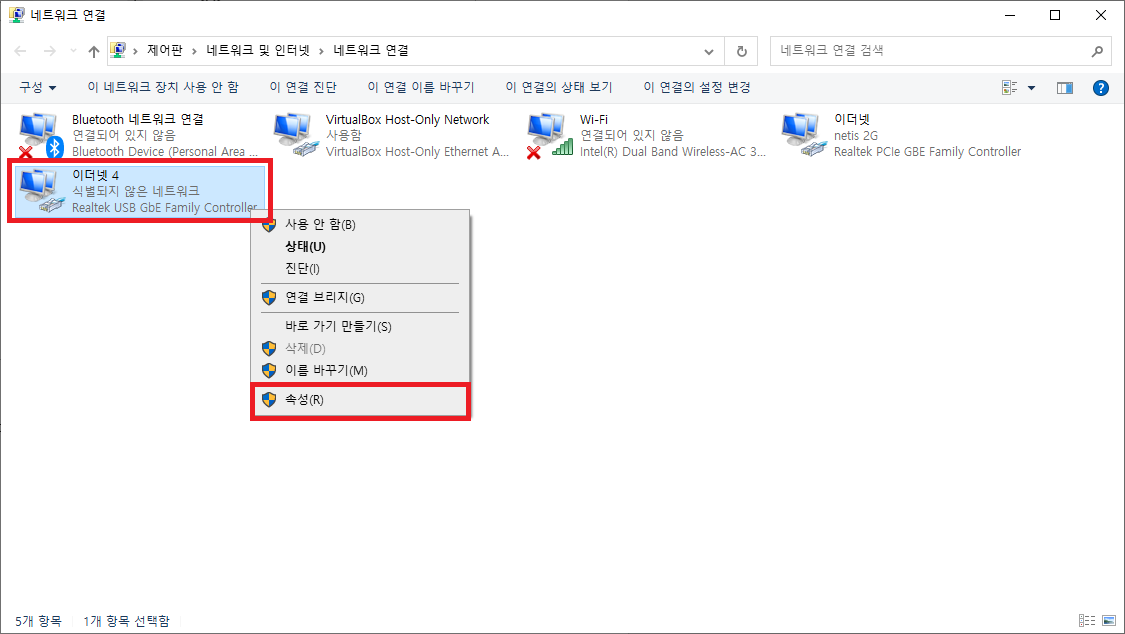
Go to Property of the network driver
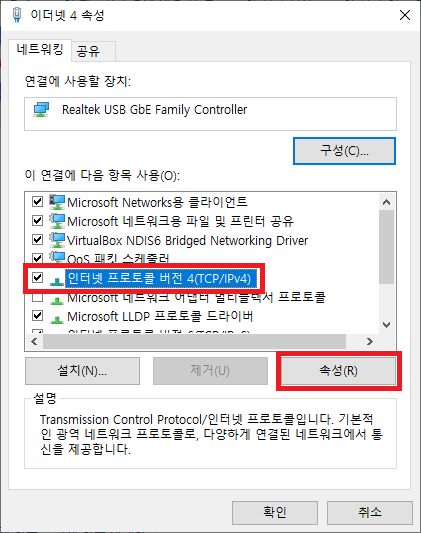
Select ‘Internet Protocol Version 4(TCP/IPv4)’ > Property
Select ‘Manual IP Setting’.
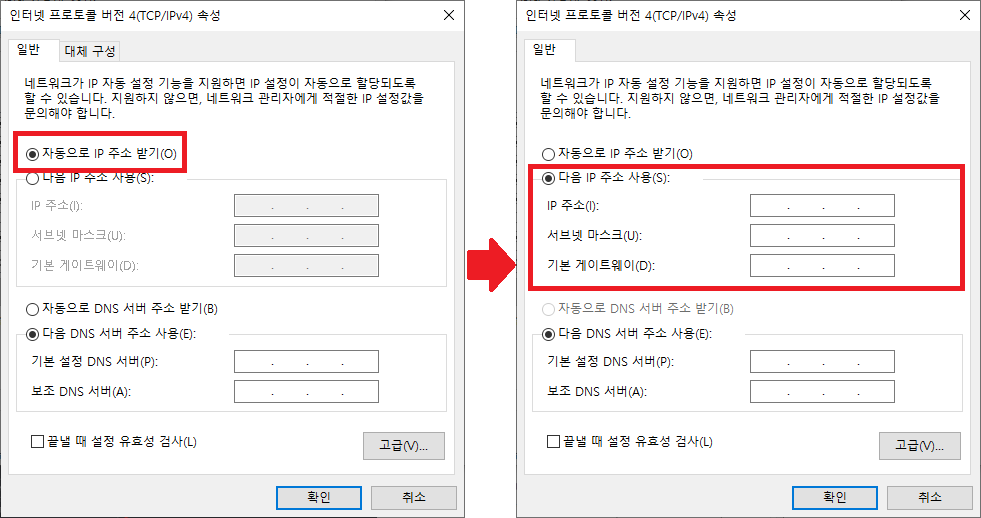
Type the desired IP address.
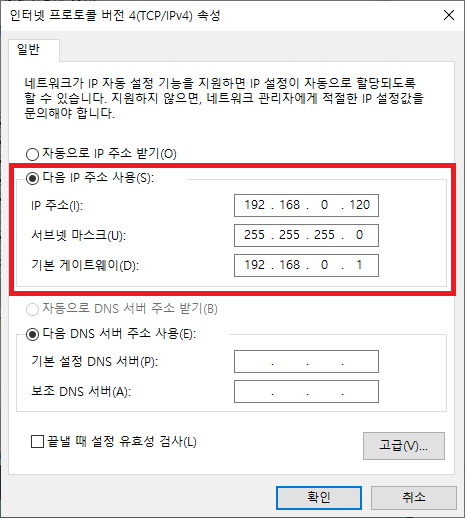
In case of IP setting of robot control box, proceed in the same way as 3.1.6 ~ 3.1.7.
4. Connect UI Program and Robot-Control-Box via TCP/IP communication
Run Rainbow Robotics UI, and click the State/Connection button( ).
).
In the ‘Connection Setting’, select ‘TCP/IP mode’.

Type the IP address of the robot-control-box that was previously set. And click ‘Connect’ button.

Check that UI program is properly connected to the control-box.

When the UI program is connected with Control-Box through TCP/IP mode, you can see that there is the word ‘TCP’ inside the connection icon as shown in the following figure.

 Rainbow Robotics