Operating UI Program Through USB Connection
1. Software Update
Caution
- System updates must be performed through USB connection
- For detailed software update methods, please refer to the software update document.
(1) The software version must be compatible with UI version 6.6.# or higher. You can check the software version as shown in the picture below.
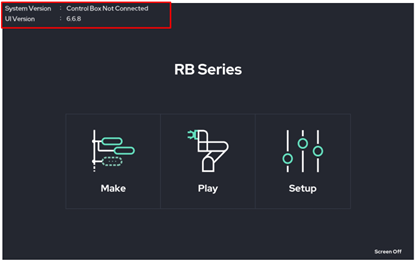
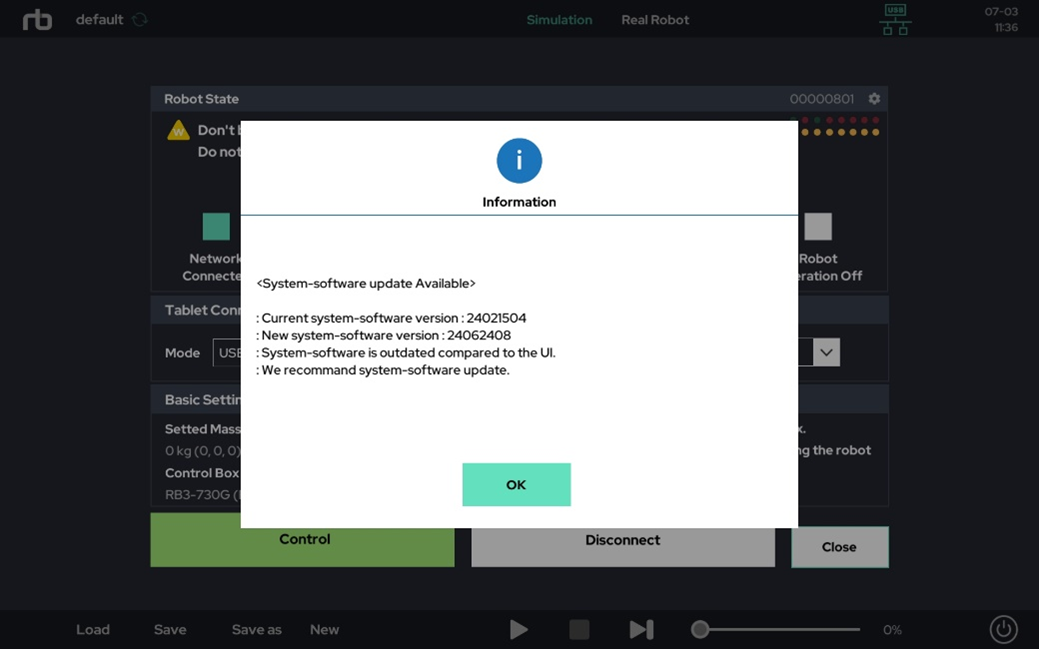
(2) If the UI version and the control box software version do not match, a software update recommendation pop-up appears as shown below.
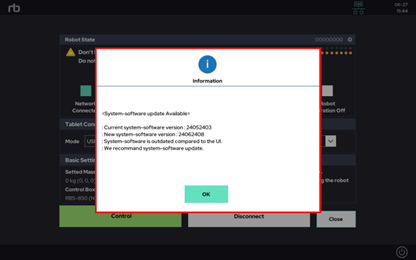
(3) Go to ‘Setup > System’ as shown below.
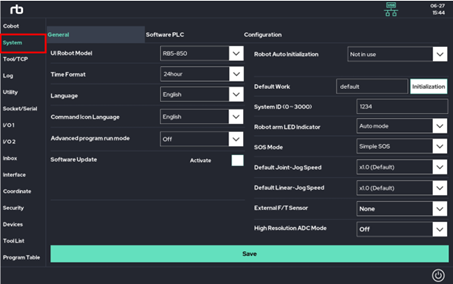
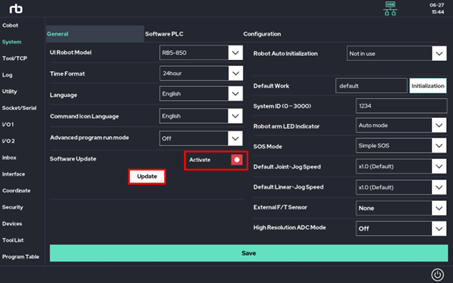
(4) Click ‘Activate Software Update’ and proceed with the update.
2. USB Connection Setup Procedure
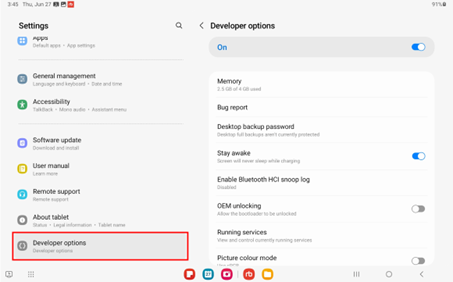
(1) Activate the developer options menu in the settings of your Android OS tablet.
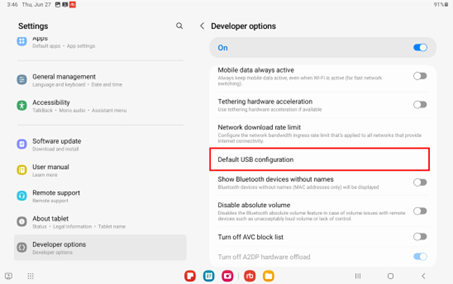
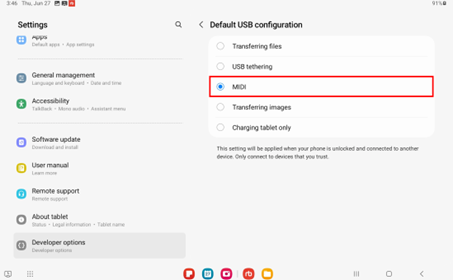
(2) Select MIDI in ‘Settings > Developer Options > Default USB Configuration’.
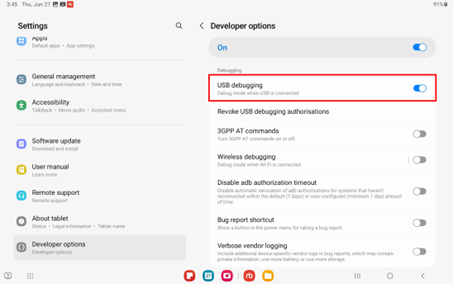
(3) Enable USB Debugging.
(4) Connect the tablet and control box with a USB A to C cable.
(5) Select ‘Allow’ in the ‘Allow access to tablet data’ message.
(6) When connecting the tablet and control box for the first time, check ‘Always allow on this computer’ in the ‘Allow USB Debugging?’ message and then select ‘Allow’.
(7) Remove the USB A to C cable from the tablet and reconnect it.
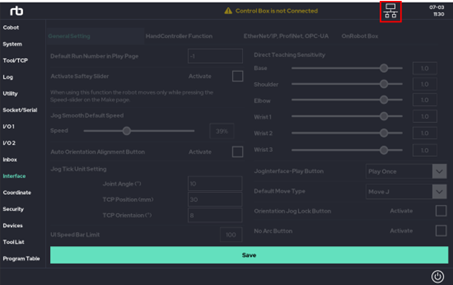
(8) Run the Rainbow Robotics Ui and click the connection icon in the upper right corner. (  )
)
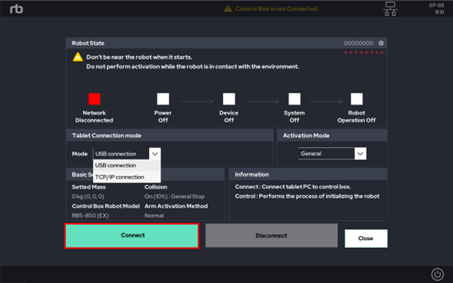
(9) Set the mode of tablet connection settings to ‘USB connection’.
(10) After confirming that the control box is not in the Please Wait state,
press the connection button to connect the control box and UI.
(11) If (10) fails, terminate the UI process and repeat steps (7) to (10).
3. Detailed Guide
(1) Activate the developer options menu in the settings of your Android OS tablet.
(2) Select MIDI in ‘Settings > Developer Options > Default USB Configuration’.
(3) Enable USB Debugging.
(4) Connect the tablet and control box with a USB A to C cable.
(5) Select ‘Allow’ in the ‘Allow access to tablet data’ message.
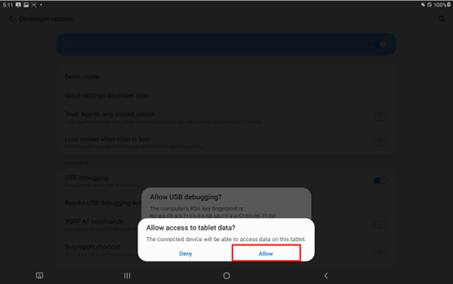
(6) When connecting the tablet and control box for the first time, check ‘Always allow on this computer’ in the ‘Allow USB Debugging?’ message and then select ‘Allow’.
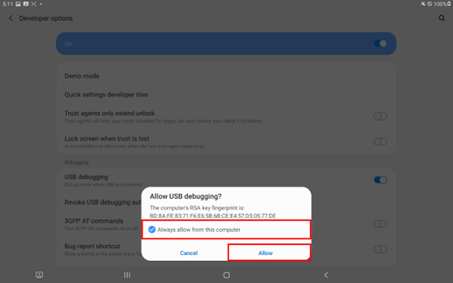
(7) Remove the USB A to C cable from the tablet and reconnect it.
(8) Run the Rainbow Robotics Ui and click the connection icon in the upper right corner. (  )
)
(9) Set the mode of tablet connection settings to ‘USB connection’.
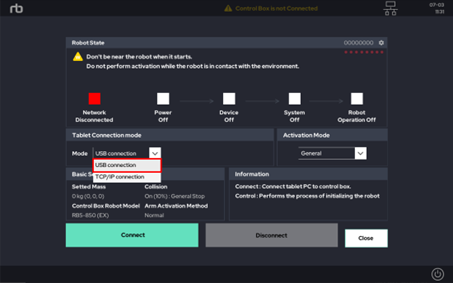
(10) After confirming that the control box is not in the Please Wait state, press the connection button to connect the control box and UI.
(11) If (10) fails, terminate the UI process and repeat steps (7) to (10).
(12) Confirm that it is properly connected to the control box. If the UI version and control box version are different, a related notification message will appear. There is no problem with use.
 Rainbow Robotics