Virtual Control Box Installation v7.2
1. Installing the VirtualBox Platform
Installing VirtualBox on the User’s PC
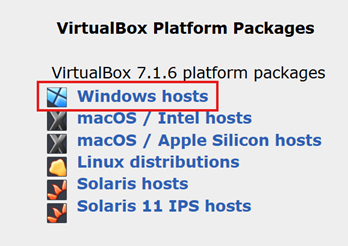
(1) Click the Window hosts button from the following link (https://www.virtualbox.org/wiki/Downloads) to downloads the installation file. In order to operate the virtual robot control box program, a virtual Linux system is required, so the above program is required to install.
(2) Install this program through the Next/Yes button without any additional setting.
(3) When this installation is complete, run the program.
2. Installing and Running the Simulator Program
Running the Simulator via VirtualBox
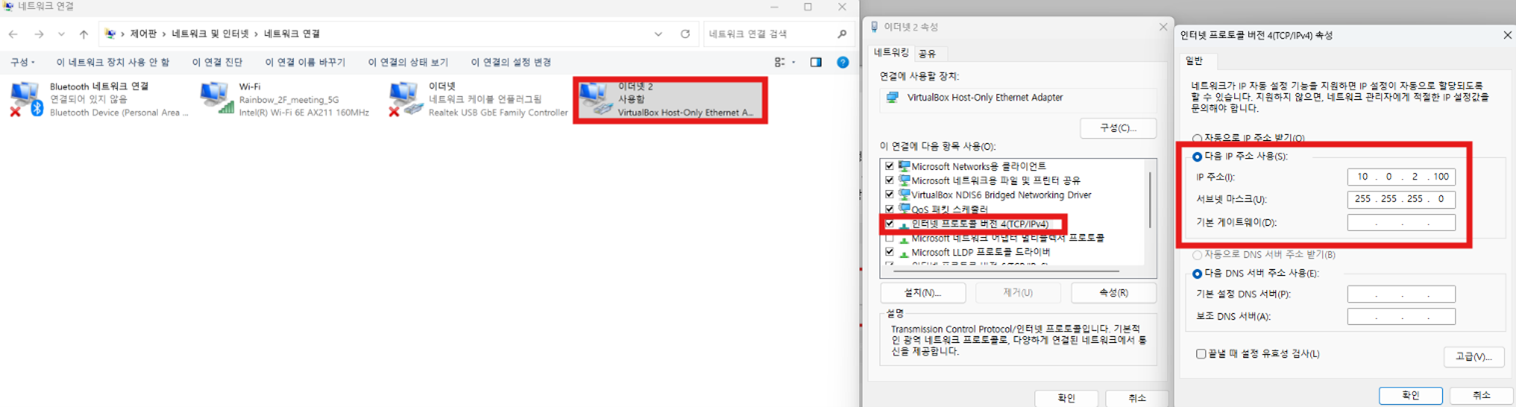
(1) Navigate to Tools->Network Setting.

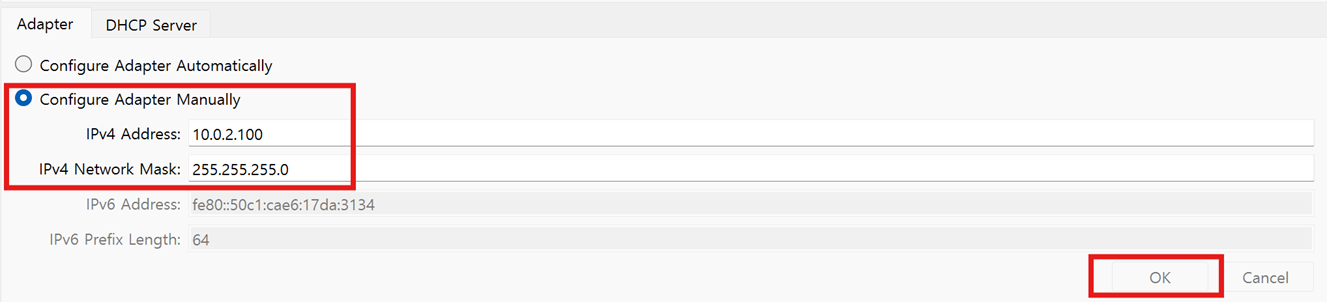
(2) Go to Tools → Network, then navigate to the Adapter section and set the network address as follows. For example, enter '10.0.2.100'. If you are already using an IP address in the 10.0.2.100 range, you can assign a different IP address that does not overlap. After entering the IP address, click the "OK" button to confirm.
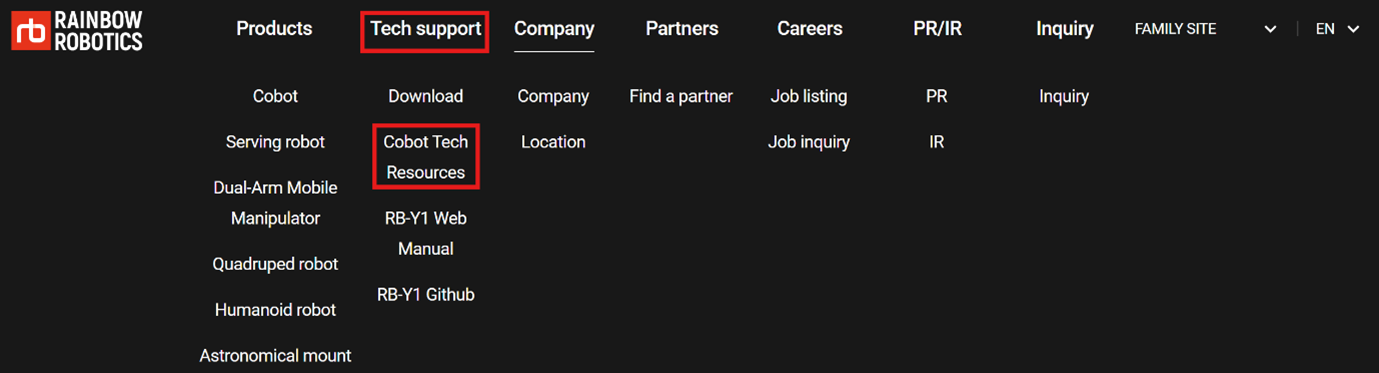
(3) Visit the official Rainbow Robotics website and navigate to Tech Support → Cobot Resources.
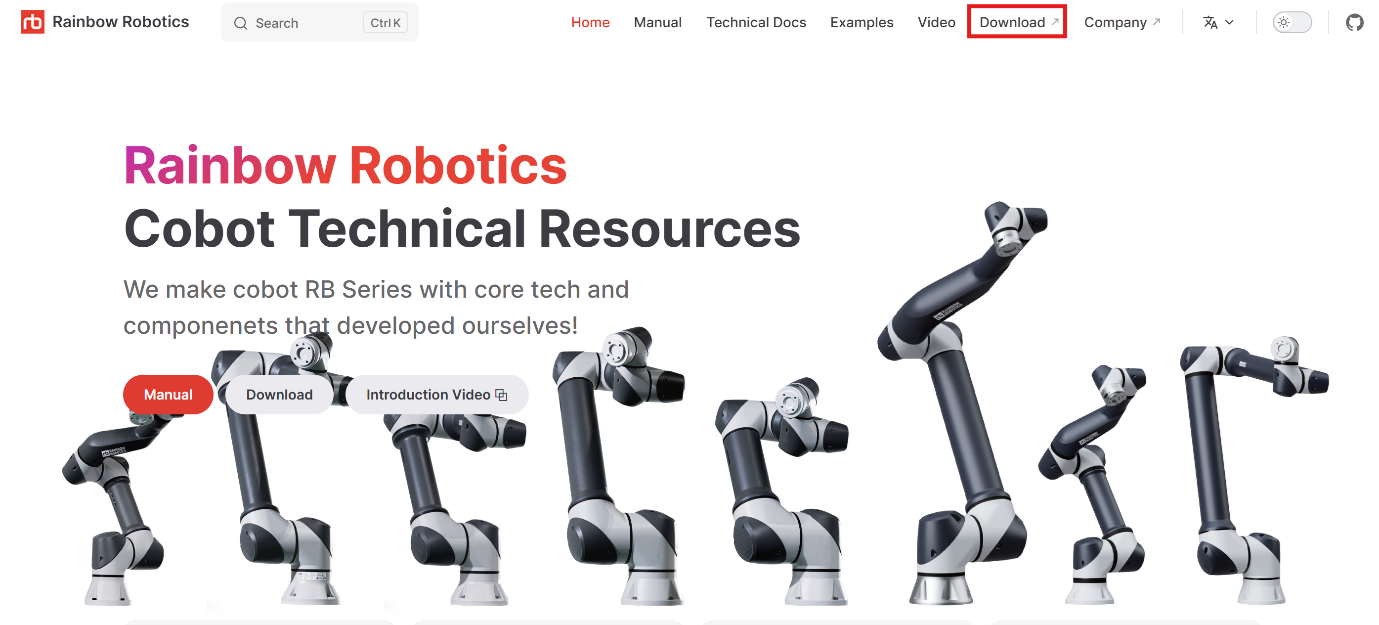
(4) Click on the "Download" tab at the top of the Rainbow Robotics Cobot Technical Documents page.
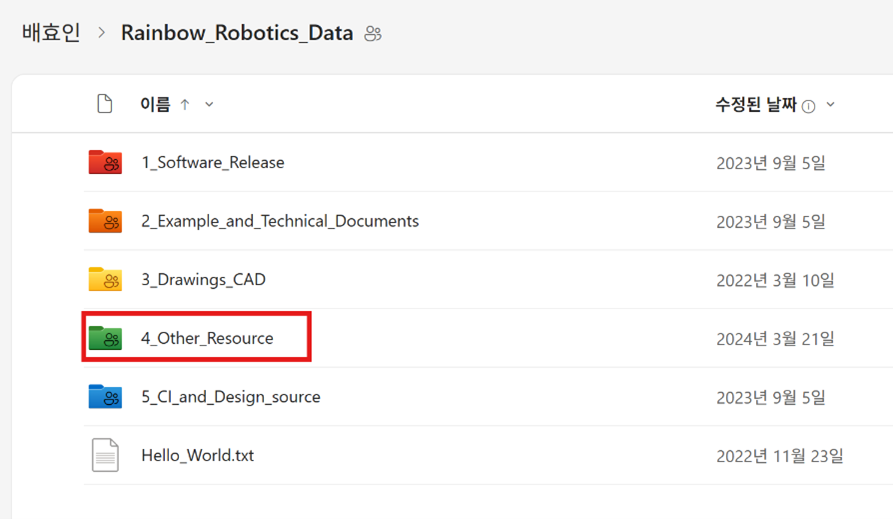
(5) When you click on the "Download" tab, a new OneDrive page will open. Navigate to the [4_Other_Resource] folder, as shown in the attached image.
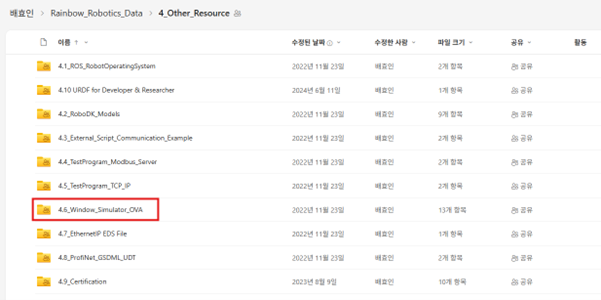
(6) Navigate to [4_Other_Resource] → [4.6_Window_Simulator_OVA] and download the latest version of the simulator.
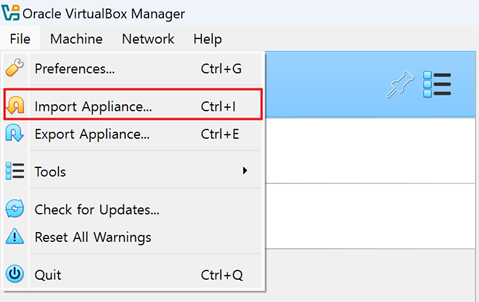
(7) Return to VirtualBox, then go to File → Import Appliance.
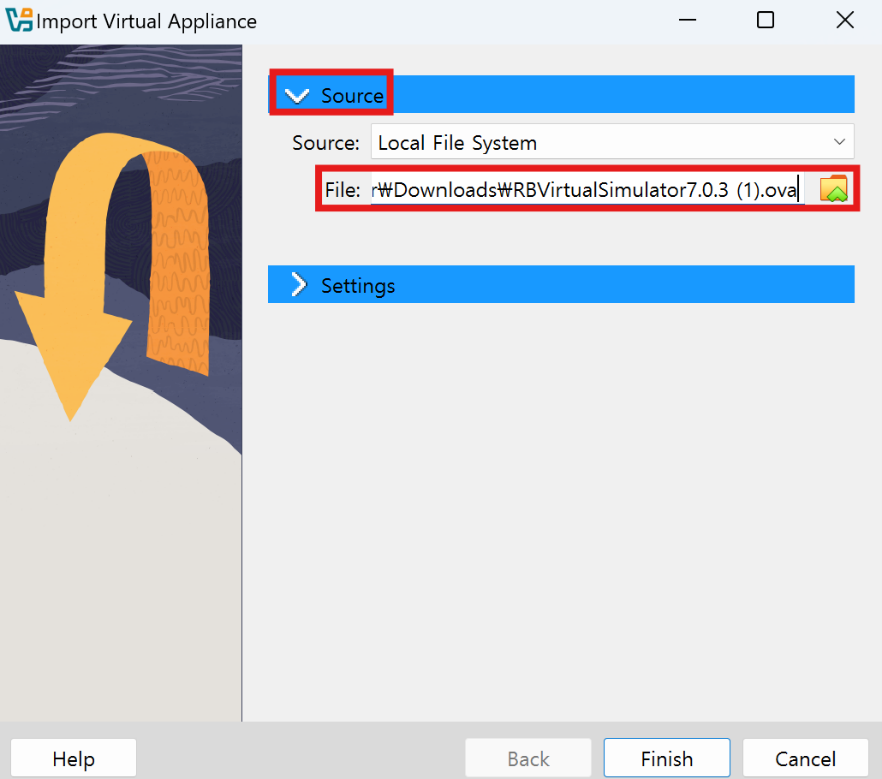
(8) Import the RBVirtualSimulator.ova file that was downloaded in step (6).
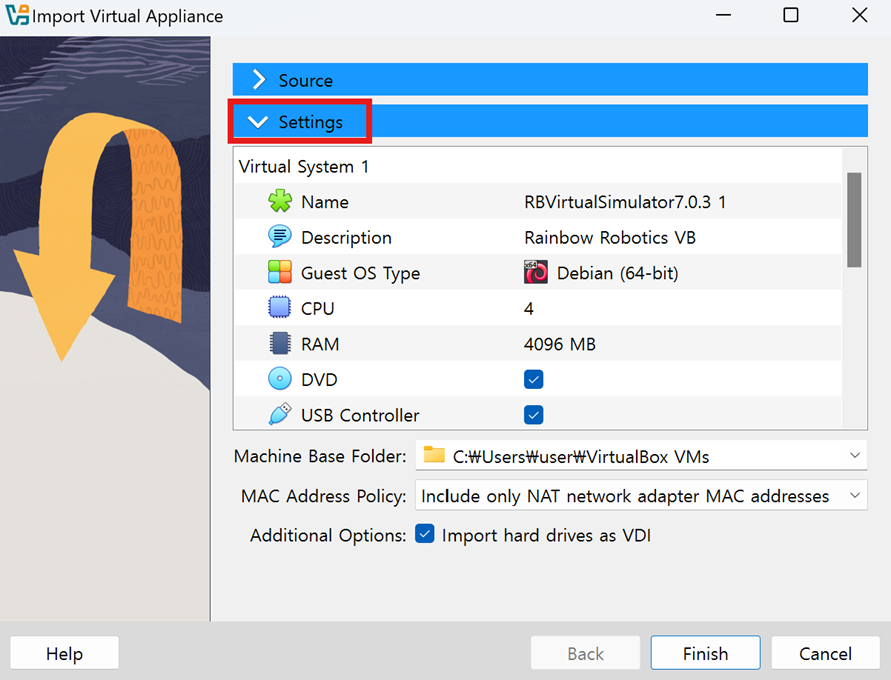
(9) In the settings section at the bottom, verify that the configurations match the reference image. Then, click "Finish" to complete the process.
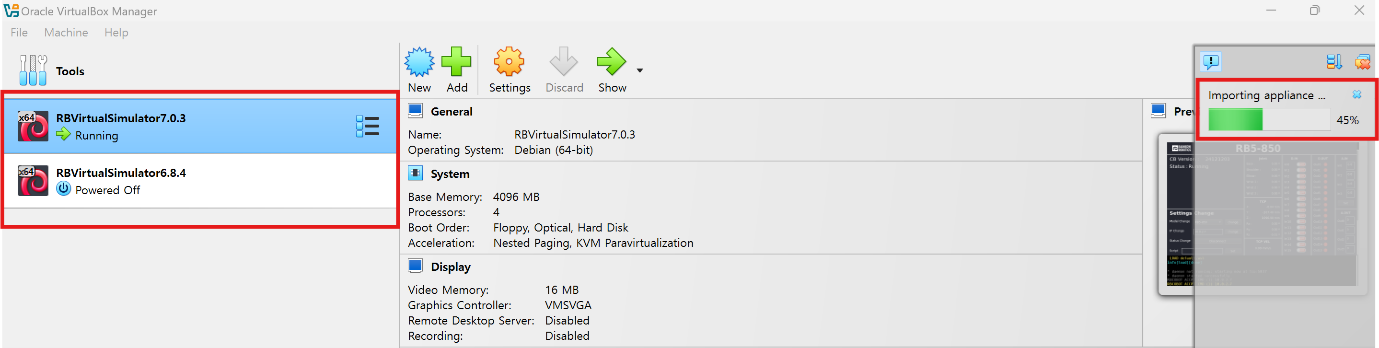
(10) Once the virtual system has been successfully added on the right side, the RBVirtualSimulator will be registered on the left side.
(11) If an error occurs during execution, click the "Change Network Settings" button.

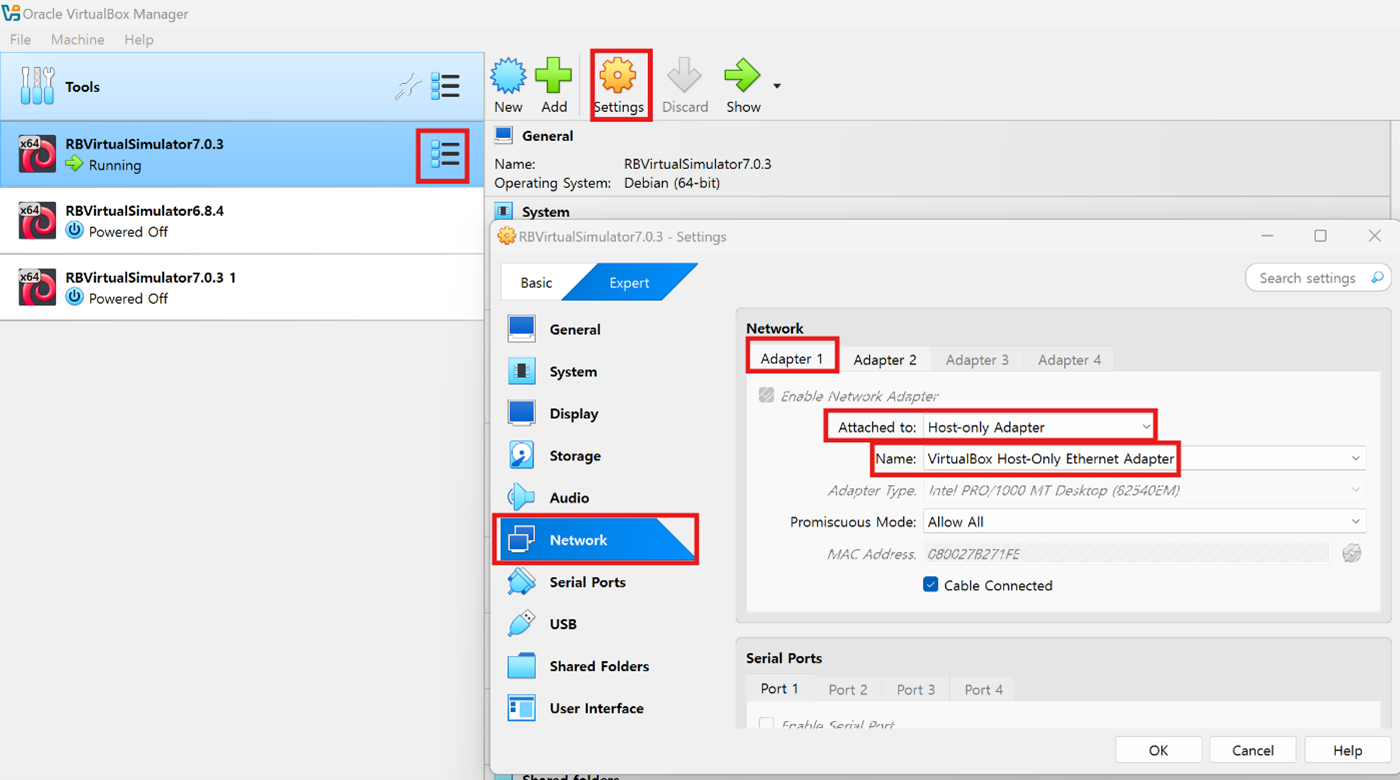
(12) Click on RBVirtualSimulator on the left side, then click "Settings" at the top. Navigate to the "Network" section. For Adapter 1, set "Attached to:" as "Host-Only Adapter". In the "Name:" field, select "VirtualBox Host-Only Ethernet Adapter". Finally, click "OK" to save the settings.
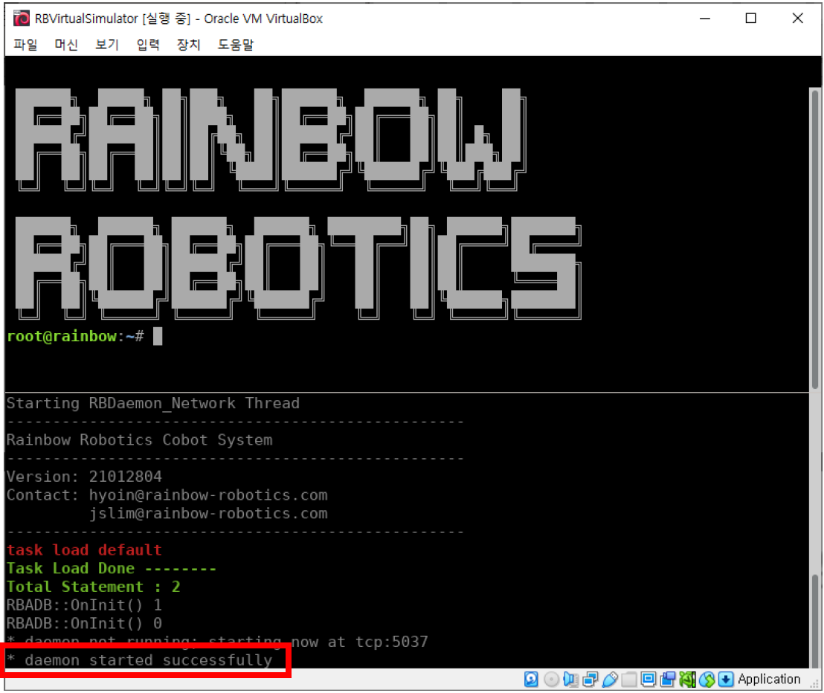
(13) After completing the settings, restart RBVirtualSimulator. You should see the virtual control box booting up successfully. Wait until the message " *daemon started successfully" appears on the screen.
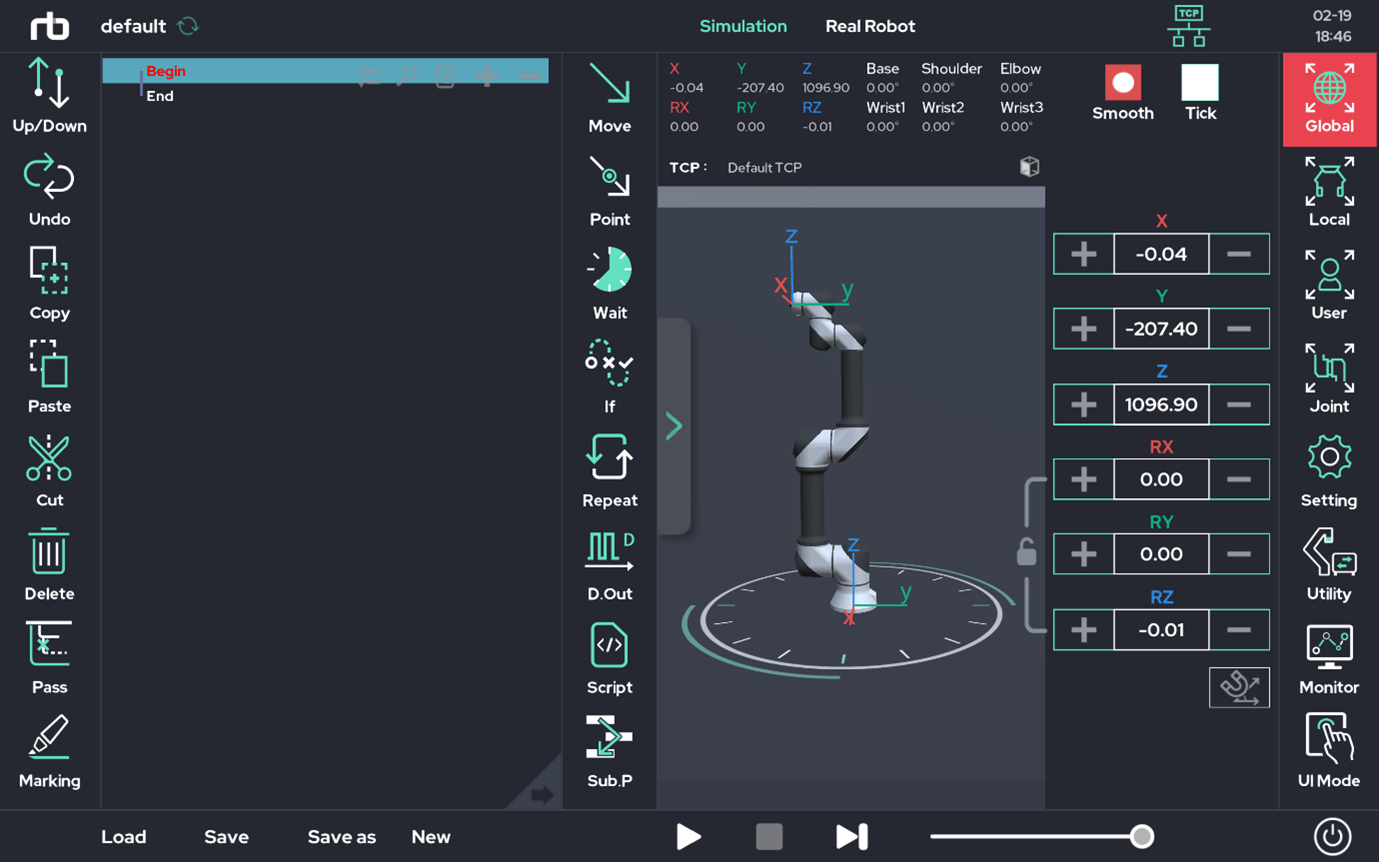
3. Running and Connecting RB Virtual Control Box – RB WindowUI
Running and Connecting RB Virtual Control Box – RB Window UI Program
(1) From the RB Technical Documents OneDrive, locate the downloaded RB_window_###(version) file and run RB_window.exe.
(2) aunch the RB Window UI and click the "Network (  )button.
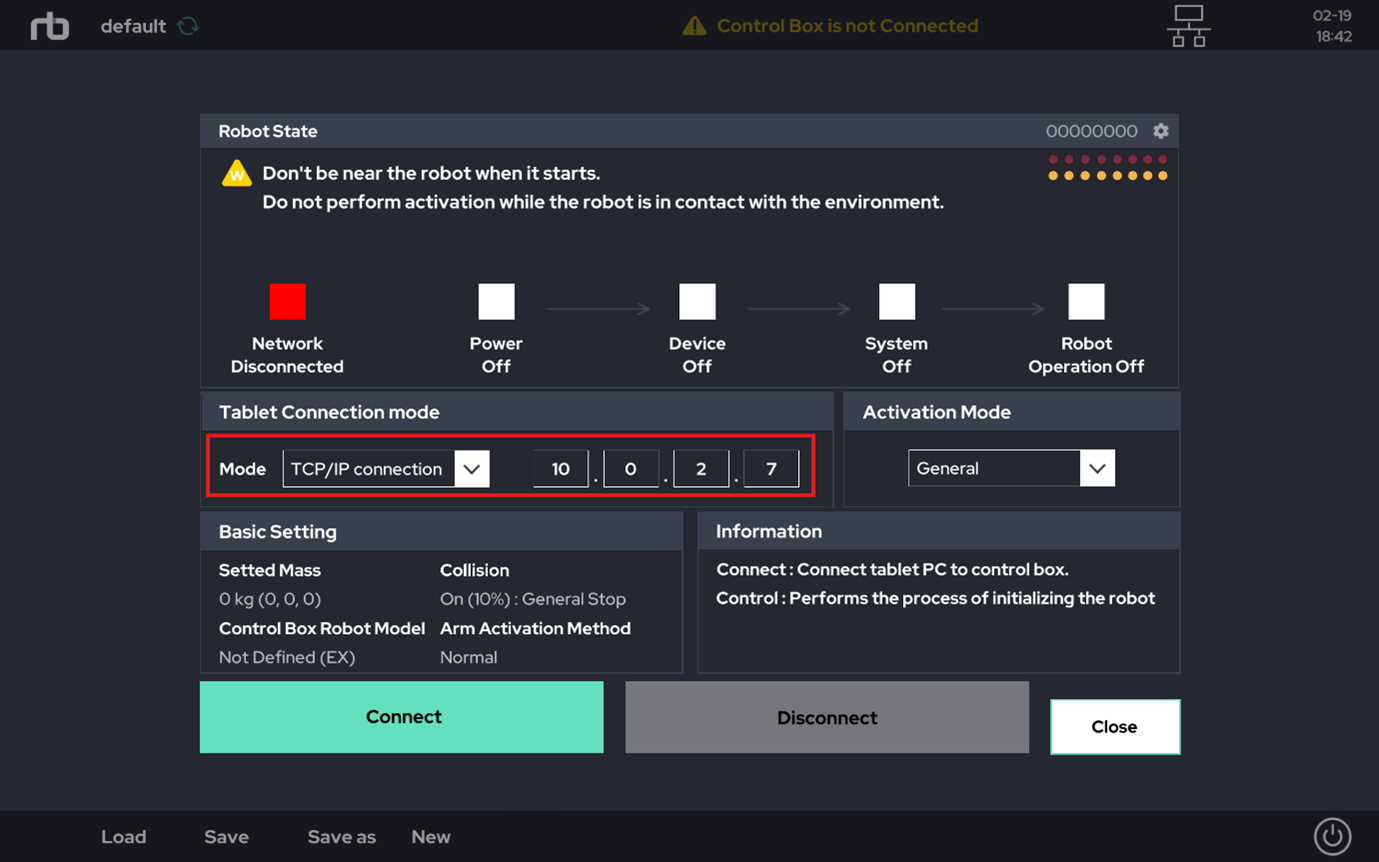
(3) If the connection is successful, a green light will appear next to "Network Connected."
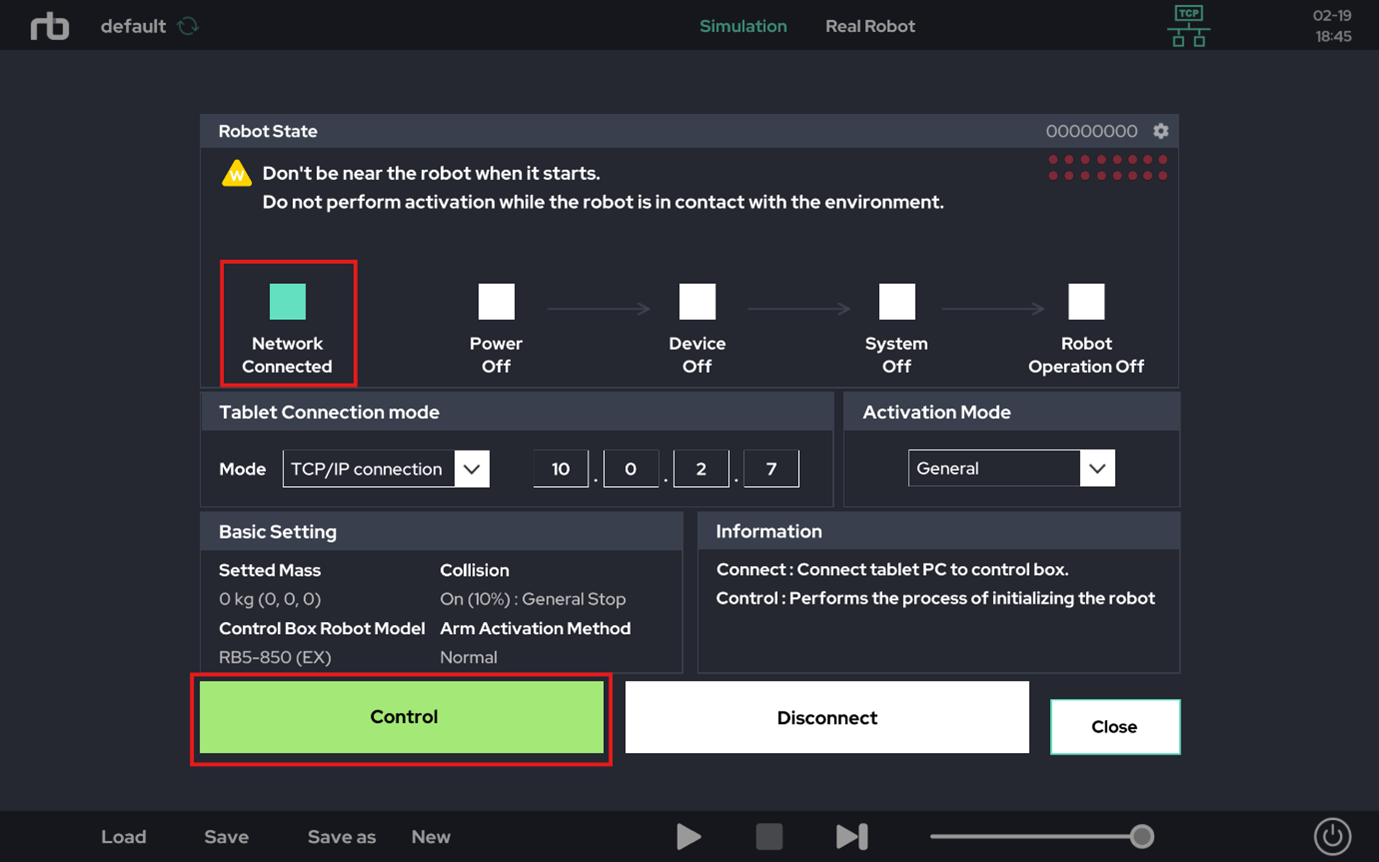
(4) In simulation mode, you can test the desired robot poses.
(Since this is a virtual control box, the Real Robot mode is not available.)
(5) If the RB Window UI fails to connect to the virtual control box, check the static IP address assigned to the "VirtualBox-Host-Only Ethernet Adapter" on your personal PC.