Operating UI Program Through Wi-Fi Connection
1. Software Update
Caution
- System updates must be performed through USB connection
- For detailed software update methods, please refer to the software update document.
(1) The software version must be compatible with UI version 6.6.# or higher. You can check the software version as shown in the picture below.
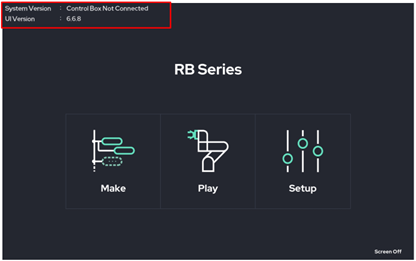
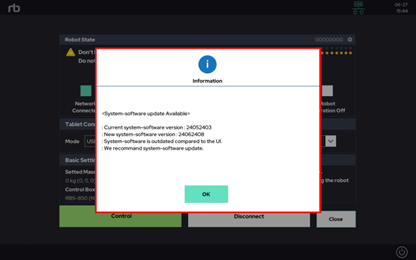
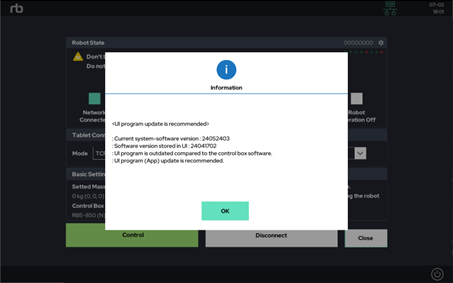
(2) If the UI version and the control box software version do not match, a software update recommendation pop-up appears as shown below.
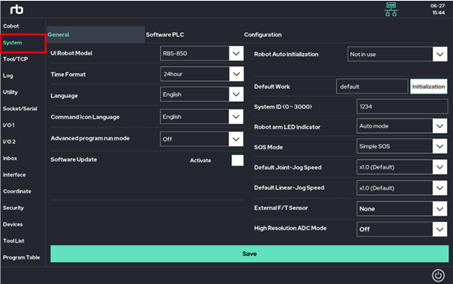
(3) Go to ‘Setup > System’ as shown below.
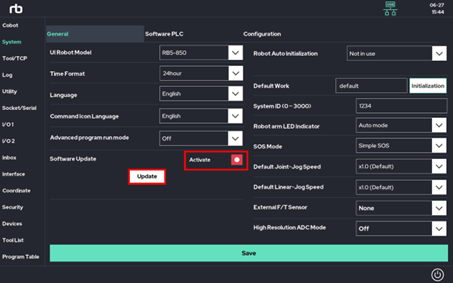
(4) Click ‘Activate Software Update’ and proceed with the update.
2. TCP/IP UI Connection Setup Procedure
- TCP/IP UI connection through Wi-Fi with tablet
(1) Connect the LAN port of the control box and the LAN port of the Wi-Fi router with a cable.
(2) Connect the tablet to the Wi-Fi transmitted by the router and check the IP band.
Ex) If the IP address assigned to the tablet is 111.222.333.☆, the Wi-Fi IP band is 111.222.333. In this case, ☆ is a ‘random number below 254, not 1’ assigned to the tablet by the router.
(3) Set the IP address of the control box to match the IP band of the Wi-Fi through USB connection.
Ex) 111.222.333.★, in this case, the last digit ★ is set to ‘a random natural number below 254 rather than 1 and ☆’.
(4) Set the subnet mask to 255.255.255.0.
(5) Set the gateway.
Ex) 111.222.333.1, the gateway uses address 1 of the IP band.
(6) Select TCP/IP connection mode. Insert the IP address of control box and press connect button.
(7) If (6) fails, check the process above.
- TCP/IP UI connection through Wi-Fi with Windows PC
(1) Connect the LAN port of the control box and the LAN port of the Wi-Fi router with a cable.
(2) Connect the tablet to the Wi-Fi transmitted by the router and check the IP band.
Ex) If the IP address assigned to the tablet is 111.222.333.☆, the Wi-Fi IP band is 111.222.333. In this case, ☆ is a ‘random number below 254, not 1’ assigned to the tablet by the router.
(3) Set the IP address of the control box to match the IP band of the Wi-Fi through USB connection.
Ex) 111.222.333.★, in this case, the last digit ★ is set to ‘a random natural number below 254 rather than 1 and ☆’.
(4) Set the subnet mask to 255.255.255.0.
(5) Set the gateway.
Ex) 111.222.333.1, the gateway uses address 1 of the IP band.
(6) Select TCP/IP connection mode. Insert the IP address of control box and press connect button.
(7) If (6) fails, check the process above.
2.1 IP Address Setting (Android OS Tablet UI)
- We recommend using the router and robot 1:1.
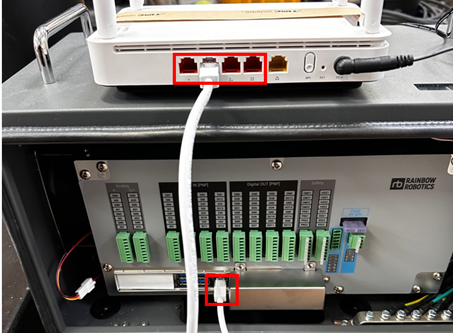
(1) Connect the router directly to the control box as shown below. (recommended)
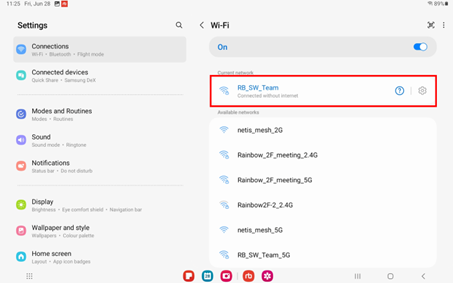
(2) Connect the tablet to the Wi-Fi of the router.
(In this document, the router generates Wi-Fi named RB_SW_Team)
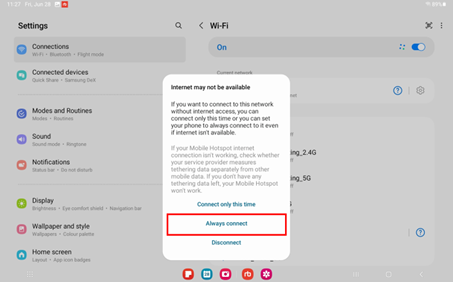
(3) Press ‘Always connect’ for the message below.
(4) Click the icons marked with a red box in the image below to check the Wi-Fi IP band.
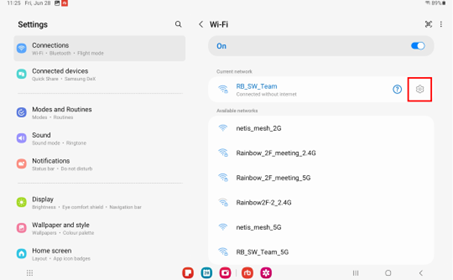
(5) In the example below, you can see that the router has assigned 192.168.0.4 as the address to the tablet. This means that address 4 has been assigned in the 192.168.0 band.
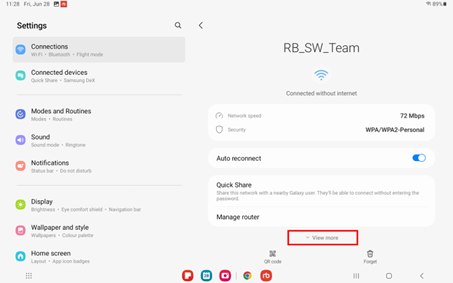
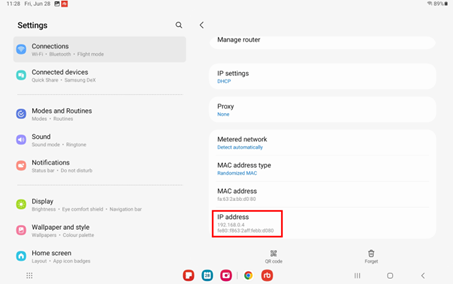
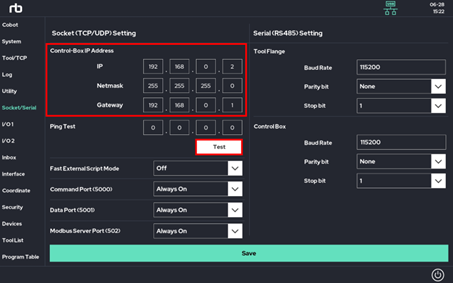
(6) Connect the control box and tablet with a USB cable and go to ‘Setup > Socket/Serial’.
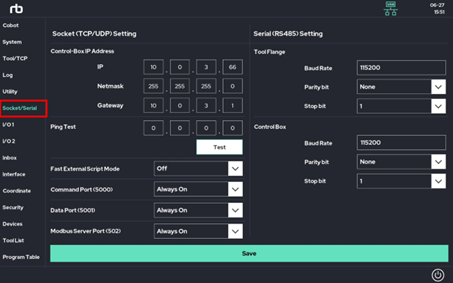
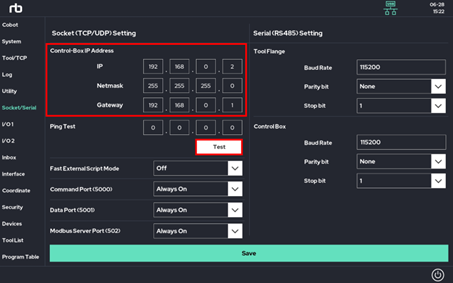
(7) Modify IP/Netmask/Gateway to match the band and the netmask of the router.
Set the IP address of the control box to an IP address in the same band except address 4. (In this case, the tablet is assigned address 4).
The gateway uses address 1 in the same IP band. In this example, the ping test can be attempted by entering the tablet’s IP address.
After few seconds, a test result pop-up will appear.
2.2 IP Address Setting (Windows OS PC UI)
- Direct connection between PC and control box is used as an example.
(1) Connect the router directly to the control box as shown below. (recommended)
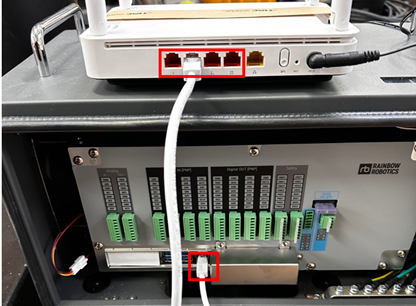
(2) Connect the PC to the Wi-Fi of the router. Press ‘Properties’.
(In this document, the router generates Wi-Fi named RB_SW_Team) 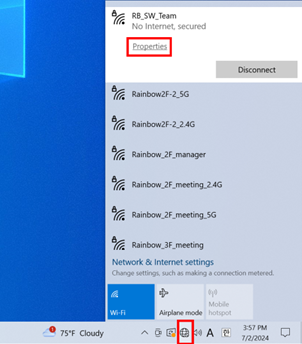
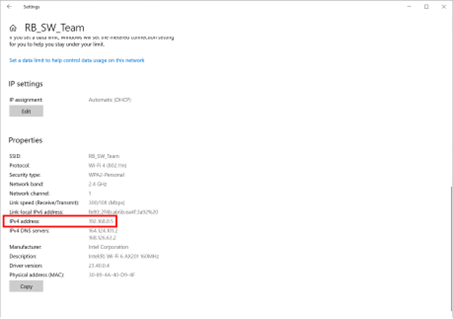
(3) When the settings window opens, scroll down to the bottom and check the IPv4 address.
(In this case, confirm that address 5 in the 192.168.0 band has been assigned to the PC)
(4) Connect the control box and tablet with a USB cable and go to ‘Setup > Socket/Serial’. 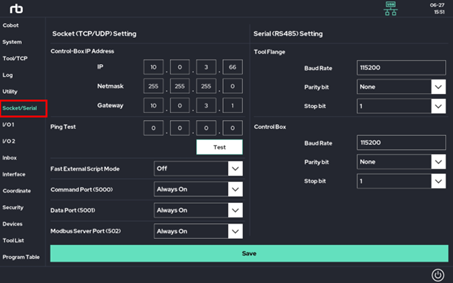
(5) Modify IP/Netmask/Gateway to match the band and the netmask of the router. Set the IP address of the control box to an IP address in the same band except address 5. (In this case, the PC is assigned address 5). The gateway uses address 1 in the same IP band.
In this example, the ping test can be attempted by entering the tablet’s IP address. After few seconds, a test result pop-up will appear.
3. Connecting the UI to the Control Box via TCP/IP Connection
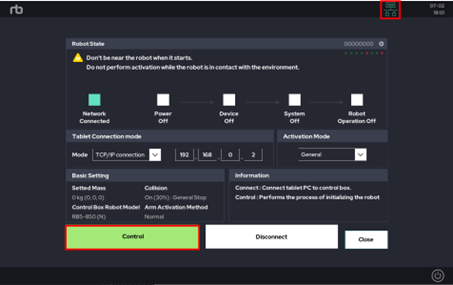
(1) Run the Rainbow Robotics UI and click the connection icon in the upper right corner. (  )
)
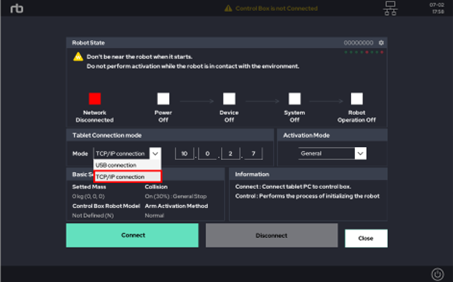
(2) Select ‘TCP/IP Connection’ in tablet connection setting mode.
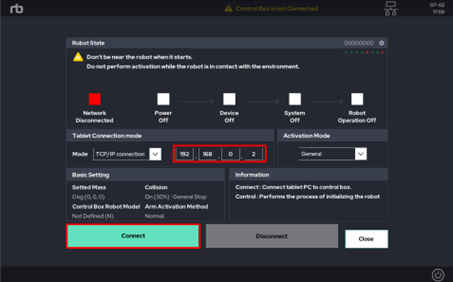
(3) Enter the IP address of the control box set previously and click connect.
(4) Confirm that it is properly connected to the control box. If the UI version and control box version are different, a related notification message will appear. There is no problem with use.
(5) If connected properly, the connection icon changes and an activation button appears. (  )
)
 Rainbow Robotics