Skip to content

Gamepad ​

The app drives the robot with the on-screen virtual joysticks by default. Plug in or pair a physical gamepad and the app switches over automatically, with no setup step.

Automatic detection ​

  • Connect a gamepad over USB or Bluetooth. The app recognizes it immediately, applies a matching profile, and hides the virtual joysticks.
  • Unplug it and the virtual joysticks come back on their own.
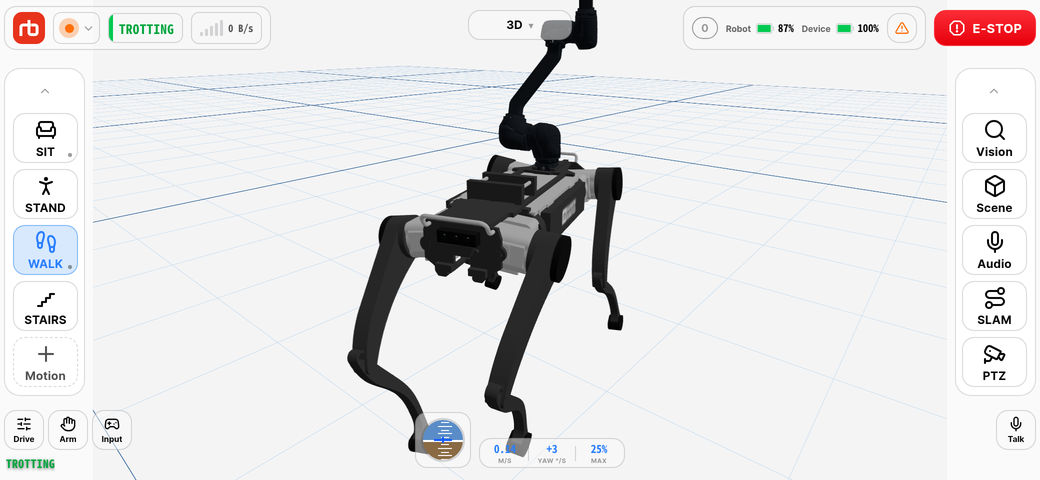
  • While a gamepad is active, the only visible change on the control home is that the virtual joysticks are gone. The cards and the viewport stay where they are. The Input popover described below shows a live diagram of the device — its name, sticks, and buttons.

Control home in gamepad mode — virtual joysticks hidden

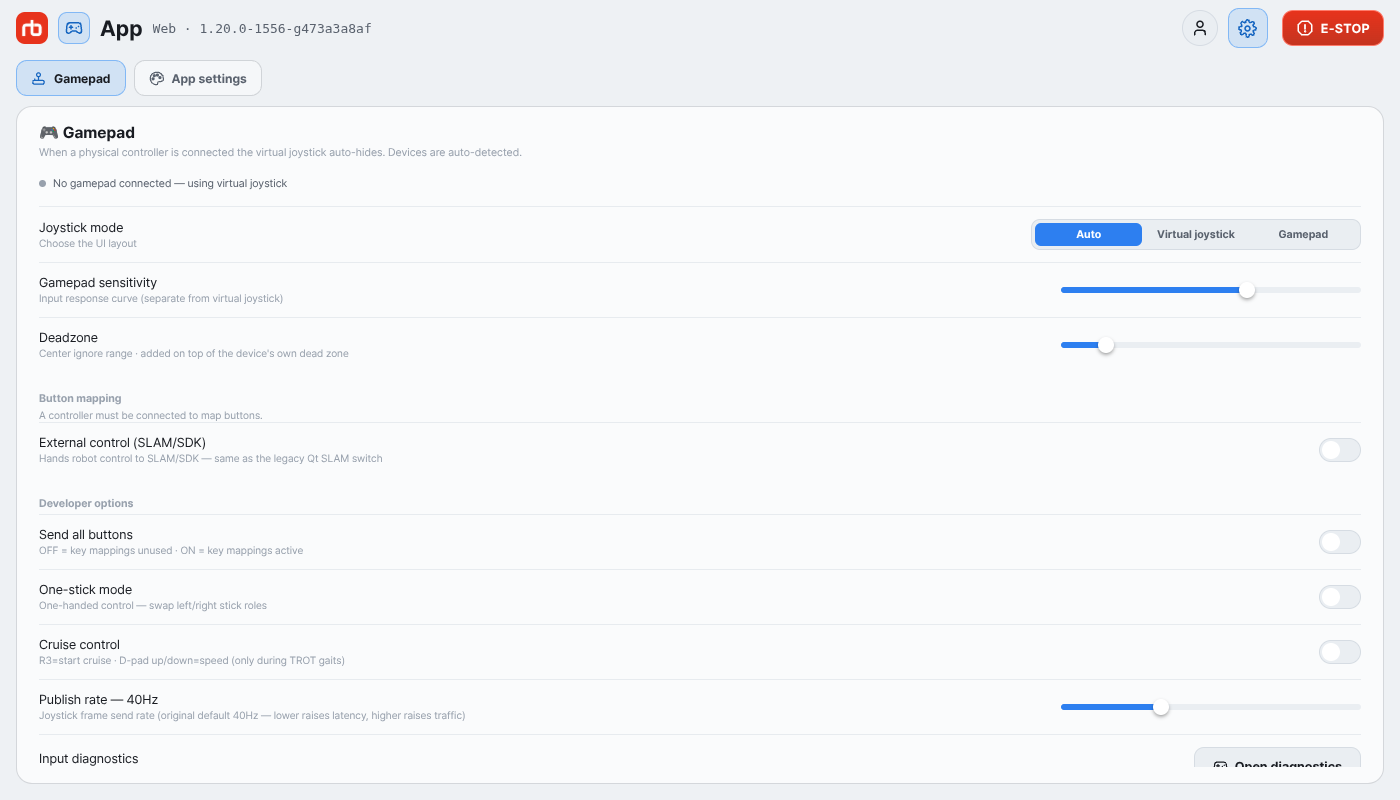
To check what is connected, open Settings (the Settings tile on the hub) › Gamepad. The status line reads Connected followed by the device name, or No gamepad connected — using virtual joystick. Below it, Active profile: shows which button/axis layout was picked (auto-detected).

Gamepad settings

Choosing the input mode ​

Two places let you override the automatic choice:

  • Settings › Gamepad › Joystick mode — Auto / Virtual joystick / Gamepad. This changes the UI layout only; whatever inputs are connected keep working.
  • Control home › Input (the gamepad button in the tool row outside the left card — just right of the left joystick, or at the left edge with a gamepad) — the same choice as Auto / Virtual / Pad. When a gamepad is connected (and the joystick mode is not set to Virtual joystick) this popover also shows a live diagram of what the app is receiving from it.

Leave the mode on Auto unless you are troubleshooting.

Safe button set ​

Out of the box the app forwards only the two shoulder buttons (L1 / R1) to the robot together with the sticks. The app leaves the remaining buttons out of the joystick frame, so an accidental press cannot trigger a robot-side button action. Buttons a developer has mapped in Button mapping, and the Cruise control keys, still act no matter how this is set.

Entering developer mode turns Send all buttons on automatically, which forwards every button. Chords the robot reads together with a shoulder button, such as L1 + B, need this setting on. While it is off, the other half of the chord never reaches the frame, so nothing happens. Returning to the normal level restores the safe set. The toggle lives in Developer mode.

Typing on a Steam Deck ​

On a Steam Deck the app draws its own on-screen keyboard: tap any text field and it appears at the bottom of the screen. It types Korean, English, digits and symbols, and the popup you are editing moves up to stay above the keyboard. The field being edited is outlined in blue — there is no blinking cursor, because the keyboard deliberately does not take the focus.

The keyboard can be driven with the gamepad as well:

ControlWhat it does
D-padMove between keys
APress the selected key
BClose the keyboard
XBackspace
YSpace
L1Shift
R1Switch Korean / English

123 and 한 / A always show where the key takes you, not where you are, and leaving the number layout returns you to the language you used last. ✓ confirms: it presses the popup's own confirm button when there is one, and otherwise submits the field.

While the keyboard is open the gamepad belongs to it — the sticks and buttons do not reach the robot, so the robot cannot move while you pick letters. Other platforms keep using the operating system keyboard.

What developer mode adds here is collected on Developer mode.

WARNING

Send all buttons and Cruise control change what the robot does in response to button presses. Test in an open area after turning either on, and keep the E-STOP within reach.

This user manual is intended for RBQ users.