Skip to content

Emergency Stop ​

WARNING

Always keep the emergency stop button accessible during operation. In any situation where the robot poses a risk to people or property, press the emergency stop button immediately.

E-STOP in the app ​

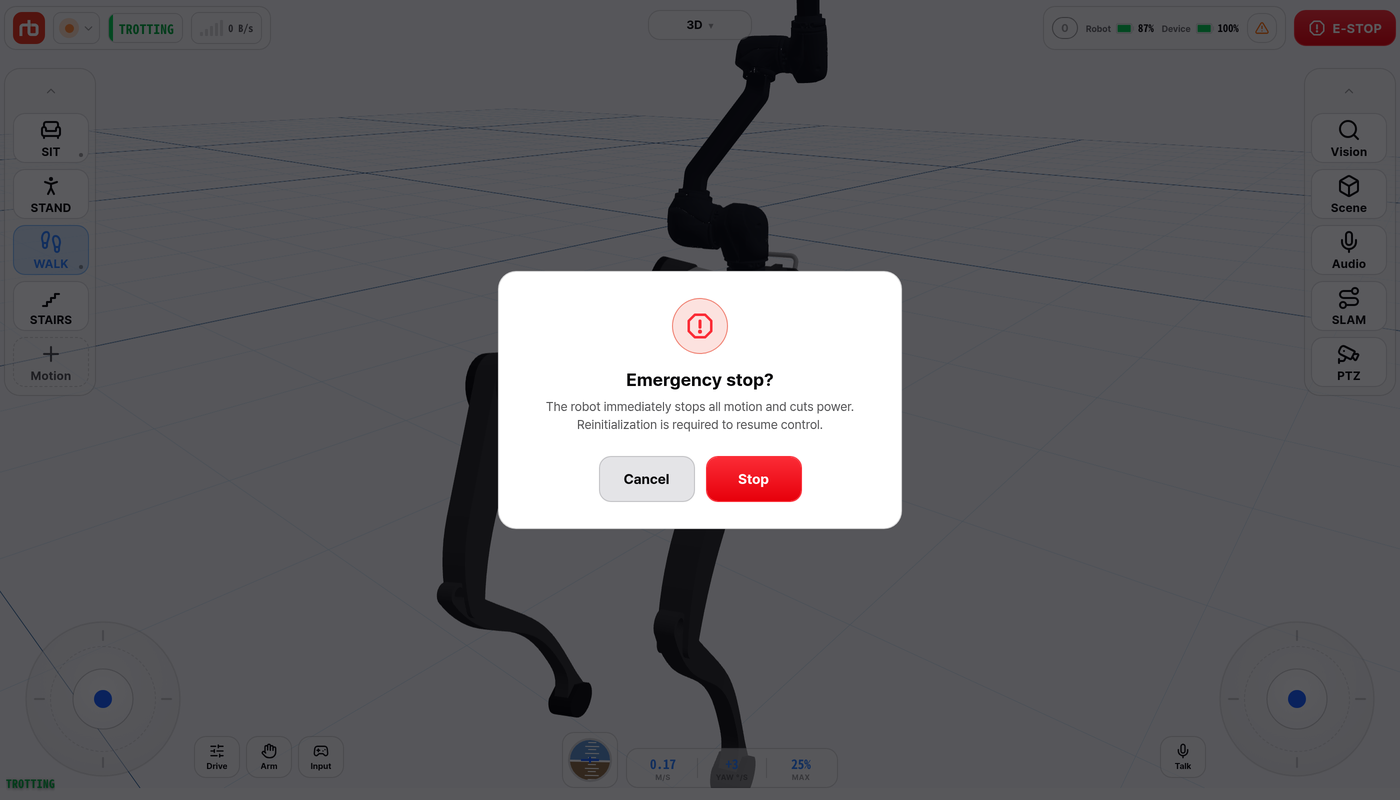
E-STOP confirmation

The red E-STOP button sits at the right of the top bar on the control home. On a very small screen, less than 720 px wide, it shows only its emergency icon (on a humanoid the RL stop label stays). On the other screens it sits at the right of the header, whenever a robot is connected or is reconnecting after a dropped link — it still works for 8 seconds after the drop. Pressing it opens the confirmation Emergency stop?:

The robot immediately stops all motion and cuts power. Reinitialization is required to resume control.

Press Stop to send the emergency stop, or Cancel to close the dialog. There is no path that fires E-STOP without this confirmation.

  • The app sends the emergency stop on a dedicated channel, ahead of anything already queued, and repeats it on the reliable command channel.
  • You do not need to own the robot first: the robot accepts E-STOP from any connected device, bypassing the ownership check. It does not take ownership — the current owner stays the same.
  • If the robot does not acknowledge the command, the app logs E-Stop send failed — no response. Use the physical E-Stop. Do not wait — use the physical button.

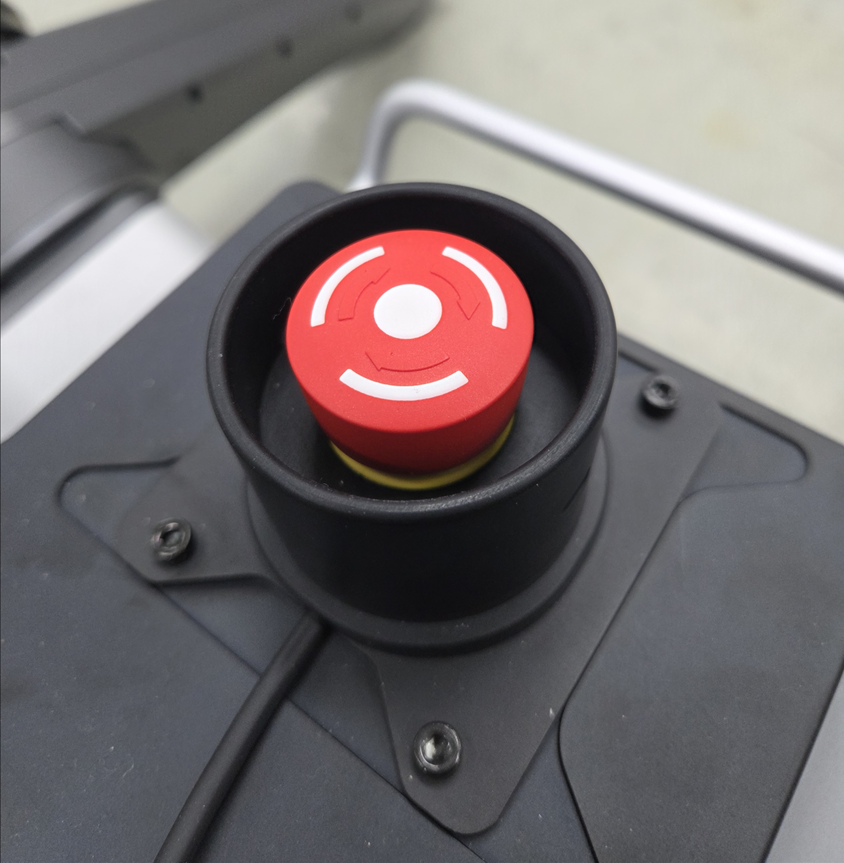
Physical emergency stop button ​

Emergency stop button on the rear of the robot
[ Emergency stop push button — located on the rear of the robot ]

When the physical emergency stop button is pressed, or the app's E-STOP is confirmed:

  • All joints switch to High Damping mode.
  • The robot resists external motion but does not accept torque or position commands.
  • The robot may lose its posture and settle to the ground under gravity.

High Damping mode protects both the user and the robot. The robot will not execute any motion commands until the emergency stop is cleared and the robot is re-initialized.

Recovery ​

  1. Ensure safety — confirm that all people and animals are at least 2 m from the robot.
  2. Release the button — if the physical button was pressed, rotate it clockwise to unlock it.
  3. Return to initial pose — if the robot has fallen or shifted, place it in the initial pose on a flat surface. Do not force the joints while the robot is in High Damping mode.
  4. Re-initialize — run the automatic start sequence or the Stand motion from the control home and confirm the robot state in the top bar before resuming operation.

What developer mode adds here is collected on Developer mode.

Spectating ​

Only one device controls the robot at a time. If you are connected while another app or controller holds ownership, after about a second this device switches to spectating: the video and the 3D view keep running, but every control below the top bar is locked. The top bar stays usable — E-STOP, the view dropdown and the status popover. The Spectating button sits just below it at the center, next to Another device is driving · tap to take control.

On the hub, in Settings and in the log nothing is covered. On the hub the Dashboard and Maintenance tiles are locked and the auto-start card is hidden; in Settings the robot tabs are locked while the app tabs stay usable. The Spectating button still appears below the top bar.

While spectating, the view dropdown offers 3D and Driver's view only. The driving device picks the camera, so Driver's view shows the same camera it is watching. When the driving device is on 3D, Driver's view switches to 3D as well, and goes back to that camera when the driver does. A spectating device never turns the robot's camera on or changes it. You hear the robot's audio only while the driving device has Listen to robot audio on.

Up to four devices can spectate a robot at once (MAX_SPECTATORS under [WebRTC] in the robot's Streamer.ini, 4 when absent, 0 for no limit; read when Streamer starts). When all slots are taken, a spectator gets no video until one frees up: the view stays on 3D and the Spectating button reads Too many viewers, video waiting · tap to take control. Video comes back on its own when a slot frees up, and taking control works regardless. A spectator connected remotely (WAN) gets no video, only the 3D view and status readouts.

Tap Spectating to open Take control?:

  • Take control — asks the robot to hand ownership to this device. The device that was driving switches to spectating.
  • ▶ Auto Start — after the confirmation Run Auto Start? → Auto Start, takes control and runs the automatic start sequence.
  • Keep spectating — closes the menu.

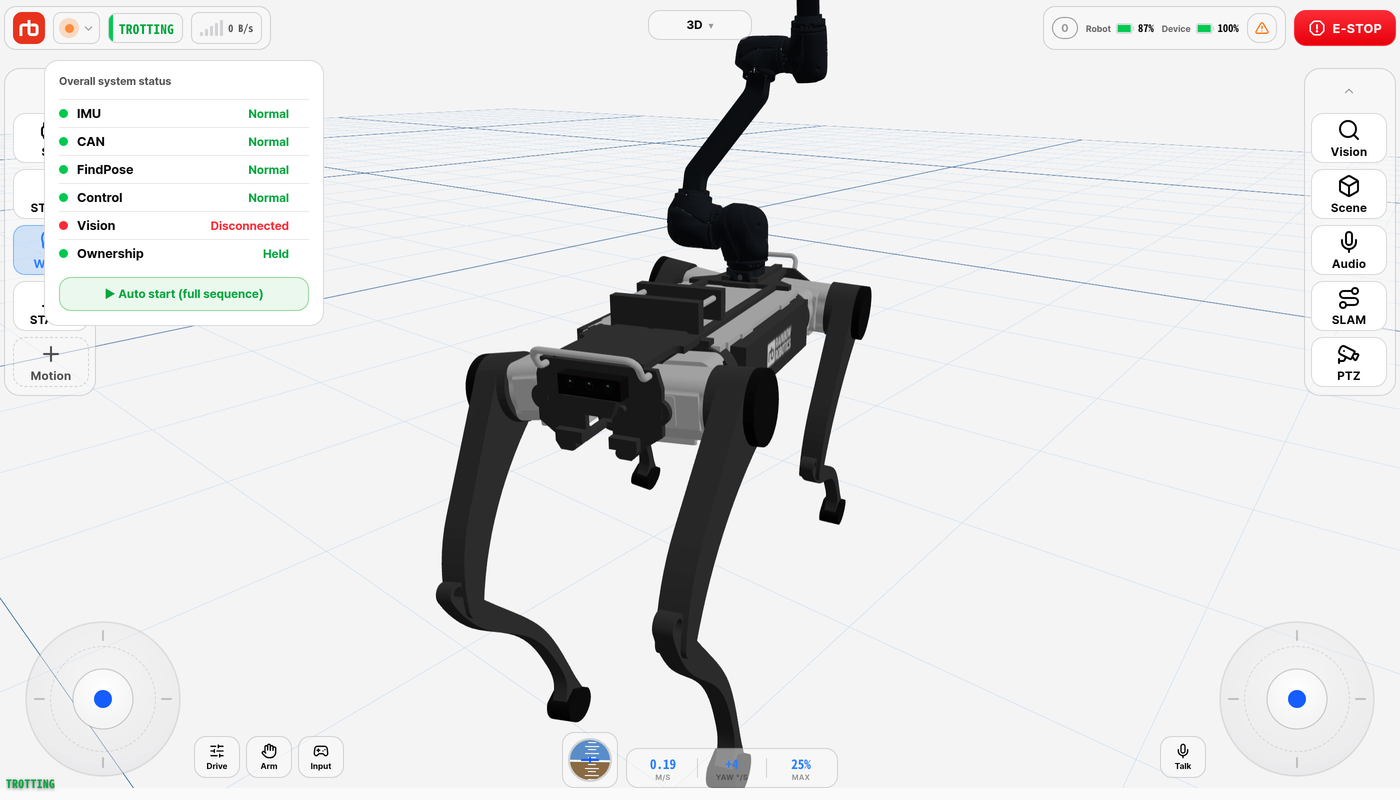
On the control home you can also check and take ownership from the Overall system status popover (tap the status chip in the top bar): the Ownership row shows Held when this device is the owner and Take ▸ when it is not.

Overall system status popover with the Ownership row

This user manual is intended for RBQ users.