Rail & spring nut
The robot uses rails for mounting optional hardware such as PTZ cameras, LiDAR units, and related brackets. Spring nuts inserted into the rail slot provide threaded anchor points for bolts.
Purchase links
| Region | MISUMI product page |
|---|---|
| South Korea | SHNTP5-5 (kr.misumi-ec.com) |
| United States | SHNTP5-5 (us.misumi-ec.com) |
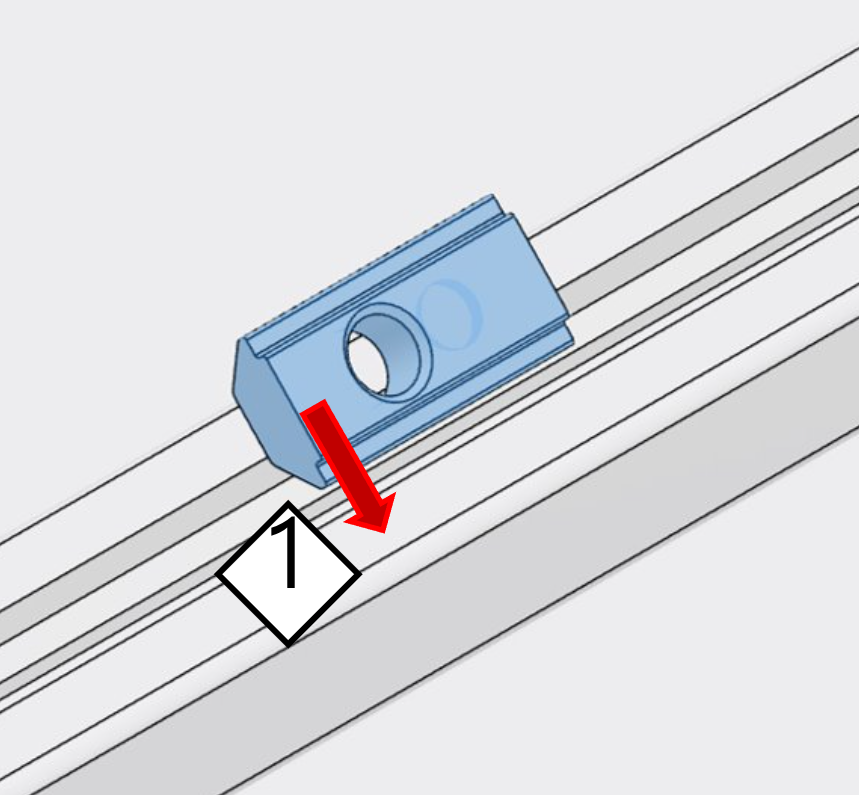
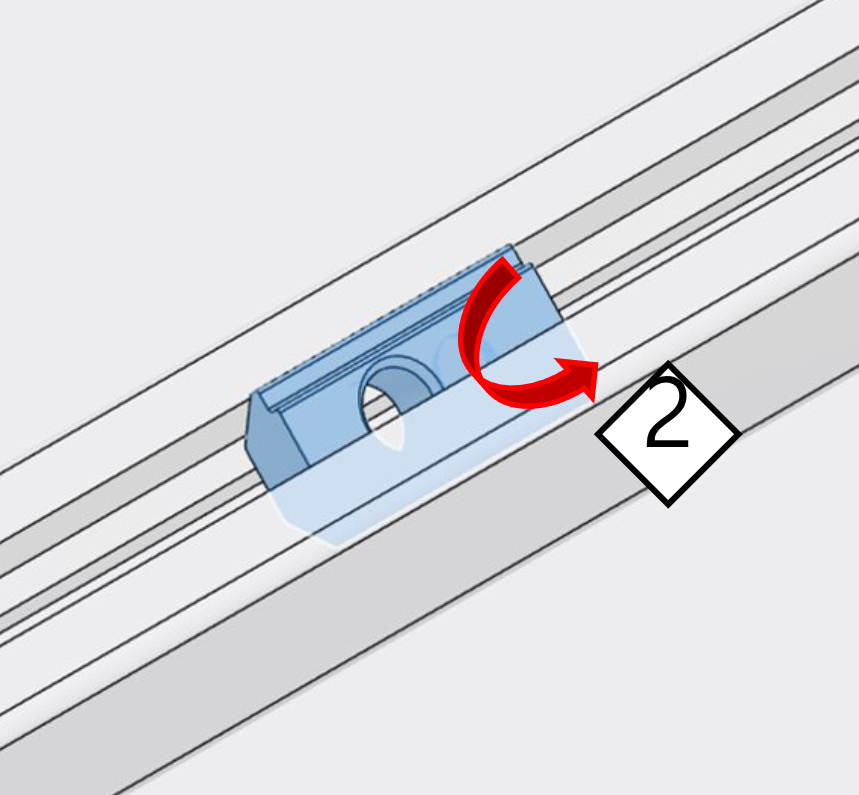
Inserting a spring nut
- Insert at an angle. Slide the spring nut diagonally into the rail slot so it enters the internal channel.
- Press the part that sticks out. A portion of the nut may sit proud of the slot; press it so the nut seats fully in the channel.
- Align with the rail. Adjust the nut so it is aligned with the slot and can slide along the rail as needed.

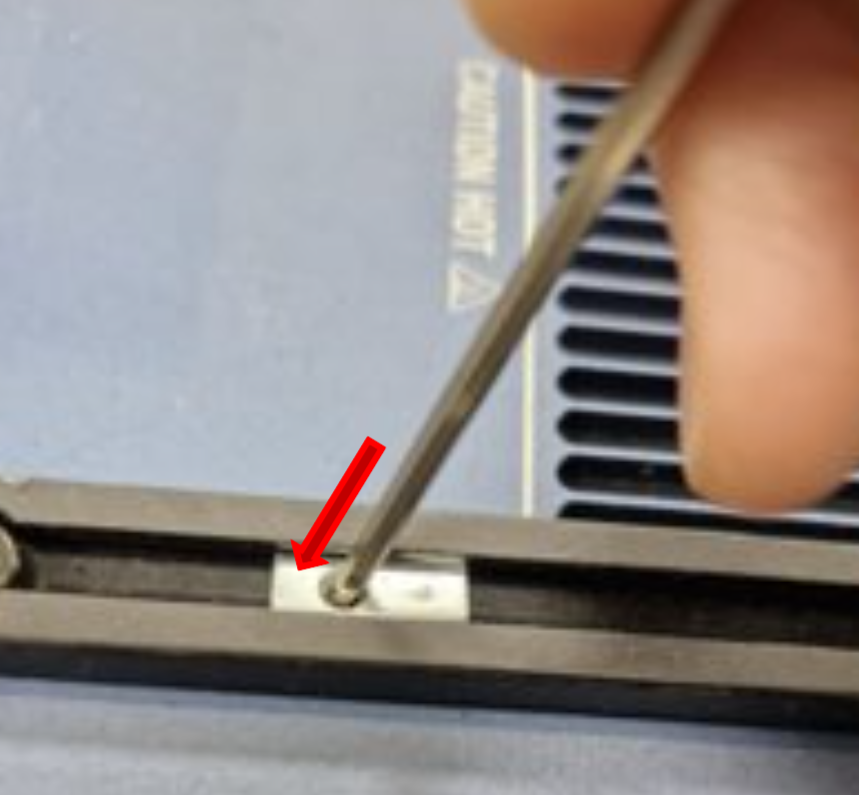
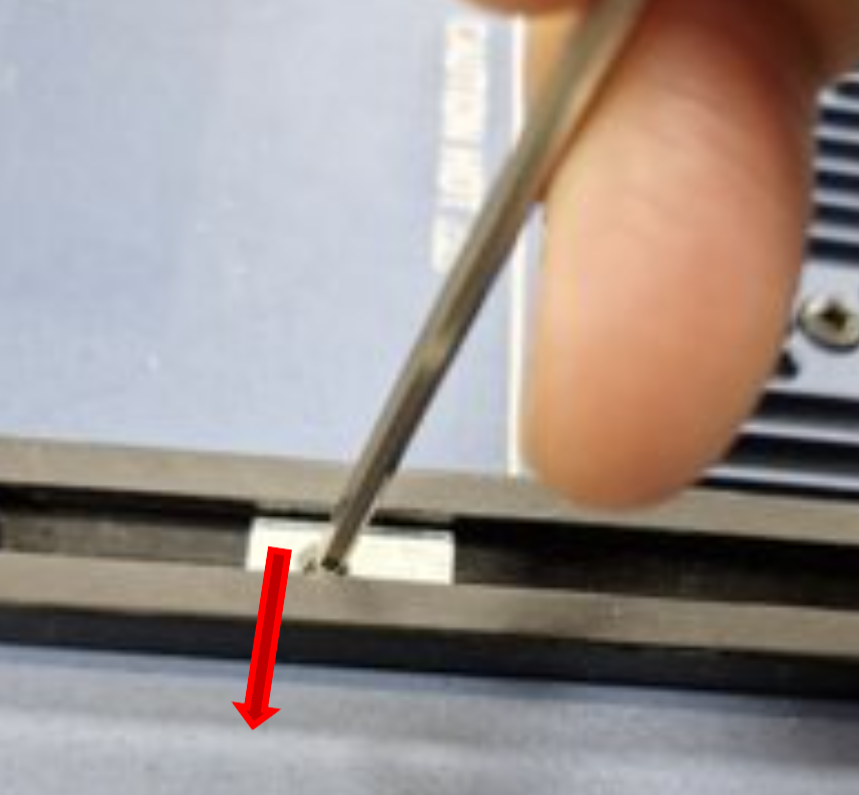
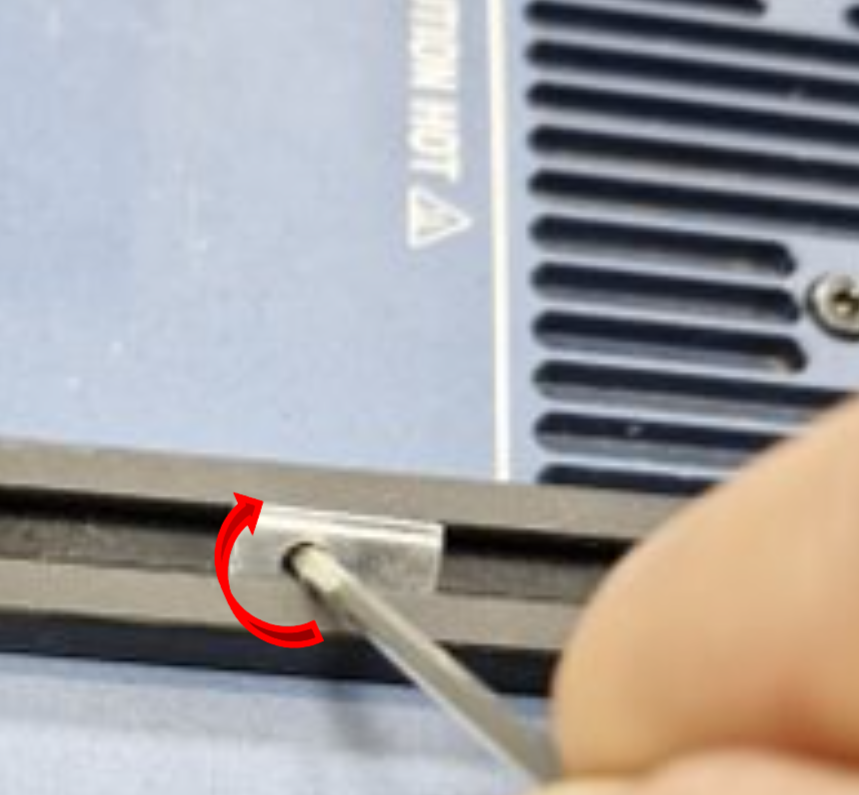
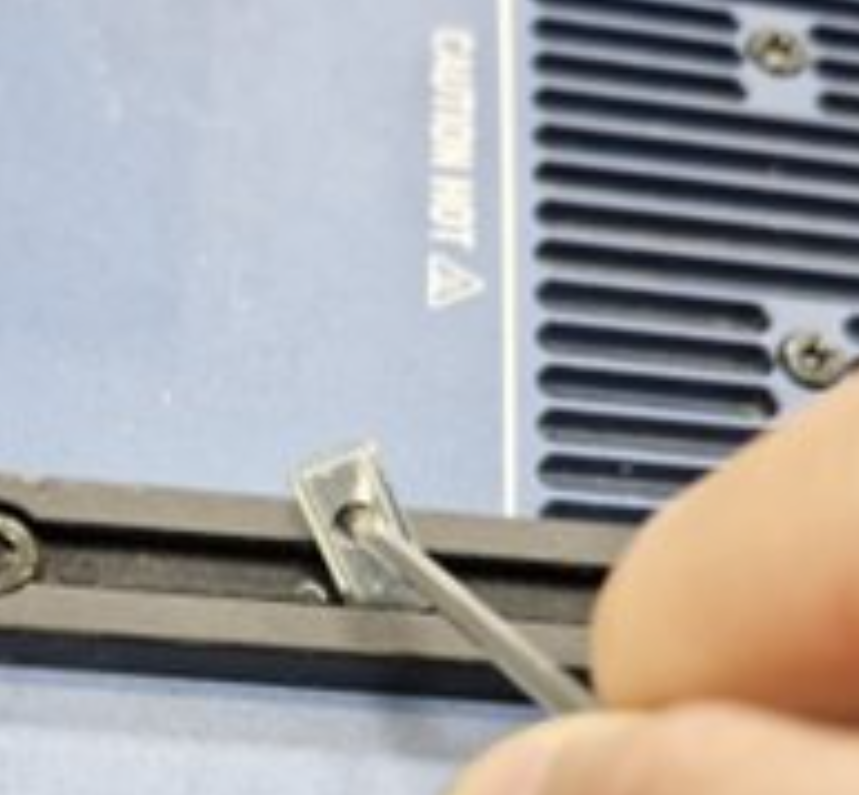
Removing a spring nut
CAUTION
Tool diameter
Use a rigid rod no larger than 4 mm in diameter. A thicker tool can damage the nut or mar the rail slot.
- Insert a rod into the nut. Pass a rigid rod (≤ 4 mm diameter) through the hole in the spring nut.
- Push to one wall. Push the nut against one inner wall of the rail slot.
- Twist and lift. While holding it against that wall, twist and lift the nut toward the opposite side of the slot so it can clear the profile and release from the rail.
- Remove. Withdraw the nut from the slot.