RPC Management Tools
How to Update RPC
Please use the provided updater program to update your RPC. During the update, the RPC will shut down, so make sure to put the robot in a safe position and connect the charger before proceeding.
Downloads (Updater)
updater : Download
You can check the latest RPC updates and release notes at the following link: RPC Release Notes on GitHub
Preparation (Updater)
Download the updater tool and extract the archive.
Download the appropriate RPC update file for your robot model from the release page.
Place the downloaded update file into the extracted updater directory.

Usage (Updater)
sudo apt-get install -y sshpass
tar -xvf updater.tar
cd updater_dist
chmod +x updater

# For ARM-based systems
./updater <update file name> <RPC IP address>

# For x86_64 systems
./updater_x86_64 <update file name> <RPC IP address>

# Example
./updater rby1_m_v1.2-0.10.6.tar.gz 192.168.30.1
./updater rby1_a_v1.0-0.10.6.tar 192.168.30.1
./updater_x86_64 rby1_a_v1.2-0.10.6.tar 192.168.0.192
Result Guide (Updater)
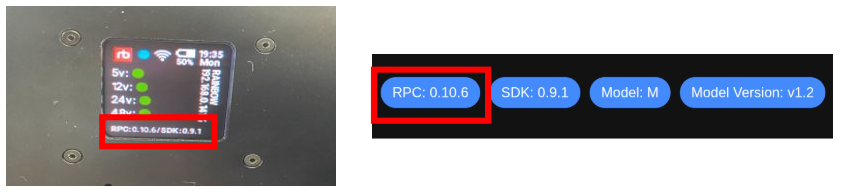
If the RPC update is completed successfully, you can verify the updated version in one of the following ways:
Check the version at the bottom of the Dashboard page in the Web UI
Check the version displayed on the backpack OLED
How to Extract Logs
The log_backup tool allows you to back up RPC logs directly through the UPC. Ensure the UPC is powered on and ready before proceeding.
Downloads (Log Backup)
log_backup(for UPC) : Download
Usage (Log Backup)
sudo apt-get install -y sshpass

# Make the tool executable
chmod +x log_backup

# Run the tool
./log_backup <RPC IP address>

# Example
./log_backup 192.168.30.1
After running the command, tar.gz log file will be generated in the same directory where you executed the program. Please attach this file when contacting us for analysis, as it will greatly assist in troubleshooting.
How to Check CAN Communication
The can_checker tool allows you to verify whether the CAN communication is functioning correctly.
Downloads (CAN Checker)
can_checker(for UPC): Download
Warning
Ensure that the robot’s main power is turned on before proceeding.
Usage (CAN Checker)
# Make the tool executable
chmod +x can_checker

# Run the tool
./can_checker <RPC IP address>

# Example
./can_checker 192.168.30.1
If the communication is functioning correctly, you will see output similar to the following. The process typically takes around 1-2 minutes to complete.
Checking can0 (right_arm)...
[SUCCESS] can0 (right_arm) is communicating!
Checking can1 (left_arm)...
[SUCCESS] can1 (left_arm) is communicating!
Checking can2 (torso)...
[SUCCESS] can2 (torso) is communicating!
Checking can3 (wheel)...
[SUCCESS] can3 (wheel) is communicating!
If any issues arise, please save the output and attach it when contacting us for further analysis.
How to Initialize the FT Sensor
The ft_zeroset tool allows you to check the FT sensor status and perform initialization if supported by the connected sensor firmware.
Downloads (FT zeroset)
ft_initialization: Download
Warning
Ensure that the robot’s main power is turned on before proceeding.
Usage (FT zeroset)
# Install required package
sudo apt-get install sshpass


# For ARM-based systems
chmod +x ./ft_zeroset
./ft_zeroset <RPC_ADDRESS>
## ARM-based systems Example
./ft_zeroset_jetson 192.168.30.1


# For x86_64 systems
chmod +x ./ft_zeroset_x86
./ft_zeroset_x86 <RPC_ADDRESS>
## For x86_64 systems Example
./ft_zeroset_x86 192.168.0.121
Result Guide (FT zerosetn)
Success Case (FT zeroset)
=== Step 0: Power Check ===
[OK] 48V power is already on. It will be left on after exit.

=== Step 1: Firmware Version Check ===

=== Step 2: FT Sensor Bias Initialization ===

=== Result ===
[NEW] right arm (can0): zero set succeeded.
[NEW] left arm (can1): zero set succeeded.
Failure Cases (FT zeroset)
=== Step 0: Power Check ===
[OK] 48V power is already on. It will be left on after exit.

=== Step 1: Firmware Version Check ===

=== Result ===
[LEGACY] right arm (can0): zero set not supported version.
[LEGACY] left arm (can1): zero set not supported version.
FAIL → Older version. Bias initialization is not supported.
If FAIL is displayed, please save the terminal output and contact our CS team(rby.support@rainbow-robotics.com). In this case, an FT sensor firmware update may be required.
How to Run Bootloader
This section describes how to update firmware using the bootloader tool. Before running the bootloader, make sure the robot is powered on and the correct firmware file is prepared.
Downloads (Bootloader)
bootloader: Download
The downloaded files include HEX firmware images for each robot module and bootloader executables for different system architectures.
HEX Firmware Files
Each HEX file contains the firmware image for the actuator modules indicated by its file name.
File name |
Target module |
|---|---|
|
head_0, head_1 |
|
left_arm_0 |
|
left_arm_1,left_arm_2 |
|
left_arm_3 |
|
left_arm_4 |
|
left_arm_5 |
|
right_arm_0, right_arm_1, right_arm_2 |
|
right_arm_3 |
|
right_arm_4 |
|
right_arm_5 |
|
torso_0, torso_1, torso_2 |
|
torso_3, torso_5 |
|
torso_4 |
Bootloader Executables
Select the bootloader executable that matches the architecture of the system where the bootloader will be executed.
File name |
Target system |
|---|---|
|
ARM-based systems, such as Jetson |
|
x86_64 systems |
Note
Use the HEX file that matches the target module. Using an incorrect HEX file may erase or flash the wrong actuator.
Warning
Ensure that the robot’s main power is turned off before proceeding.
Usage (Bootloader)
## For ARM-based systems
sudo chmod +x upc_firmware_bootloader_jetson
## For x86_64 systems
sudo chmod +x upc_firmware_bootloader_x86


# RUN
./upc_firmware_bootloader_<OS> <RPC IP> <TARGET JOINT> <HEX FILE>
## ex) torso_0.
## For ARM-based systems
./upc_firmware_bootloader_jetson 192.168.30.1 torso_0 com_torso_0_1_2.hex
## For x86_64 systems
./upc_firmware_bootloader_x86 <RPC IP> torso_0 com_torso_0_1_2.hex
After running the bootloader command, the flash target confirmation message will be displayed.
========================================
 UPC->RPC CAN Bootloader Flash (native RPC burn worker)
========================================
[OK] HEX parsed
========================================
 FLASH TARGET CONFIRMATION
========================================
[TARGET] joint=torso_0
[TARGET] hex=com_torso_0_1_2.hex
[WARN] Wrong CAN/BNO/HEX can erase or flash the wrong actuator.
[WARN] No SSH, power, erase, or burn command has been sent yet.
Type "yes" to start flash [yes]:
If the target joint and HEX file are correct, type yes and press Enter to start the flash process.
Type "yes" to start flash [yes]: yes
Result Guide (Bootloader)
Success Case (Bootloader)
[DONE] flash sequence complete
Failure Cases (Bootloader)
If the bootloader fails, check the error message and rerun the flash process again. In most cases, the firmware can be recovered by running the bootloader again.
Unsupported firmware version
This error occurs when the firmware version does not support the bootloader.
[FAIL] unsupported firmware version for this bootloader
Incorrect HEX file
This error occurs when the selected .hex file does not match the target joint.
[ERR] HEX filename <Hex File Name>.hex is not allowed for joint torso_0 (expected=com_torso_0_1_2.hex)
Check that the target joint name and .hex filename are correct, then run the bootloader again.
Error during Erase
This error occurs when the erase step does not complete normally.
[STEP] ERASE start (may take up to ~30s)
[WARN] ERASE ack(22) not received, retry 2/2
[SUMMARY] rewrite-required failure: ERASE ack(22) not received after 2 attempts
[RECOVERY] image state is uncertain; rerun the full flash to perform full erase + full rewrite
[STEP] cleanup remote resources
[OK] cleanup done
In this case, the firmware image state may be uncertain.
Run the flash process again to perform erase and rewrite.
Error during burn
This error occurs when communication fails while writing the firmware.
[STEP] BURN start (8816/8816 lines)
    progress: 5290/8816 (60%) elapsed=9.99s rate=530 lines/s
[SUMMARY] rewrite-required failure: BL handshake timeout at line 5337 (expected 99)
[RECOVERY] image state is uncertain; rerun the full flash to perform full erase + full rewrite
[STEP] cleanup remote resources
[OK] cleanup done
In this case, the firmware write process was interrupted. Run the flash process again to perform erase and rewrite.
Unsupported firmware version
This error occurs when the current firmware version is too old to be supported by this bootloader.
[FAIL] unsupported firmware version for this bootloader
If FAIL is displayed, please save the terminal output and contact our CS team(rby.support@rainbow-robotics.com).